If you’ve been following my blog, you already know how passionate I am about car care. With a small fleet of vehicles in my family, keeping them in top shape is no small task. While most people focus on maintaining the paint and trim, one detail that’s often overlooked is tire care. After you’ve polished up your car and it’s looking great, taking the extra step to clean and condition the tires adds that perfect finishing touch, elevating your car’s appearance to the next level.
Personally I like Chemical Guys products, they may cost a little more than other brands but at least you know they work well.
1. Start with a Thorough Rinse
Before applying any cleaner, give your tires a good rinse to remove loose dirt and grime. Use a high-pressure hose or even a simple bucket of water and a brush. This helps loosen up the dirt that builds up on the tire surface, making the cleaning process more effective.
I would have never thought I would be posting to my blog about an electric weed trimmer. I am what you call a die hard gas yard tools kind of guy. In fact I was so upset when LawnBoy was bought out by Toro in 1989 and simply did away with the amazing 2cycle machines that every landscaper had in the 80’s and 90’s.
When I became a home owner back in 1998, lawn mowing and weed trimming were just necessary yard chores. I did some research and decided The Echo GT-2000 was the most cost effective gas powered trimmer for my size yard. Over the years it has proven to be very reliable with minimal head aches. Back in 2018 I cleaned the exhaust port out to remedy a stalling issue (CLICK HEAR TO READ).
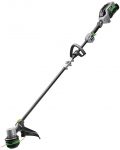
The unit is now about 22 years old and is going to need a full overhaul to get back to top running condition. I have been so busy lately its easier just to buy a new unit. The search was on for a new string trimmer. Reading reviews about the trimmers I found a new category that intrigued me – ELECTRIC -. Really? I thought electric trimmers were tethered to an electrical outlet and only used on homes with small yards. To my surprise these devices have now evolved into a competitive category! The manufacture claims the battery operated trimmers can compete on the same level as a gas powered unit.
WHAT WEED TRIMMER TO BUY:
I read all the reviews, watched a couple hours of You-Tube and digested the information on these trimmers so you don’t have to. My thinking was as we move our cars and other devices away from gas I figured I would give an electric trimmer a shot.
During my research the EGO ST1521 checked a bunch of boxes that I had in my head.
As powerful as a gas trimmer
Light weight, but strong
Decent run time (20 to 30 min)
Easy to spool up the line
.095″ line capable
Variable speed
Is the EGO ST1521S as powerful as my old gas trimmer. Oh yeah! In fact I believe its more powerful. The spec says the EGO has a max of 5800 RPM and the ECHO 7200, but you would never know. The EGO spins plenty fast!
Reviewers said the unit is light weight and balanced. It even has a carbon fiber shaft that is guaranteed for life. Personally I feel the unit is a bit heavier than my ECHO, however it is very balanced and the extra weight is not noticeable. A shoulder strap would have been a nice add on, but is NOT included.
2.5ah Battery
Run time is always a concern with electric power tools and the EGO does not disappoint in that department. They claim the 2.5ah battery can provide about 30 min of run time. I personally have not used it more than 20 min per use and have always had juice to spare. Other reviewers have stated a 40 to 45 min run time. You can purchase additional 2.5ah and 5.0ah batteries if needed.
a trimmer treat! Spooling up the line
Excuse my language, but re-stringing the trimmer has always been a pain in the ass. The original head on my ECHO had to be wound just perfectly for the “BUMP” advance to work properly. Years later I switched to the head that you inserted pre-cut line into the head (strips) and that meant flipping the trimmer over every few minutes to replace the line.
Well move over bacon here comes something way better. The EGO ST1521S has an AUTOMATIC SPOOL FUNCTION. Yes you read that correctly! Simply thread the line into the head evenly. Basically you need about 12ft of line and spool it through the head leaving 6ft on each side. Then push the magic button and the line will wind automatically. This is a serious time saver and keeps the stress level of winding the spool to a minimum. Plus they recommend you use the .095″ line which is much more durable than the .080″.
Over All Assessment of the EGO ST1521S
I am very happy with my purchase, in fact as my other gas power tools wear out I would be willing to try other EGO products, such as their leaf blower,chain saw and even lawn mower (hmm ok maybe not the lawn mower… but who knows their lawn mower got good reviews too – READ HERE)
Will this trimmer last another 20 years? I would assume the motor and head could make it to 20, but the 2.5 battery would most likely have to be replaced sometime after year 3 or 4 under normal use. At current prices the 2.5ah battery is about $145. Lets do some math – If regular fuel is $3.00 per gallon you would have to use 48 gallons of gas to equal the cost of the battery. That’s about 12 gallons of fuel per year. Considering I might only use 2 gallons of gas for the season the cost of operating the EGO is about $30 more per year than the gas trimmer (assuming the battery lasts 4 years)
There are still a number of older cars on the road that don’t have LED headlights. Before the LED Headlight craze we had HID (high intensity discharge) projector style lights, and before that halogen lights and even before that incandescent type lighting. It is amazing how far lighting technology has come in just the last 20 years increasing visibility and safety while we are on the road.
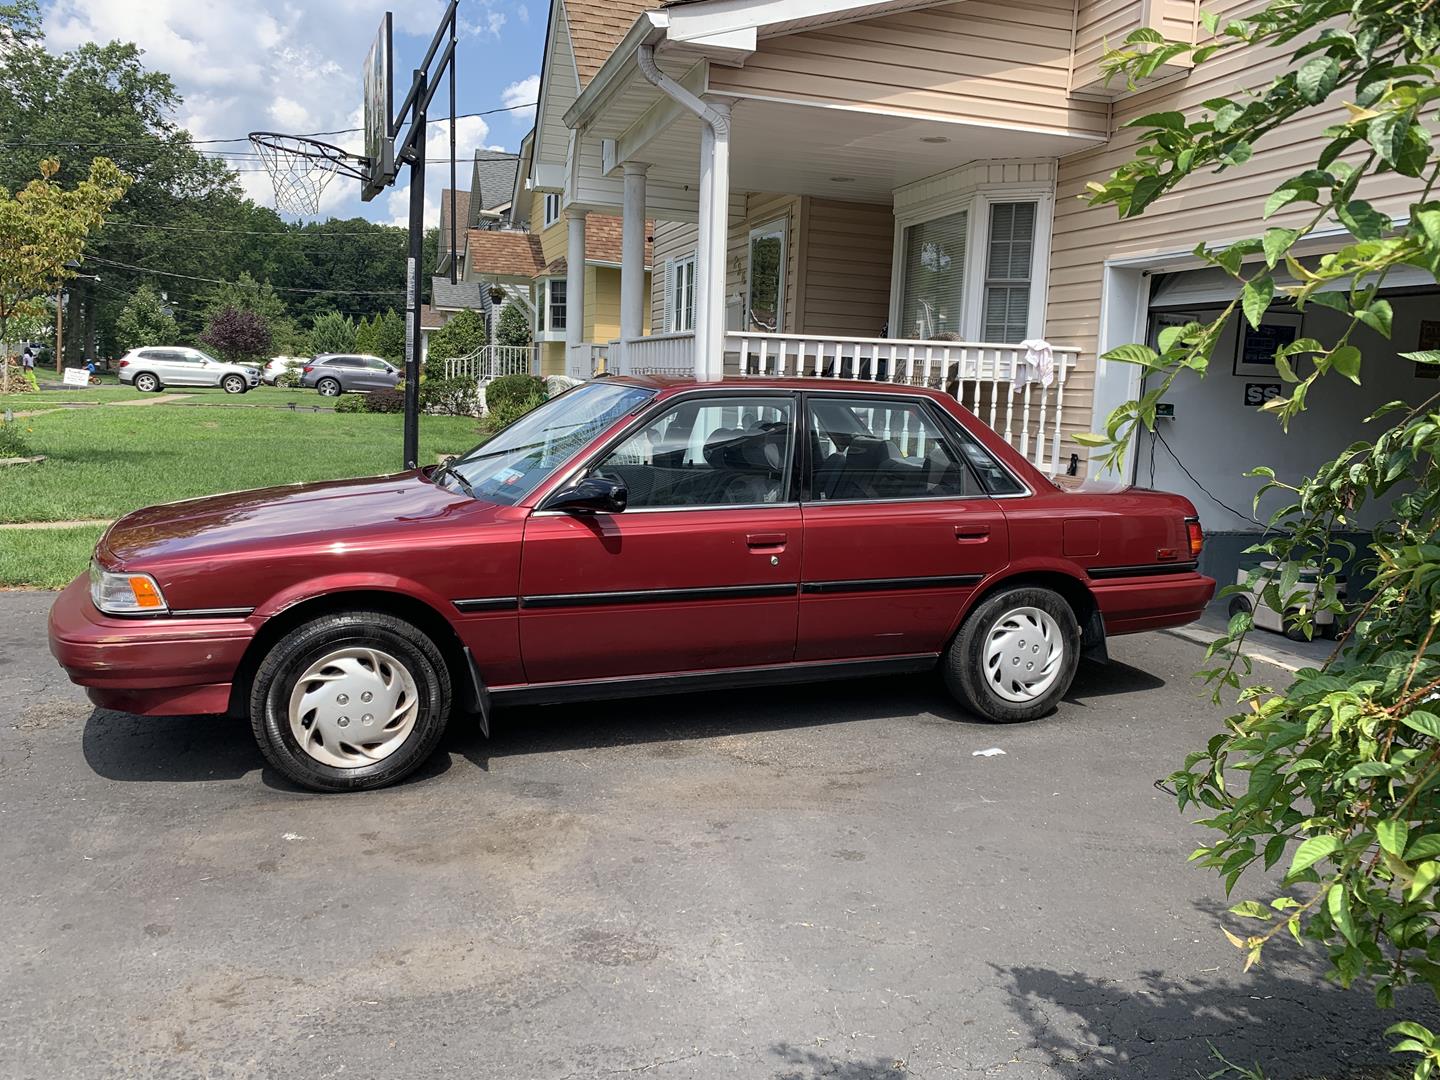
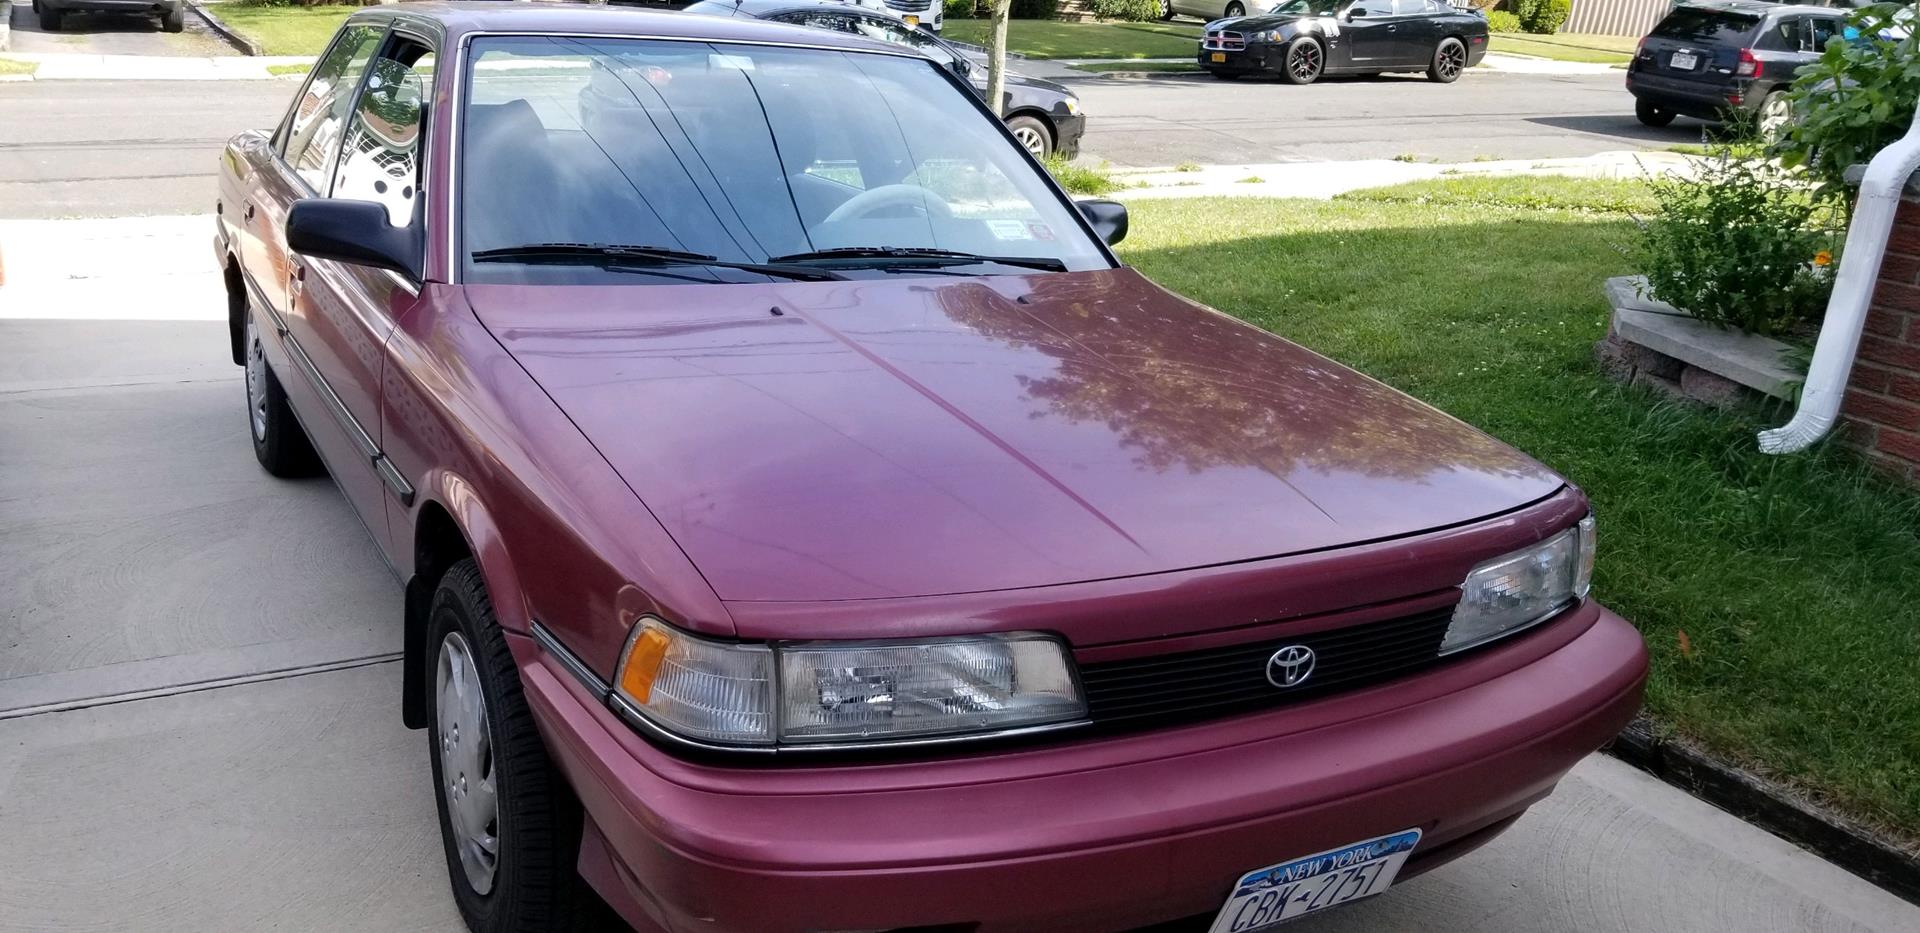
My son is a new driver and he was luck enough to be gifted a 1991 Toyota Camry. The car is in great condition for being 30 years old, and runs and drives like it was new! Wanting to make sure he is as safe as he can be in his ride, I decided to make a few upgrades. New dash camera, new radio with Bluetooth, and finally new LED headlights to replace the old halogen bulbs.
Picking a replacement bulb
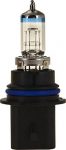
Old style halogen bulb
The Toyota Camry was originally equipped with the standard dual filament 9004 type halogen bulbs. They still make replacement halogen bulbs and modern 9004 bulbs are quite bright. Here we have a direct replacement Philips bulb pair for $33.00 at Amazon
If you want to take your lighting one step further consider installing a direct fit 9004 LED Headlight replacement. The LED Headlights will connect to the existing wiring and should snap right into the same socket as the old bulb.
Led Headlight
After doing extensive research on Amazon I decided to give these Sealight bulbs a chance. The normally sell for $45 a pair, but every time I visit the site they are on sale or have some kind of coupon. At the time of this writing they are $25.00 on Amazon
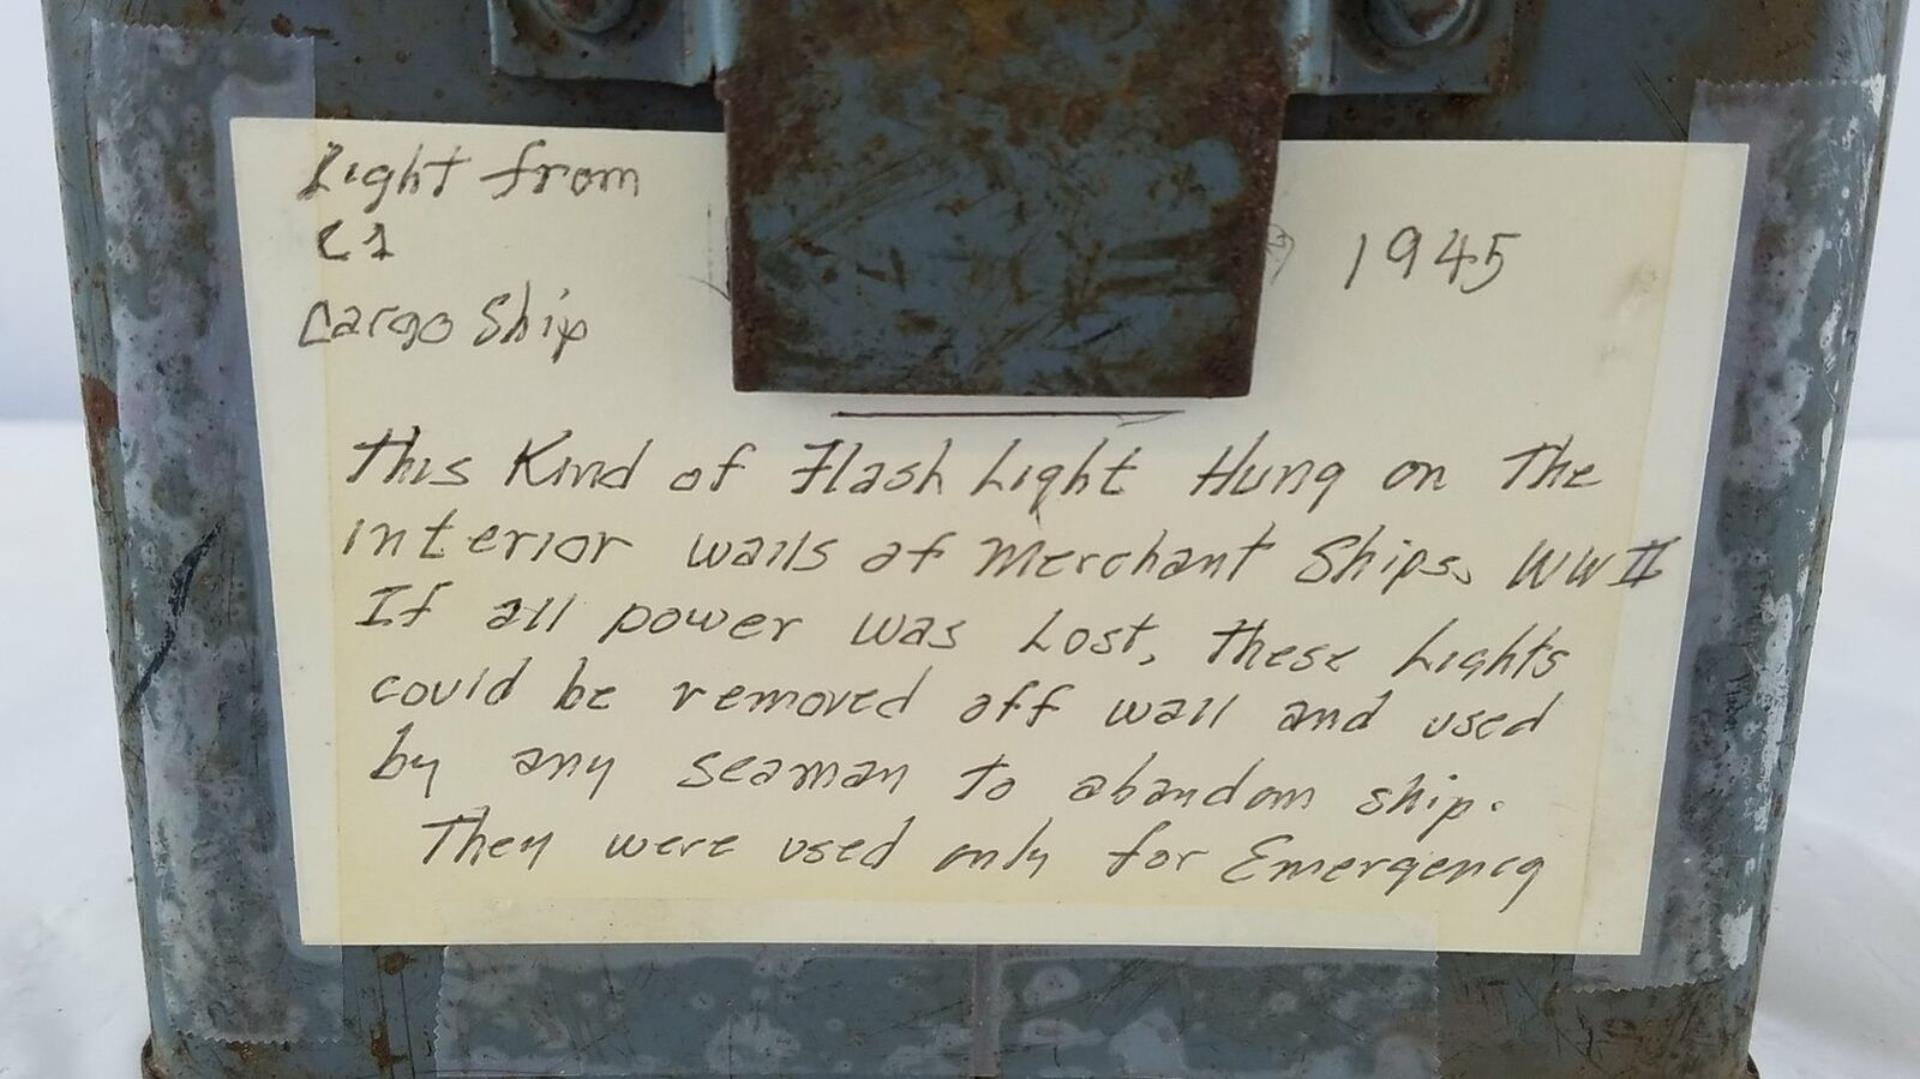
World War II ended 76 years ago, and at this point there are not many surviving service men and woman around to tell the tales of the time. I believe we need to preserve the stories of the past to enlighten future generations to insure history will never repeat itself. When I came across this Battleship lantern from the mid 1940’s at my local Goodwill, I felt it needed to be restored and preserved to tell its story for many more years.
I purchased the light for $20 from the Goodwill, which I felt was a bit overpriced for its condition. However hopefully some of my purchase price is going to a good cause. Researching a 76 year old flashlight proved to be more difficult than you would expect. According to Google, the 5293-L Lantern was attached to the US Navy Battleships and according to the letter that came with the lantern it was also used on cargo and merchant ships.
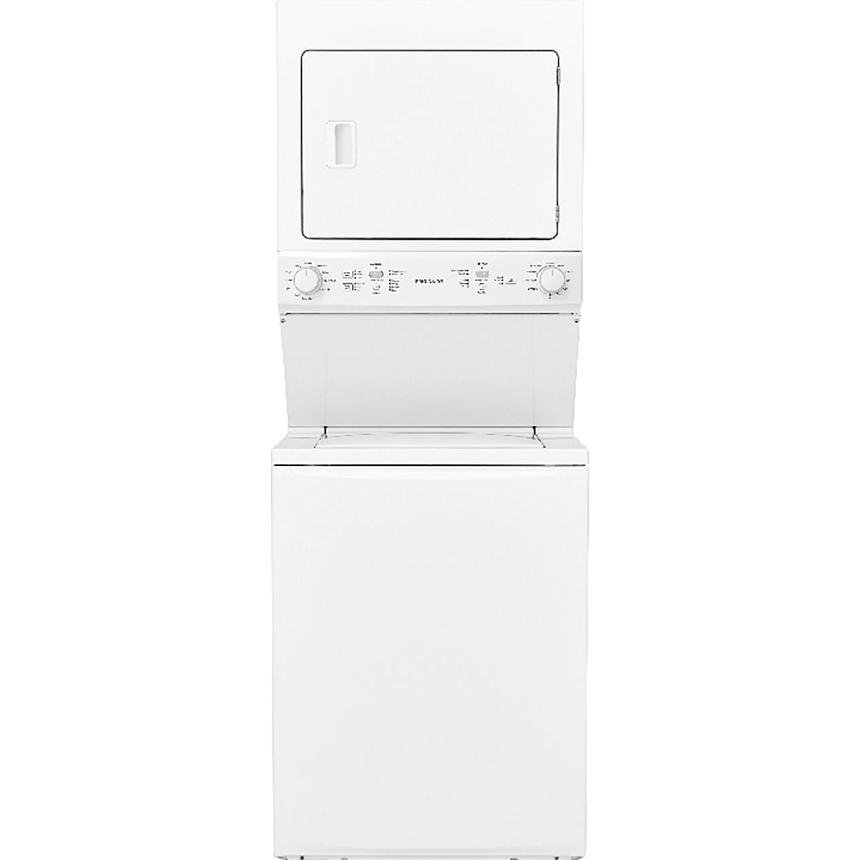
There's noting more aggravating than having a fairly new appliance (that is out of warranty) quit working. However there's nothing more satisfying than fixing it yourself and saving $200+ on a service call. I have a 5 year old Frigidaire washer / dryer combo unit and recently the dryer stopped getting hot. The unit continued to spin /tumble, however no heat. The dryer is gas and giving it a good listen there was no attempt to even light the flame. It was time to take the dryer apart!
TOOLS YOU CAN USE
Some type of screw gun or drill with a Phillips bit set. I personally like this Makita, but never the less a cordless drill or screw gun would be helpful.
A stubby screwdriver set is also very helpful they are so inexpensive and available for$10 at Amazon like this one.
We need to test some of the parts. Any digital multi-meter with an ohms / continuity scale will work just fine. They are very inexpensive $25 at Amazon
Time to take the unit apart
I am going to describe to the best of my ability how to take this dryer apart, however there are some great YouTube videos that explain it better than I can. I still recommend you read my description as I will tell you what my personal experience was during the process.
First disconnect the power
Shut off the gas line I did not disconnect mine, but it might be a good idea to do so.
Shut off the water lines Again, I left mine attached, but it might be a good idea to disconnect
Remove the drain hose from the sink or stand pipe
Guess what, I left mine connected.
Remove the dryer vent (use the stubby screwdriver)
Now locate the dryer motor access cover and remove the two screws that are holding it to the dryer. You should see the motor, belt and belt tensioner. If you have never done this before take a quick picture of how the belt is set around the motor
Push the tensioner to the left, this will give the belt some slack and allow you to remove it from the motor
There are 4 screws on the rear of the unit (RED ARROWS) remove them (it will make life a bit easier later.
Work your way to the front of the unit. There are two screws holding a white trim cover on - (YELLOW ARROWS) remove them and set the cover aside
Under the trim cover remove the two screws that hold the control panel on, (BLUE) arrows. Then push down on the control panel to remove. *** IMPORTANT *** Disconnect the dryer door switch.
Next there are two screws directly below the screws you just removed. They are holding a silver plate on. Just take the top two out. No need to remove the entire silver plate.
WE ARE GOING TO TAKE THE DOOR OFF
Two more additional screws hold the bottom of the door on. remove them.
Next work your way to the top front of the dryer. 4 screws need to be removed. Now the door can come off! Get some help. The DOOR IS HEAVY!
Ok we're in!
There is a little black piece of rubber in the top center of the dryer. Its called a drum stop and needs to be removed.
Now the entire drum needs to come out. You could use a helper with this step. The drum sits in a bearing at the back of the dryer wall. Its like a ball and socket. Lift up on the back of the drum to remove the ball from the socket. (this may take a little bit of effort.)
Slide the drum out (don't catch the belt on anything!
WHAT PARTS TO TEST
This is what the inside of the dryer looks like with the drum removed. Kind of simple, don't you think?
Lets get to testing, all the way in the back on top (RED ARROWS) are two thermal fuses. This is the most common part to die. Start w/ one of the fuses and remove one wire. Then check across the fuse (both legs) with your multi-tester set to continuity. A BEEP = GOOD!
The first part I tested was bad! Thermal limiter 137032600, I believe they sell everything at Amazon and was able to pick this one up for $20
Moving down the line, be sure to test the flame sensor as well (Aqua Arrow) same procedure here, pull one of the wires off and check for continuity.
The yellow arrow points to the leads for the igniter. Use the OHMs setting on the meter to see if there is any resistance. If is shows OPEN (or infinity) its bad.
Same goes for the gas valves, check for resistance.
CLEAN ME!
The reason my dryer failed was because of lint buildup. Over the years lint collected behind the drum and it looked burnt. There was lint in the door, the sides the exhaust fan, pretty much everywhere. Use a vacuum to clean the entire dryer before you put it back together. don't forget the back of the drum.
A couple of closing thoughts
DON'T MOVE THE DRYER AROUND WHILE ITS APART! The sheet metal is so thin it will bend.
The door was hard to get back on because my dryers sheet metal shifted a bit.
The BELT GOES GROOVED SIDE DOWN. While you are in there you may want to order a replacement belt.
I love cars, to me they are not just a functional piece of everyday life but more a work of art. Even the ugliest car had to be designed by someone who thought it was a good idea at the time. My kids are getting older and my youngest is learning to drive. We were fortunate to have a 1991 Toyota Camry dropped into our lap. A 30 year old “beater” that runs and drives and is in surprisingly good condition. The only problem is it has 30 year old paint, that has apparently never been waxed or polished. The goal is to do a paint correction that would give the car a great look from 10ft away (lol)
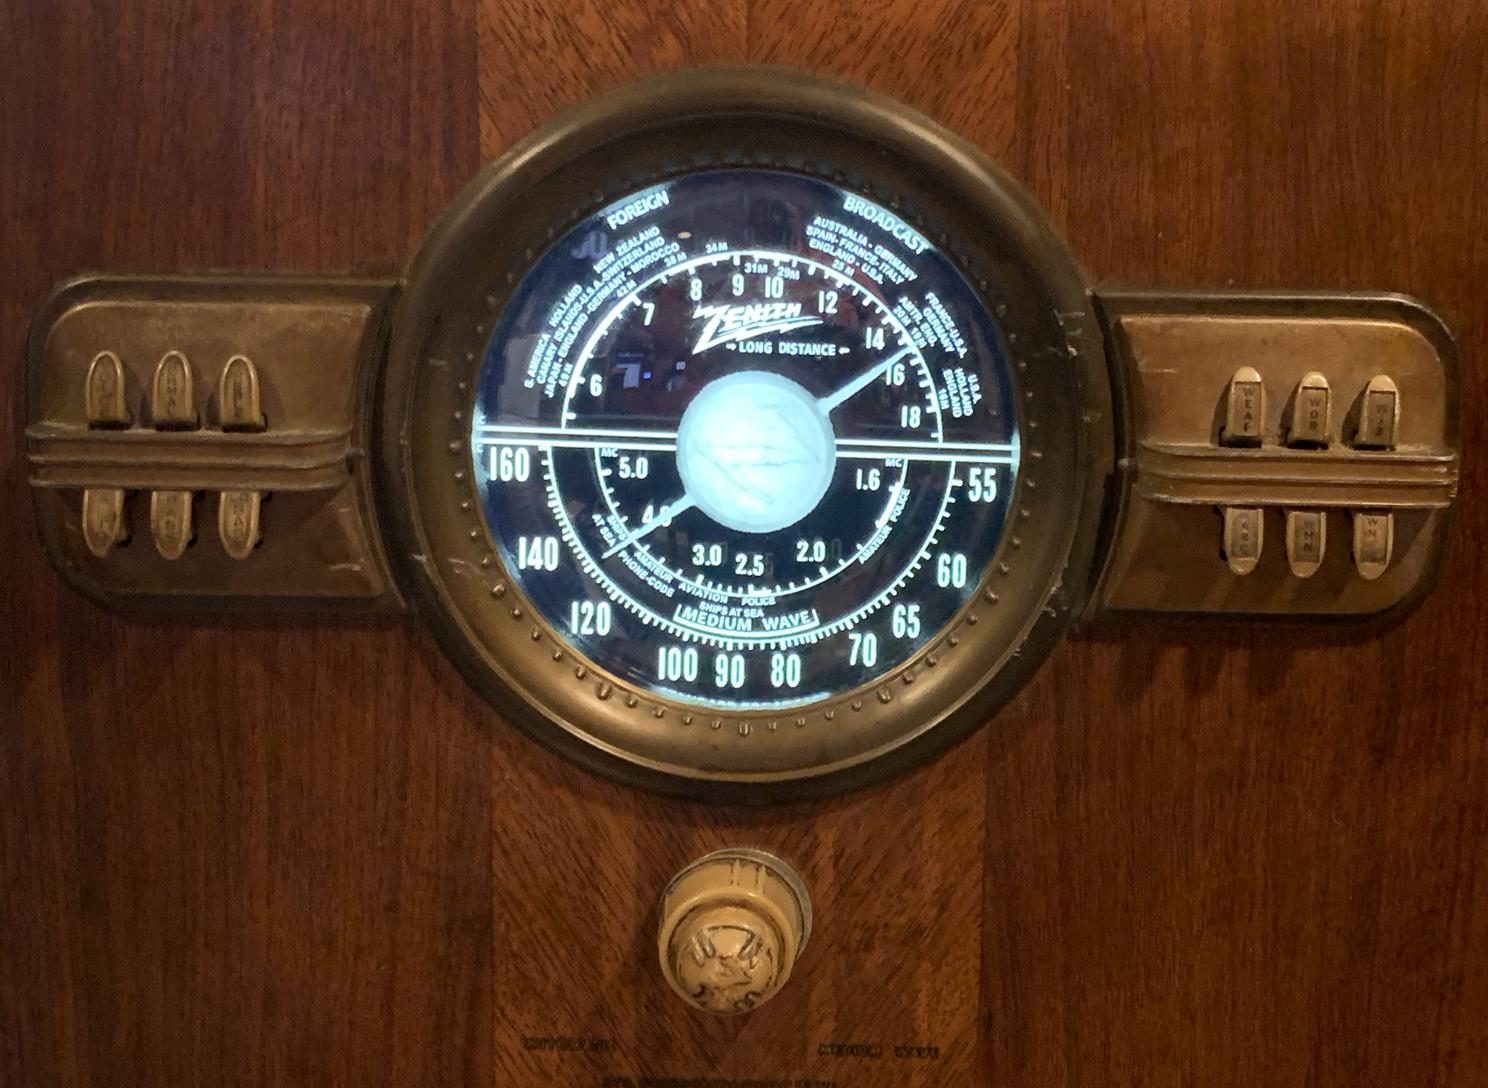
Old radio enthusiast please don’t send me hate mail after reading this blog. I know many of you will frown on what I have done to this 80+ year old radio. I promise you this Zenith will get tons more use in its current condition rather than in original form.
The project consisted of gutting the original electronics from the radio and replacing them with newer more modern tech. Resulting in a working radio that still has the spirit of the original.
Parts List – Hardware
MS Surface
An older Microsoft Surface Pro 3 – I don’t recommend you go out and purchase a surface for this project. Re-purposing and old laptop, or tablet is ideal to keep the cost down. I’m sure you could even use a Raspberry Pi with an external display. I just happened to have an old Surface that needed a new job. Continue reading “1940’s Zenith Radio Restomod”
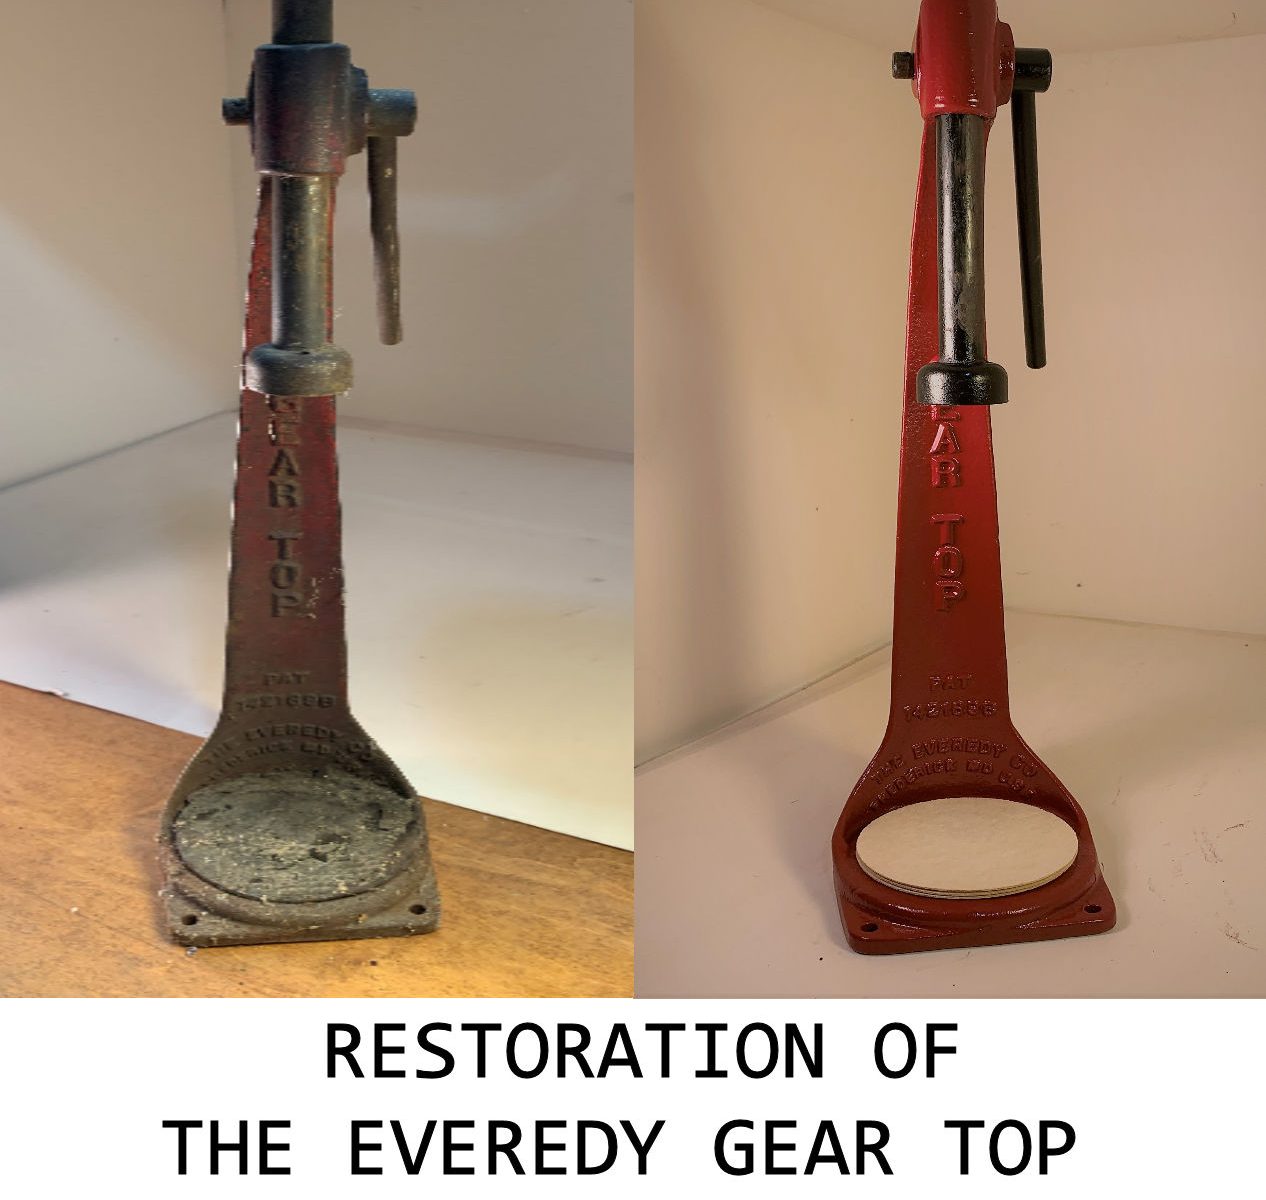
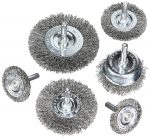
Covid19 has pretty much left me trapped in the house over the last few months. Needing to keep busy I started to clean out the basement, selling some stuff on Ebay while tossing the rest out in the trash. I did come across this Everedy Gear Top Bottle Capper under a table gathering dust and rust and decided it would be a good restoration project. Restoration would be very easy as there are only a few parts and the capper was simple to take apart.
Tools you can use
Since the bottle capper is made of cast iron and had some serious rust, I decided to go with a wire brush to remove the dirt and prep the surface for paint.
If you have been to my site before you know that I’m a DIY type of guy and that includes taking care of my cars. I have been hand washing and waxing my cars since I was 17 years old. Car care technology has changed over the last 30 years and I’m always looking for the next big thing to try on my vehicle. Lately there has been lots of talk about Ceramic Coating your car for the ultimate shine and protection.
I did a ton of research into different types of Ceramic Coatings and most of them have proven to be very expensive, and they come in small bottles so you could possibly need two to complete your car. Also, if you put too much on your paint could develop high spots and it could wind up worse than when you started.
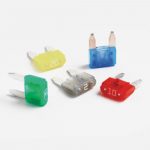
We all rely on the 12 volt auxiliary power outlet (formerly know as the cigarette lighter) in our cars. They charge our phones, power our GPS, run our kids video games. When the power goes out it can really be frustrating. Most of the time these auxiliary power outlets are easy to fix and get back into service quickly and easily.
Sometimes its as simple as a fuse
The car auxiliary power outlet was designed in the early 1900’s for lighting cigarettes in automobiles and though we have a profound new view on smoking the outlet itself has not changed much since then. The shape of the outlet opens itself up to issues simply because small metal objects can become lodged in the socket causing short circuits. In all honesty, there have been quite a few times I had a penny fall into the auxiliary power outlet and caused a blown fuse.
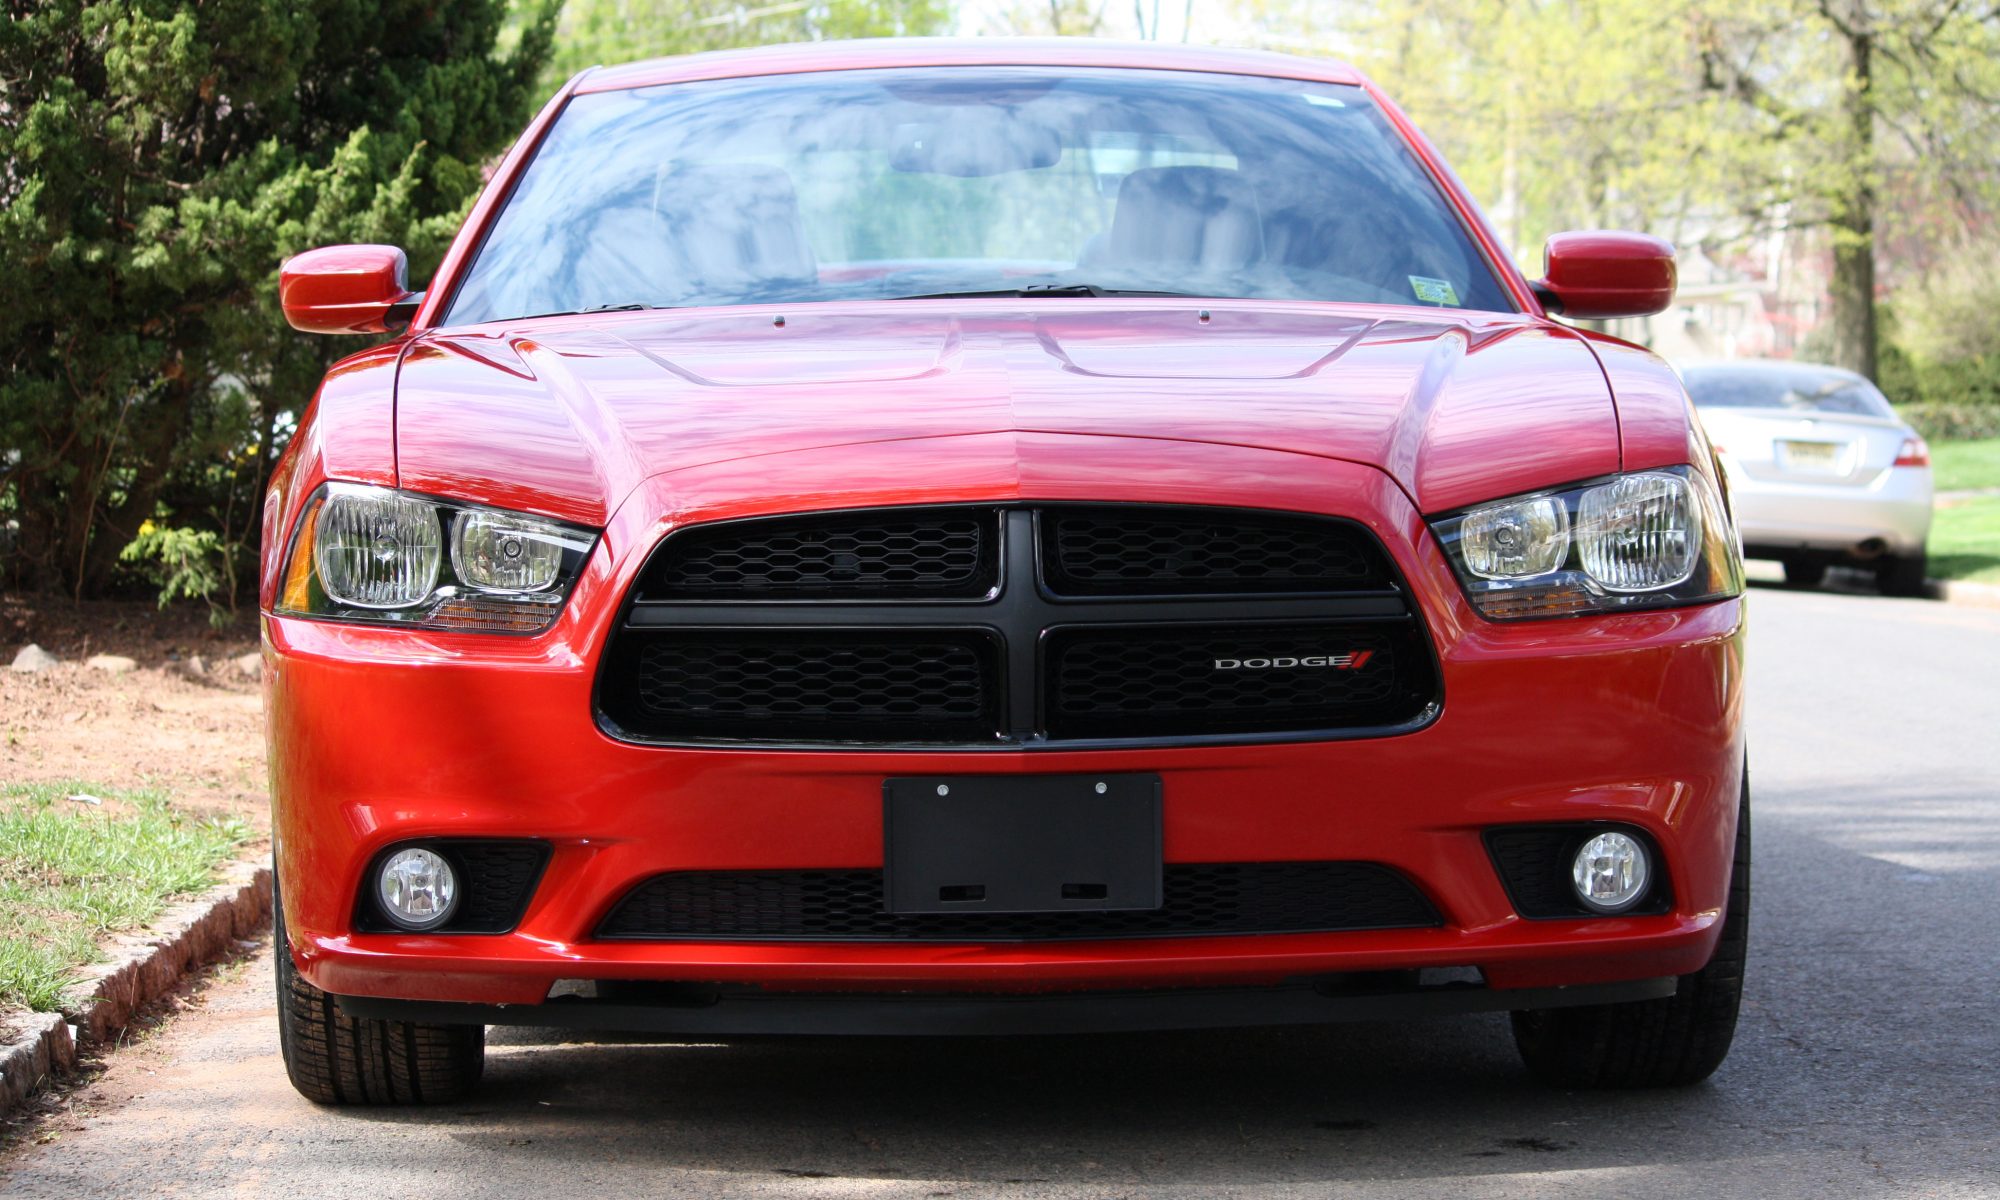
In the case of my 2014 Dodge Charger I’m not exactly what caused the fuse to blow, but its a simple fix none the less.


 Pro Tip: After rinsing, apply Chemical Guys Signature Series Wheel Cleaner. It’s safe for tires and wheels, making it an easy dual-purpose cleaner.


")
")


 he outlet opens itself up to issues simply because small metal objects can become lodged in the socket causing short circuits. In all honesty, there have been quite a few times I had a penny fall into the auxiliary power outlet and caused a blown fuse.