

Once a year I change my air filter and cabin filter to help keep my GS 350 performing at its best. The Lexus dealer can charge upwards of $150 for each of these services. You can save yourself hundreds of dollars if you take 5 to 10 minutes to do it yourself. In this post I will show how easy it is to swap out the GS cabin filter. Click this LINK to see how easy it is to change the Air filter.
Where to get the correct Cabin Filter?
I believe many Lexus models take the same cabin filter. I searched on Amazon and many of the filters i came across said they were NOT a match for my car. Finally I found this EcoGard filter that said it was going to be a good fit, I took a chance and made the purchase.
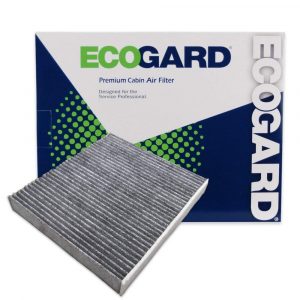
EcoGard filter for GS350 $16.54 at Amazon.com
There are lots of other compatible filters. Picking a cabin filter is more a personal preference since they are a creature comfort and will not affect the performance of the car. Use this link to search all of Amazon for filters that should fit the GS 350 – CLICK ME
Changing the filter
The cabin filter is located behind the glove box. Its quite easy to replace and NO TOOLS are required (Thank you Lexus!)
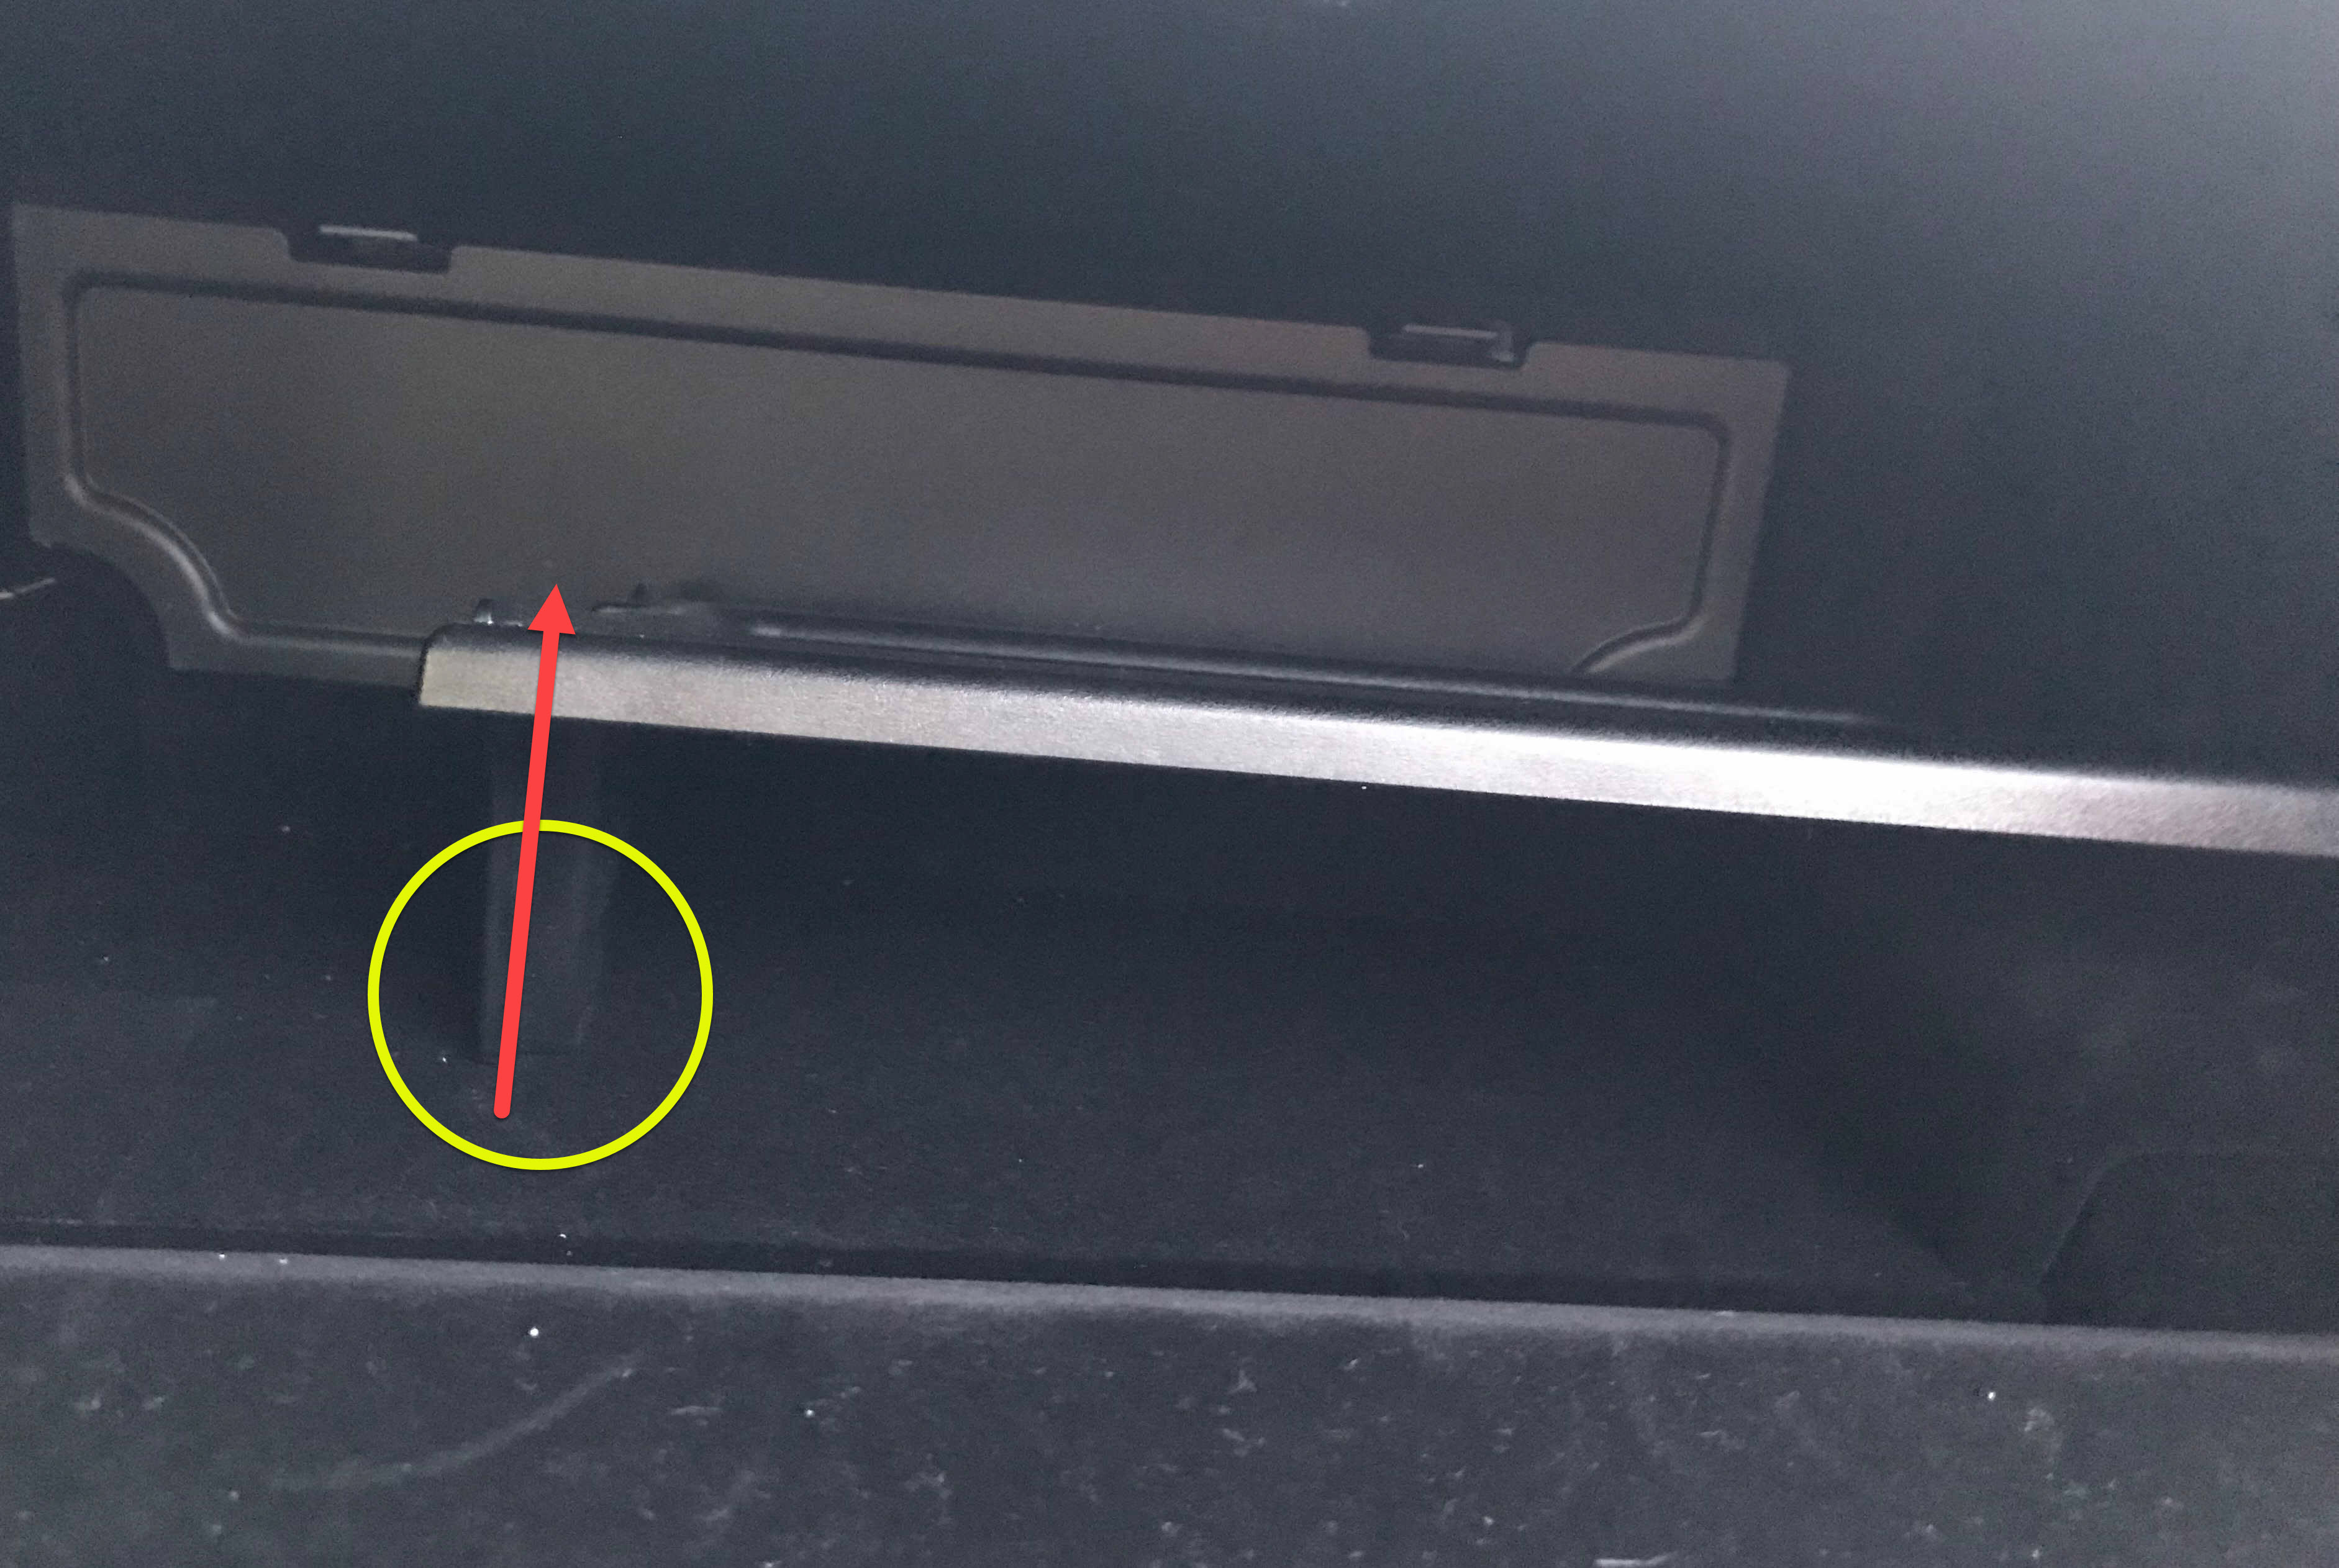
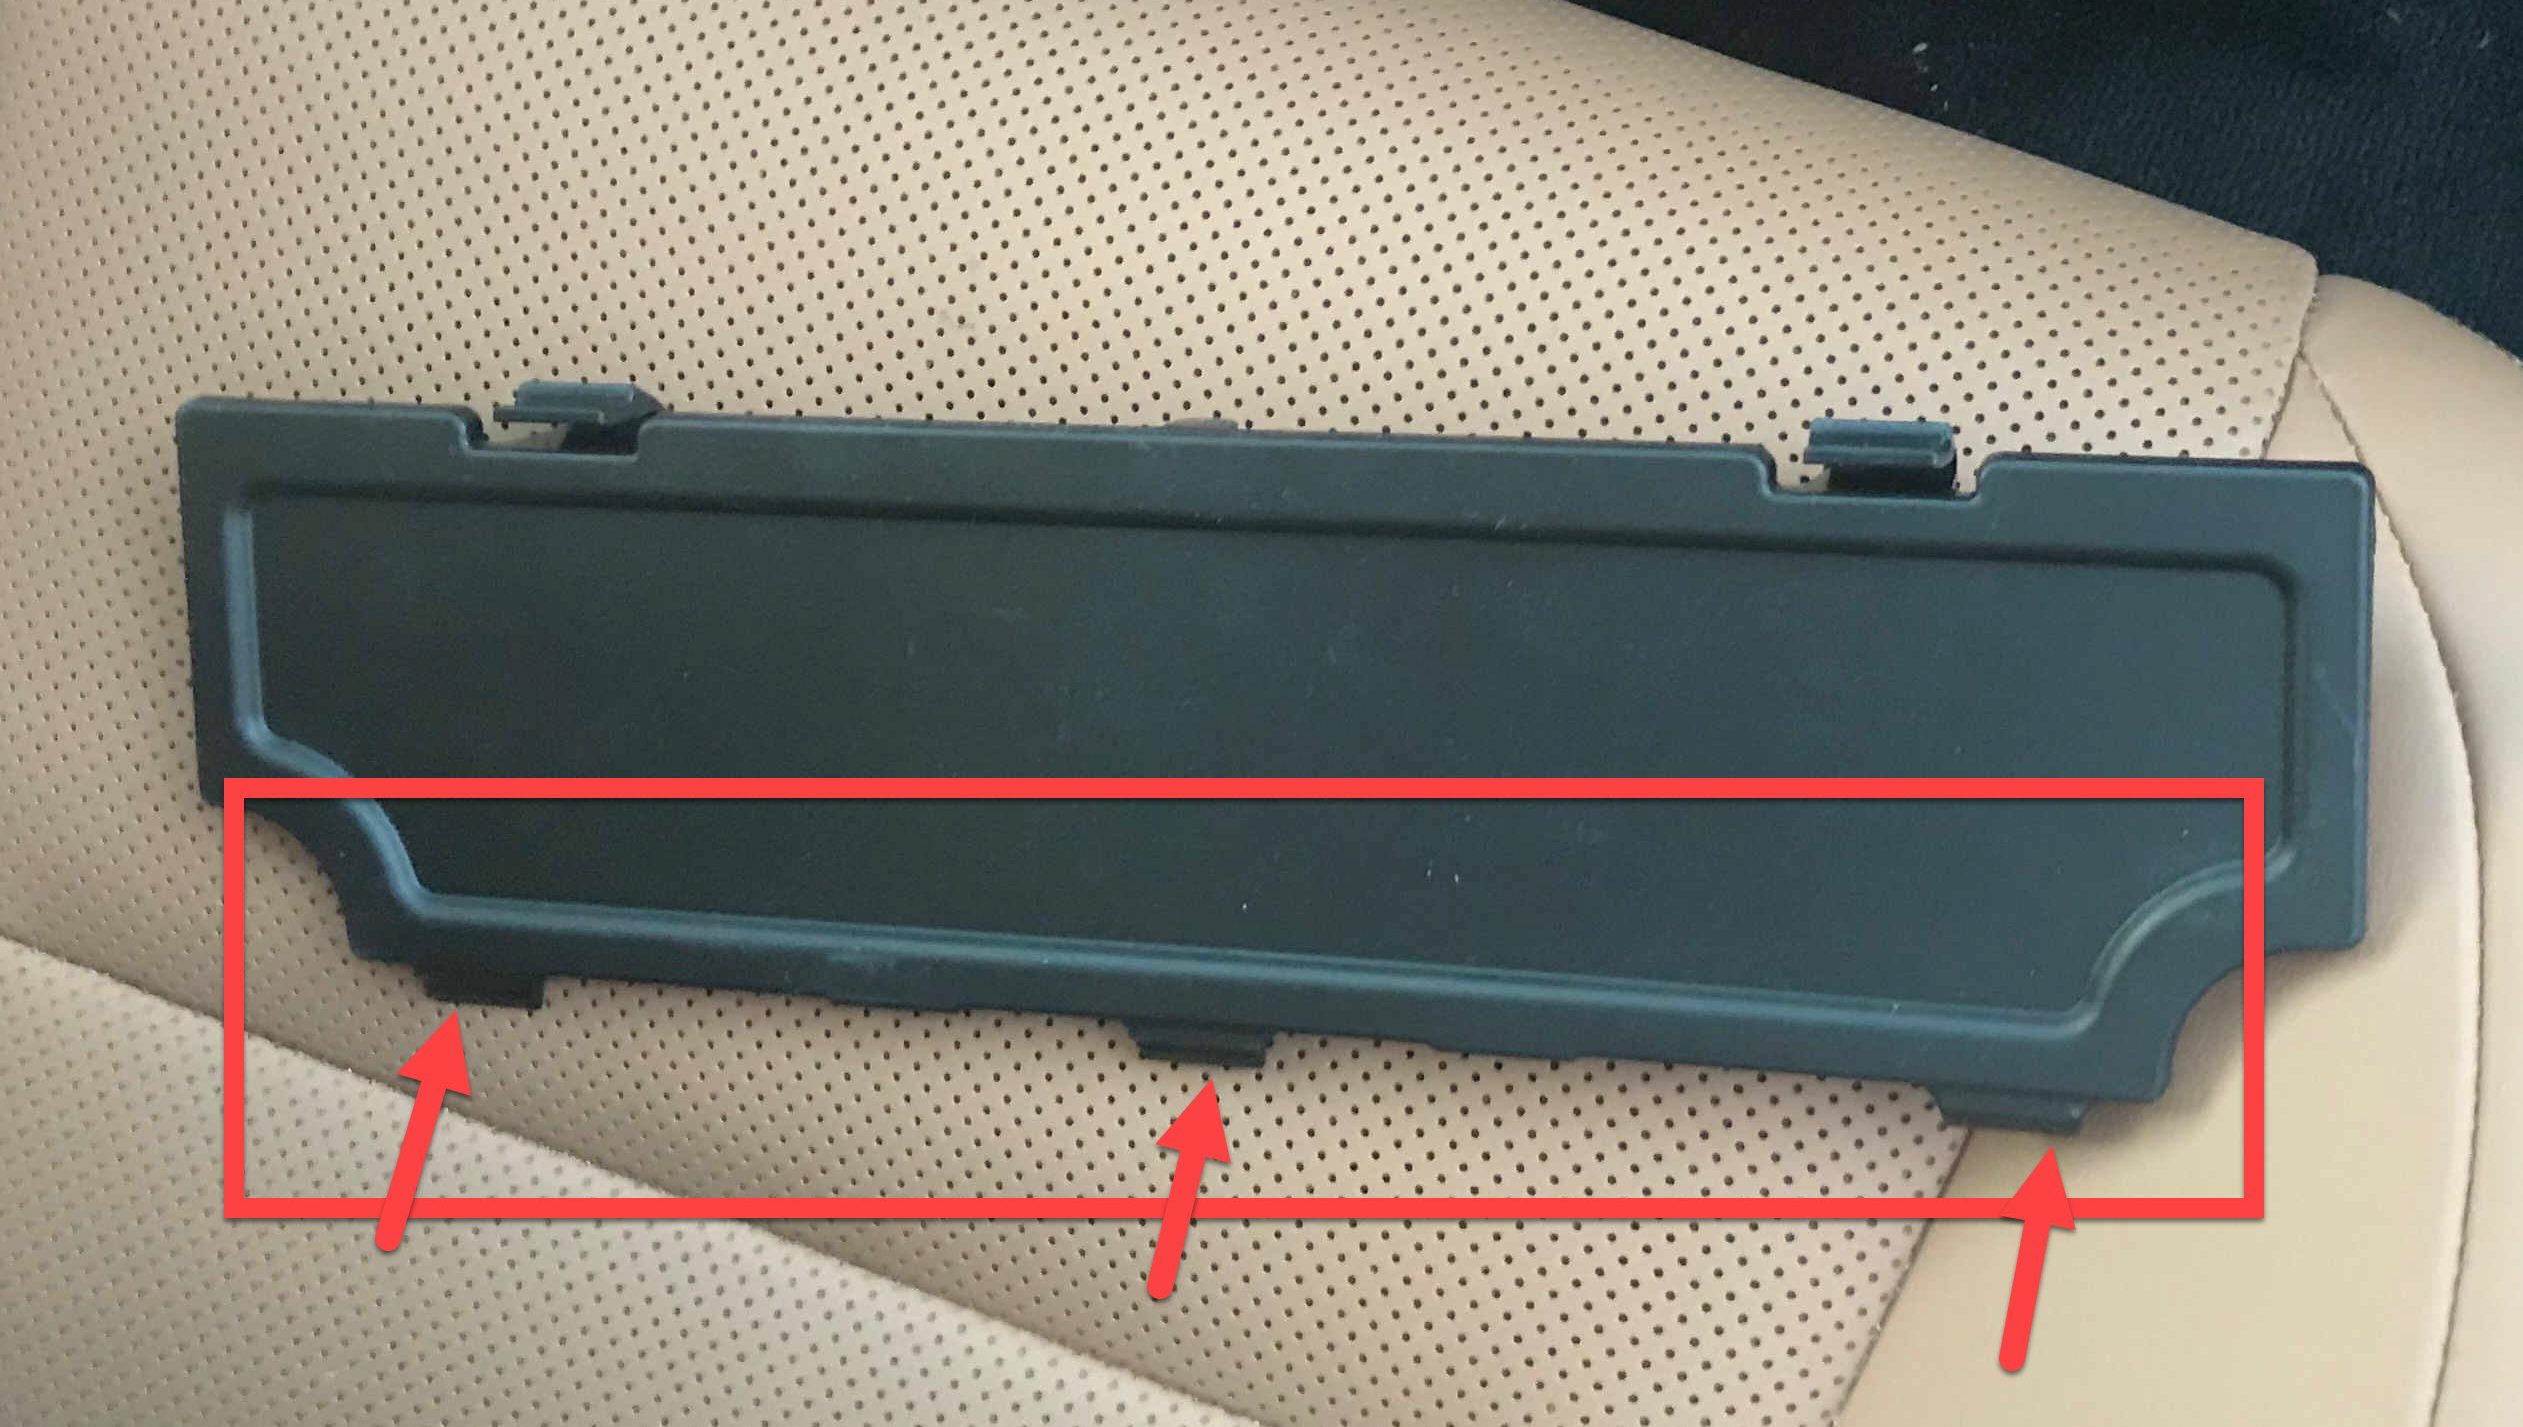
STEP 1: Remove the Shelf
Open the glove box and remove the contents. My GS 350 has a shelf in the glove box that also needs to be removed. The shelf has TABS that slide into holes which secure it into place.
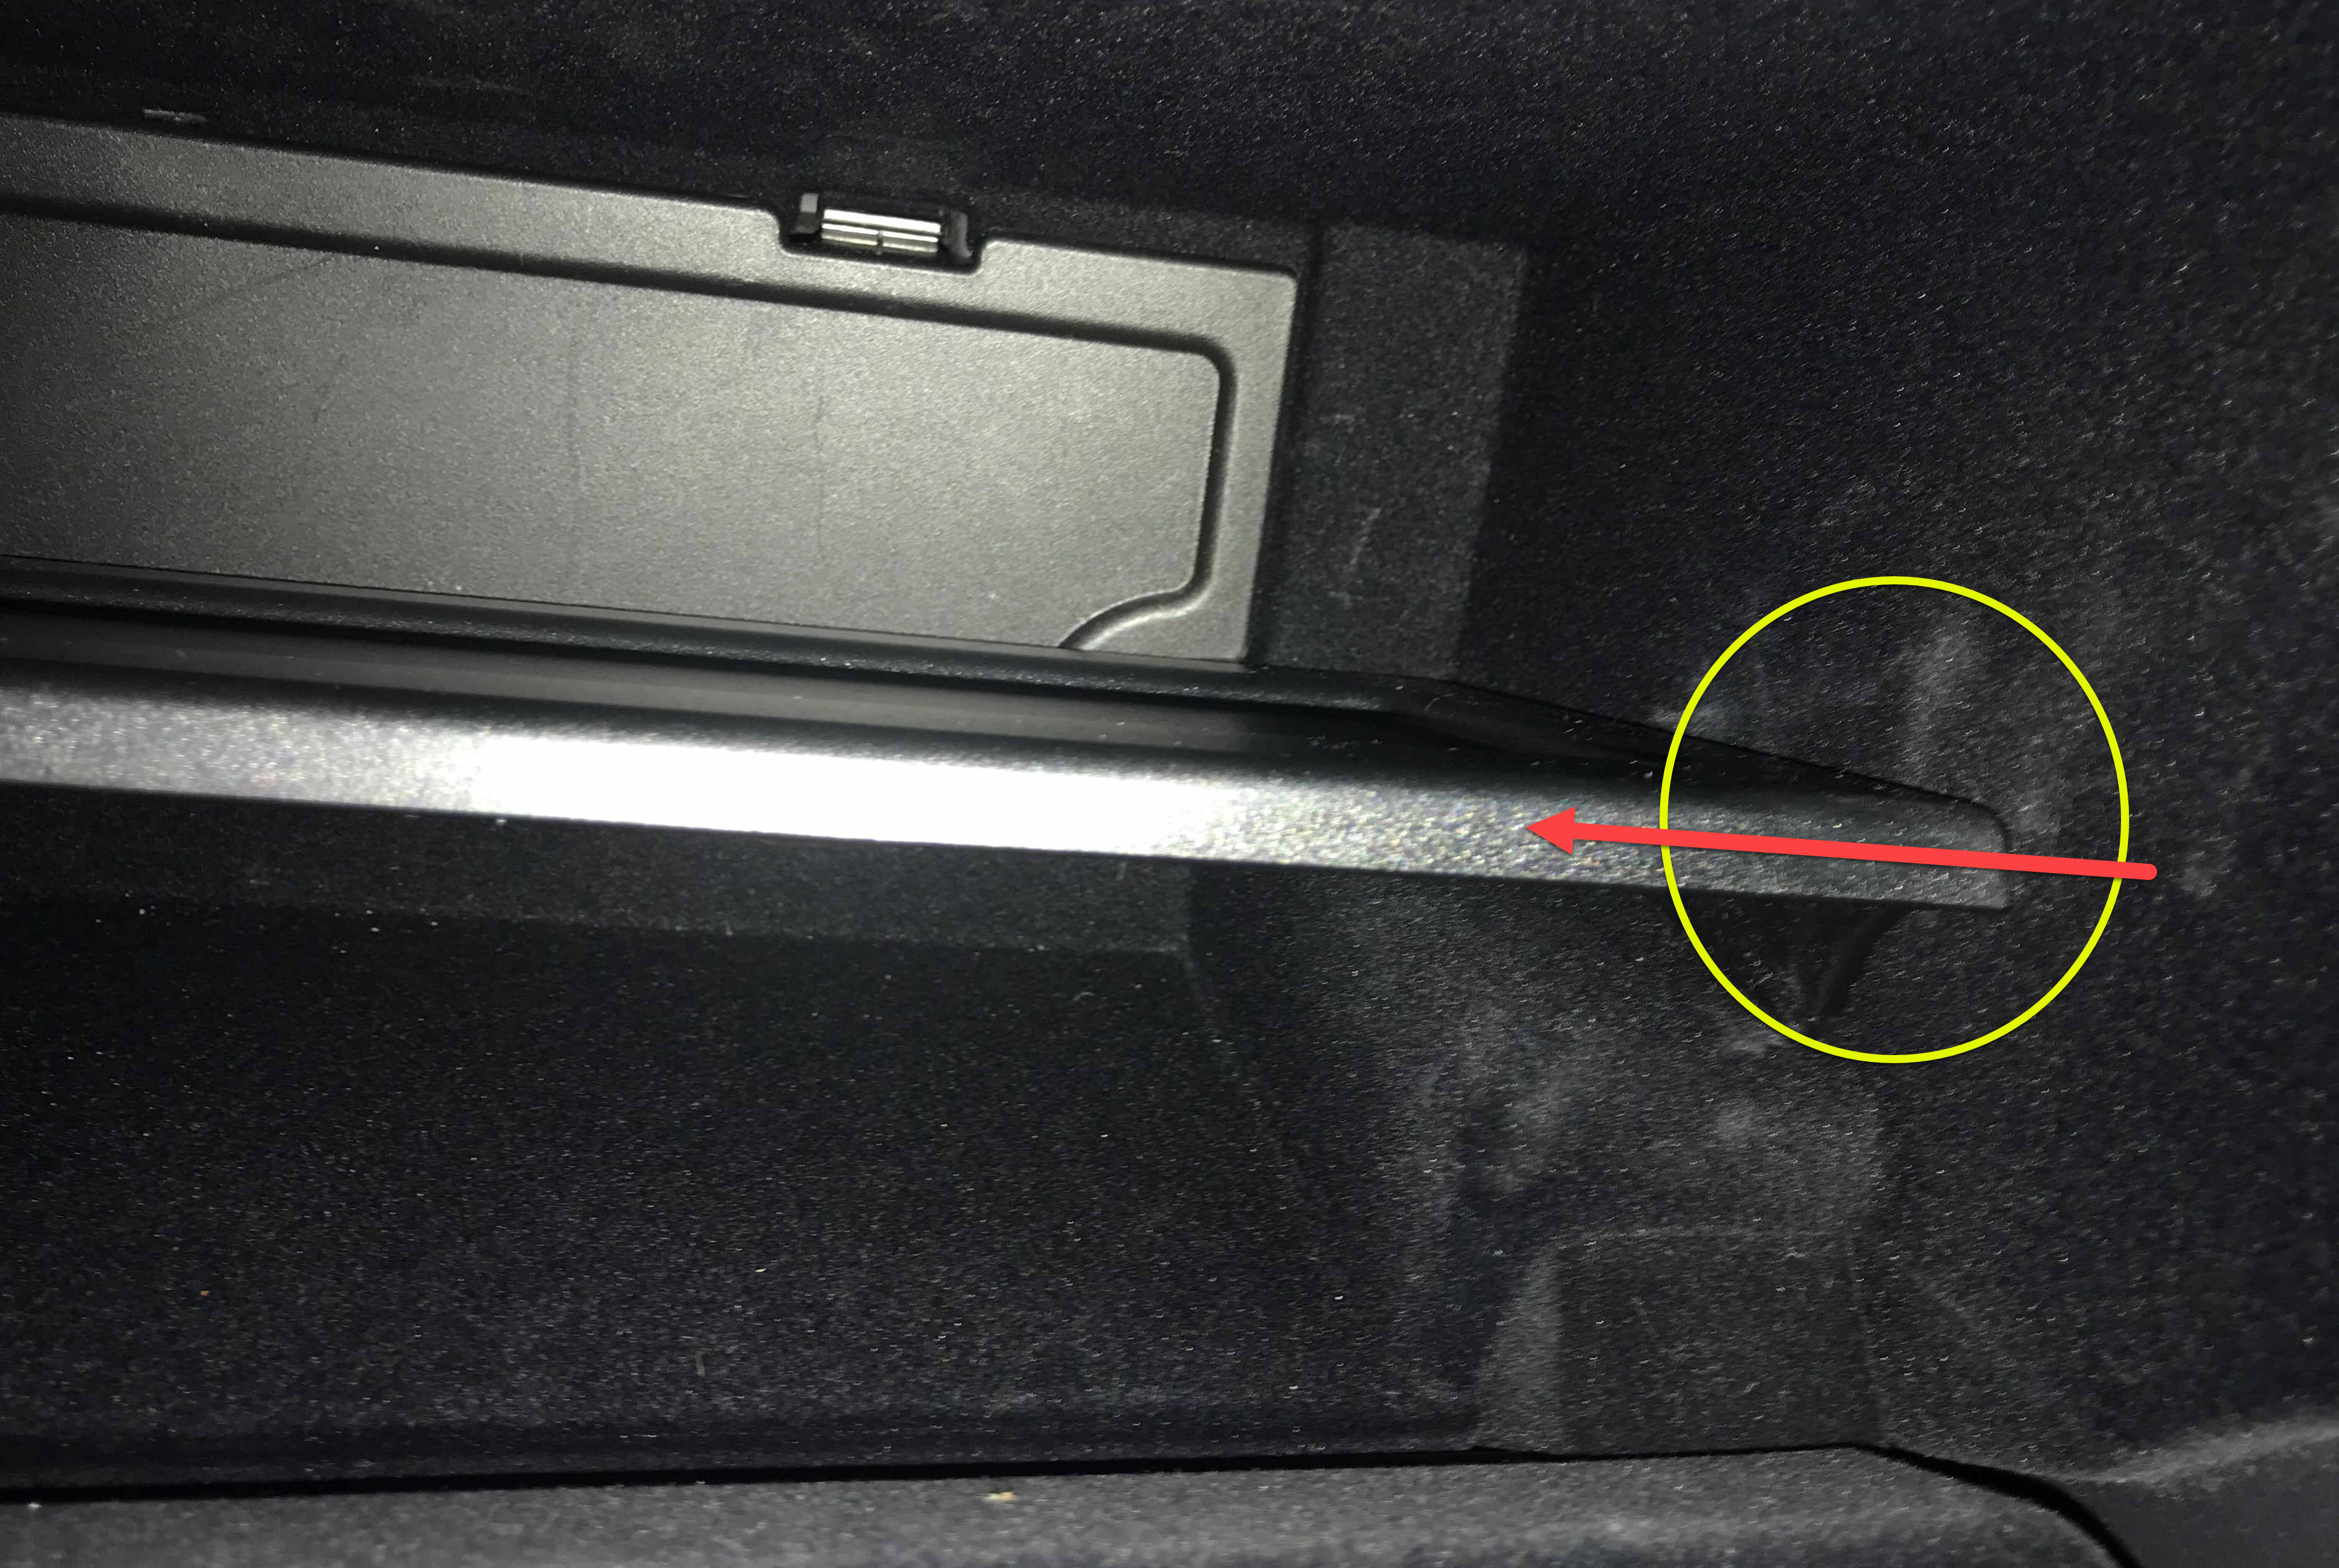
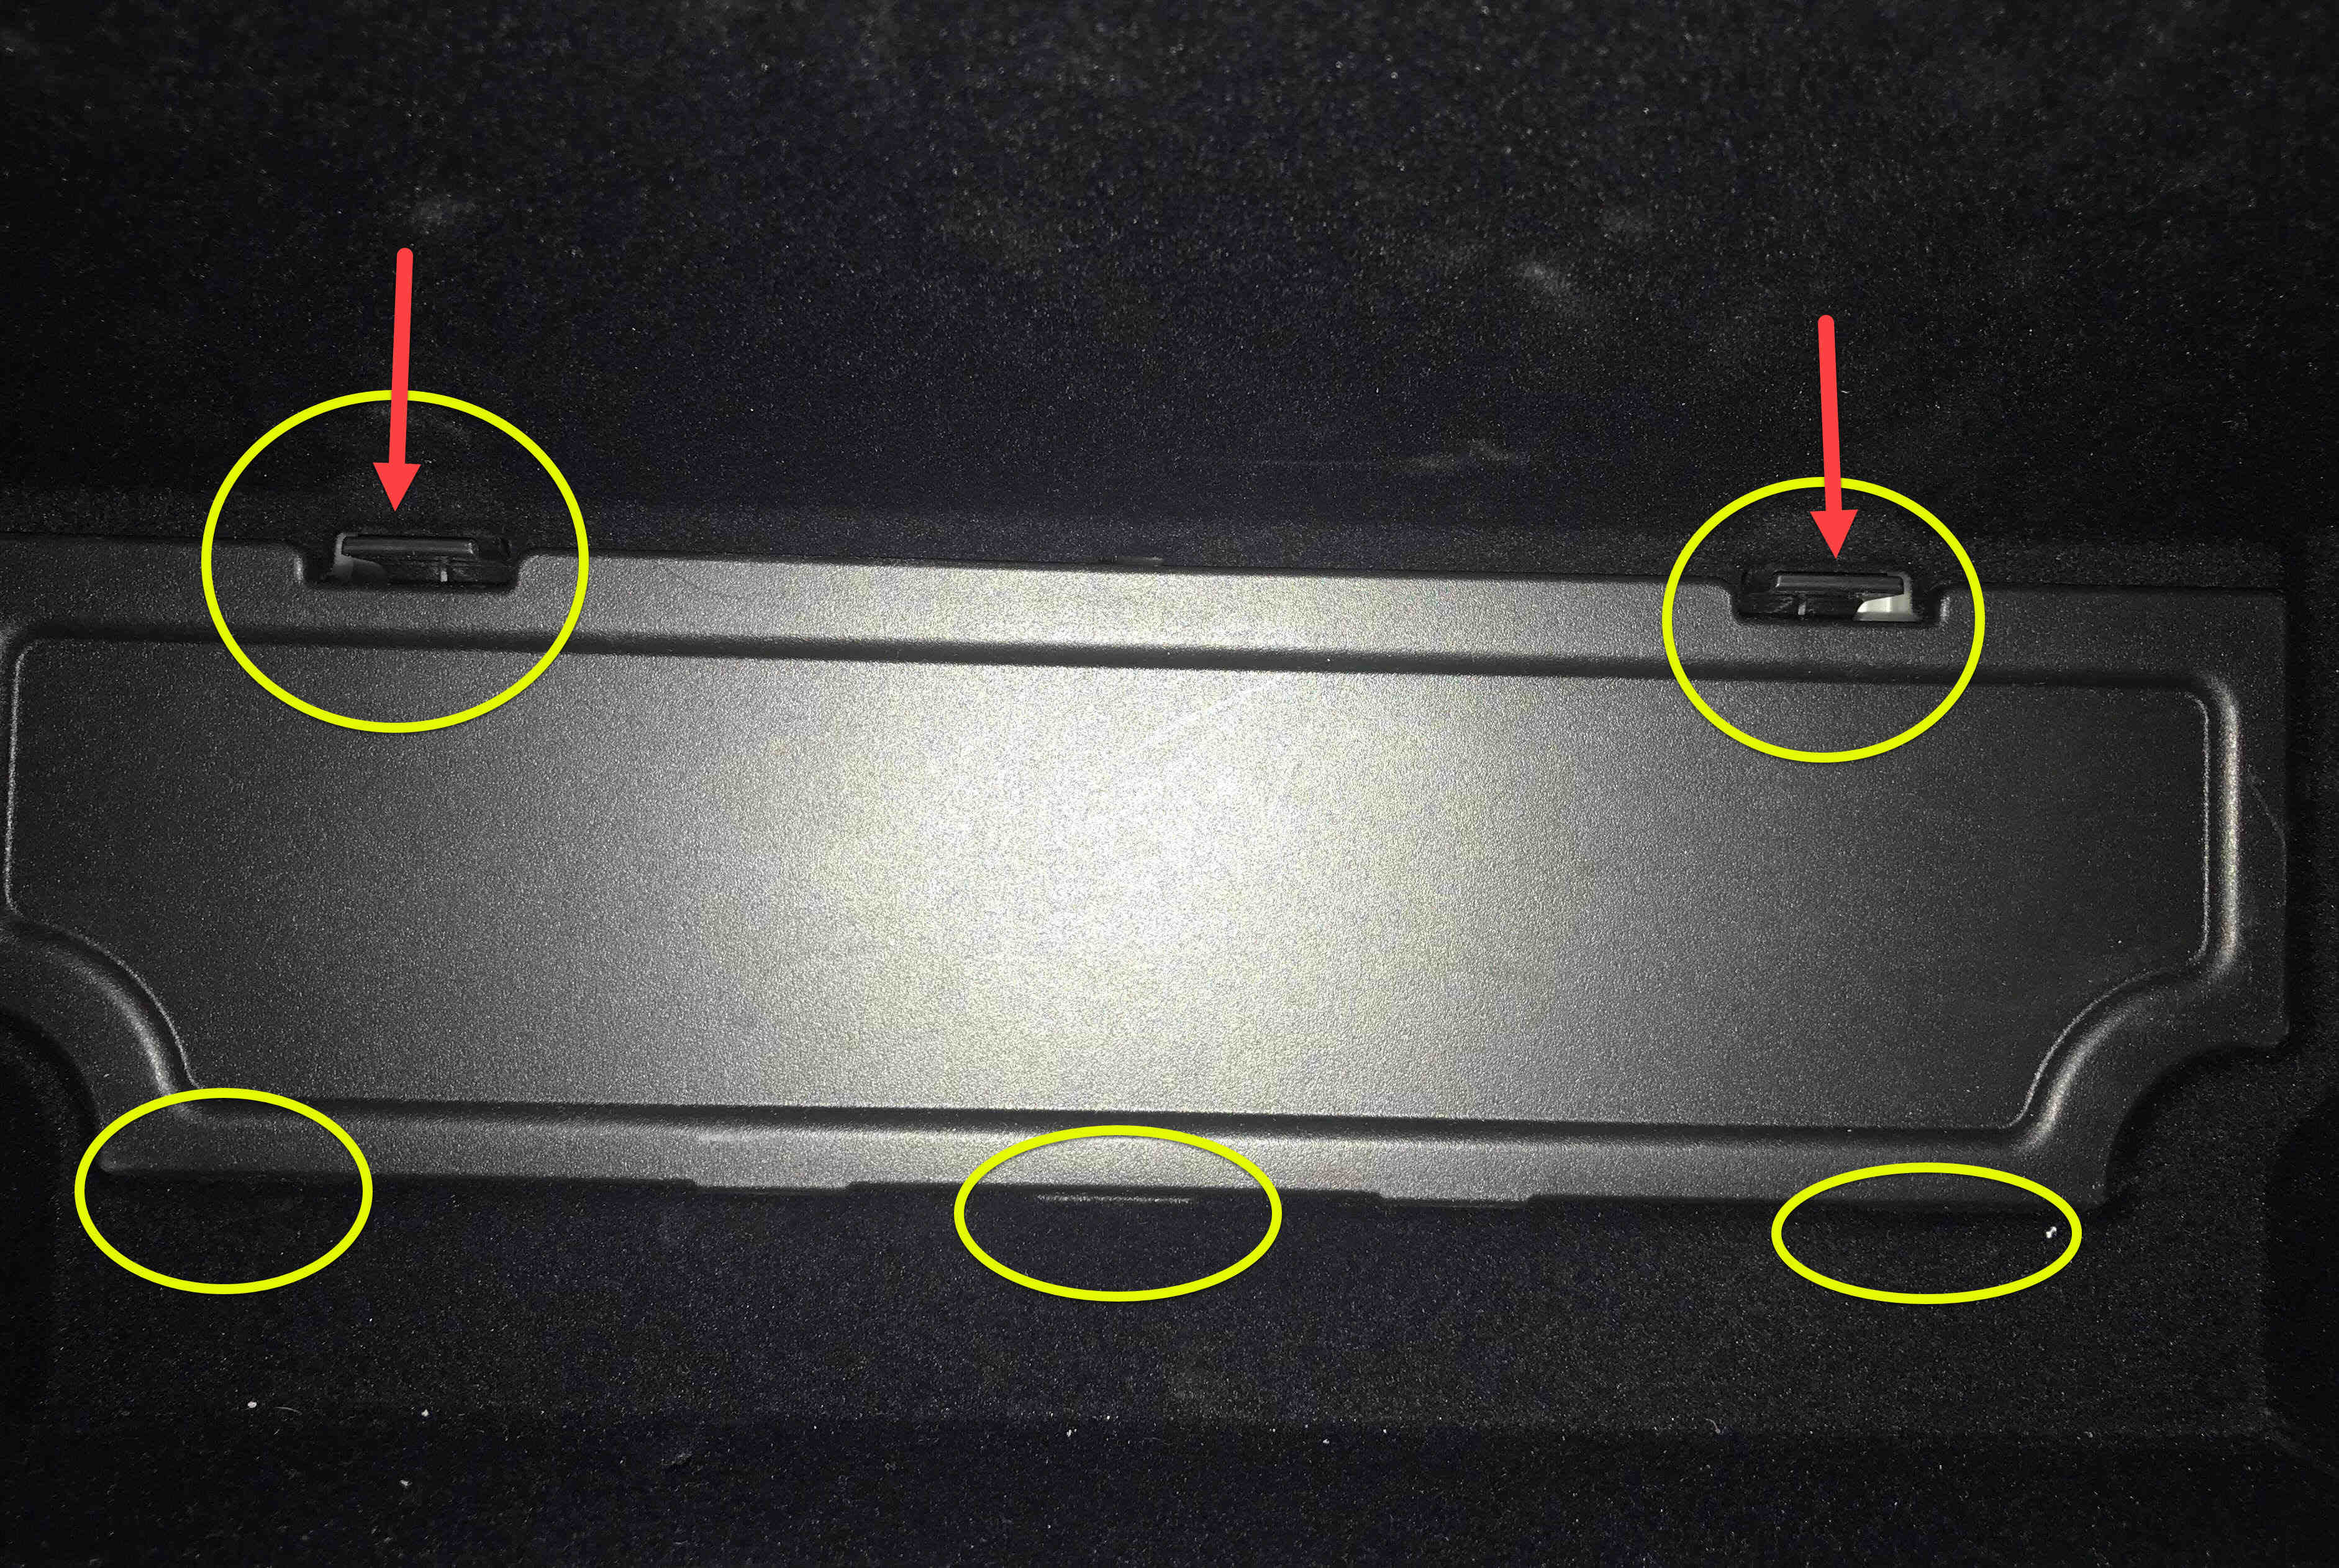
STEP 2 : Remove the outer cover
Once the shelf has been removed, you will now have access to the cover of the cabin filter. There are two clips at the top of the cover that need to be pressed down, and three tabs at the bottom that hold the clover in place. Push the tabs down, gently open the cover then LIFT up as not to break the tabs on the lower part of the cover.
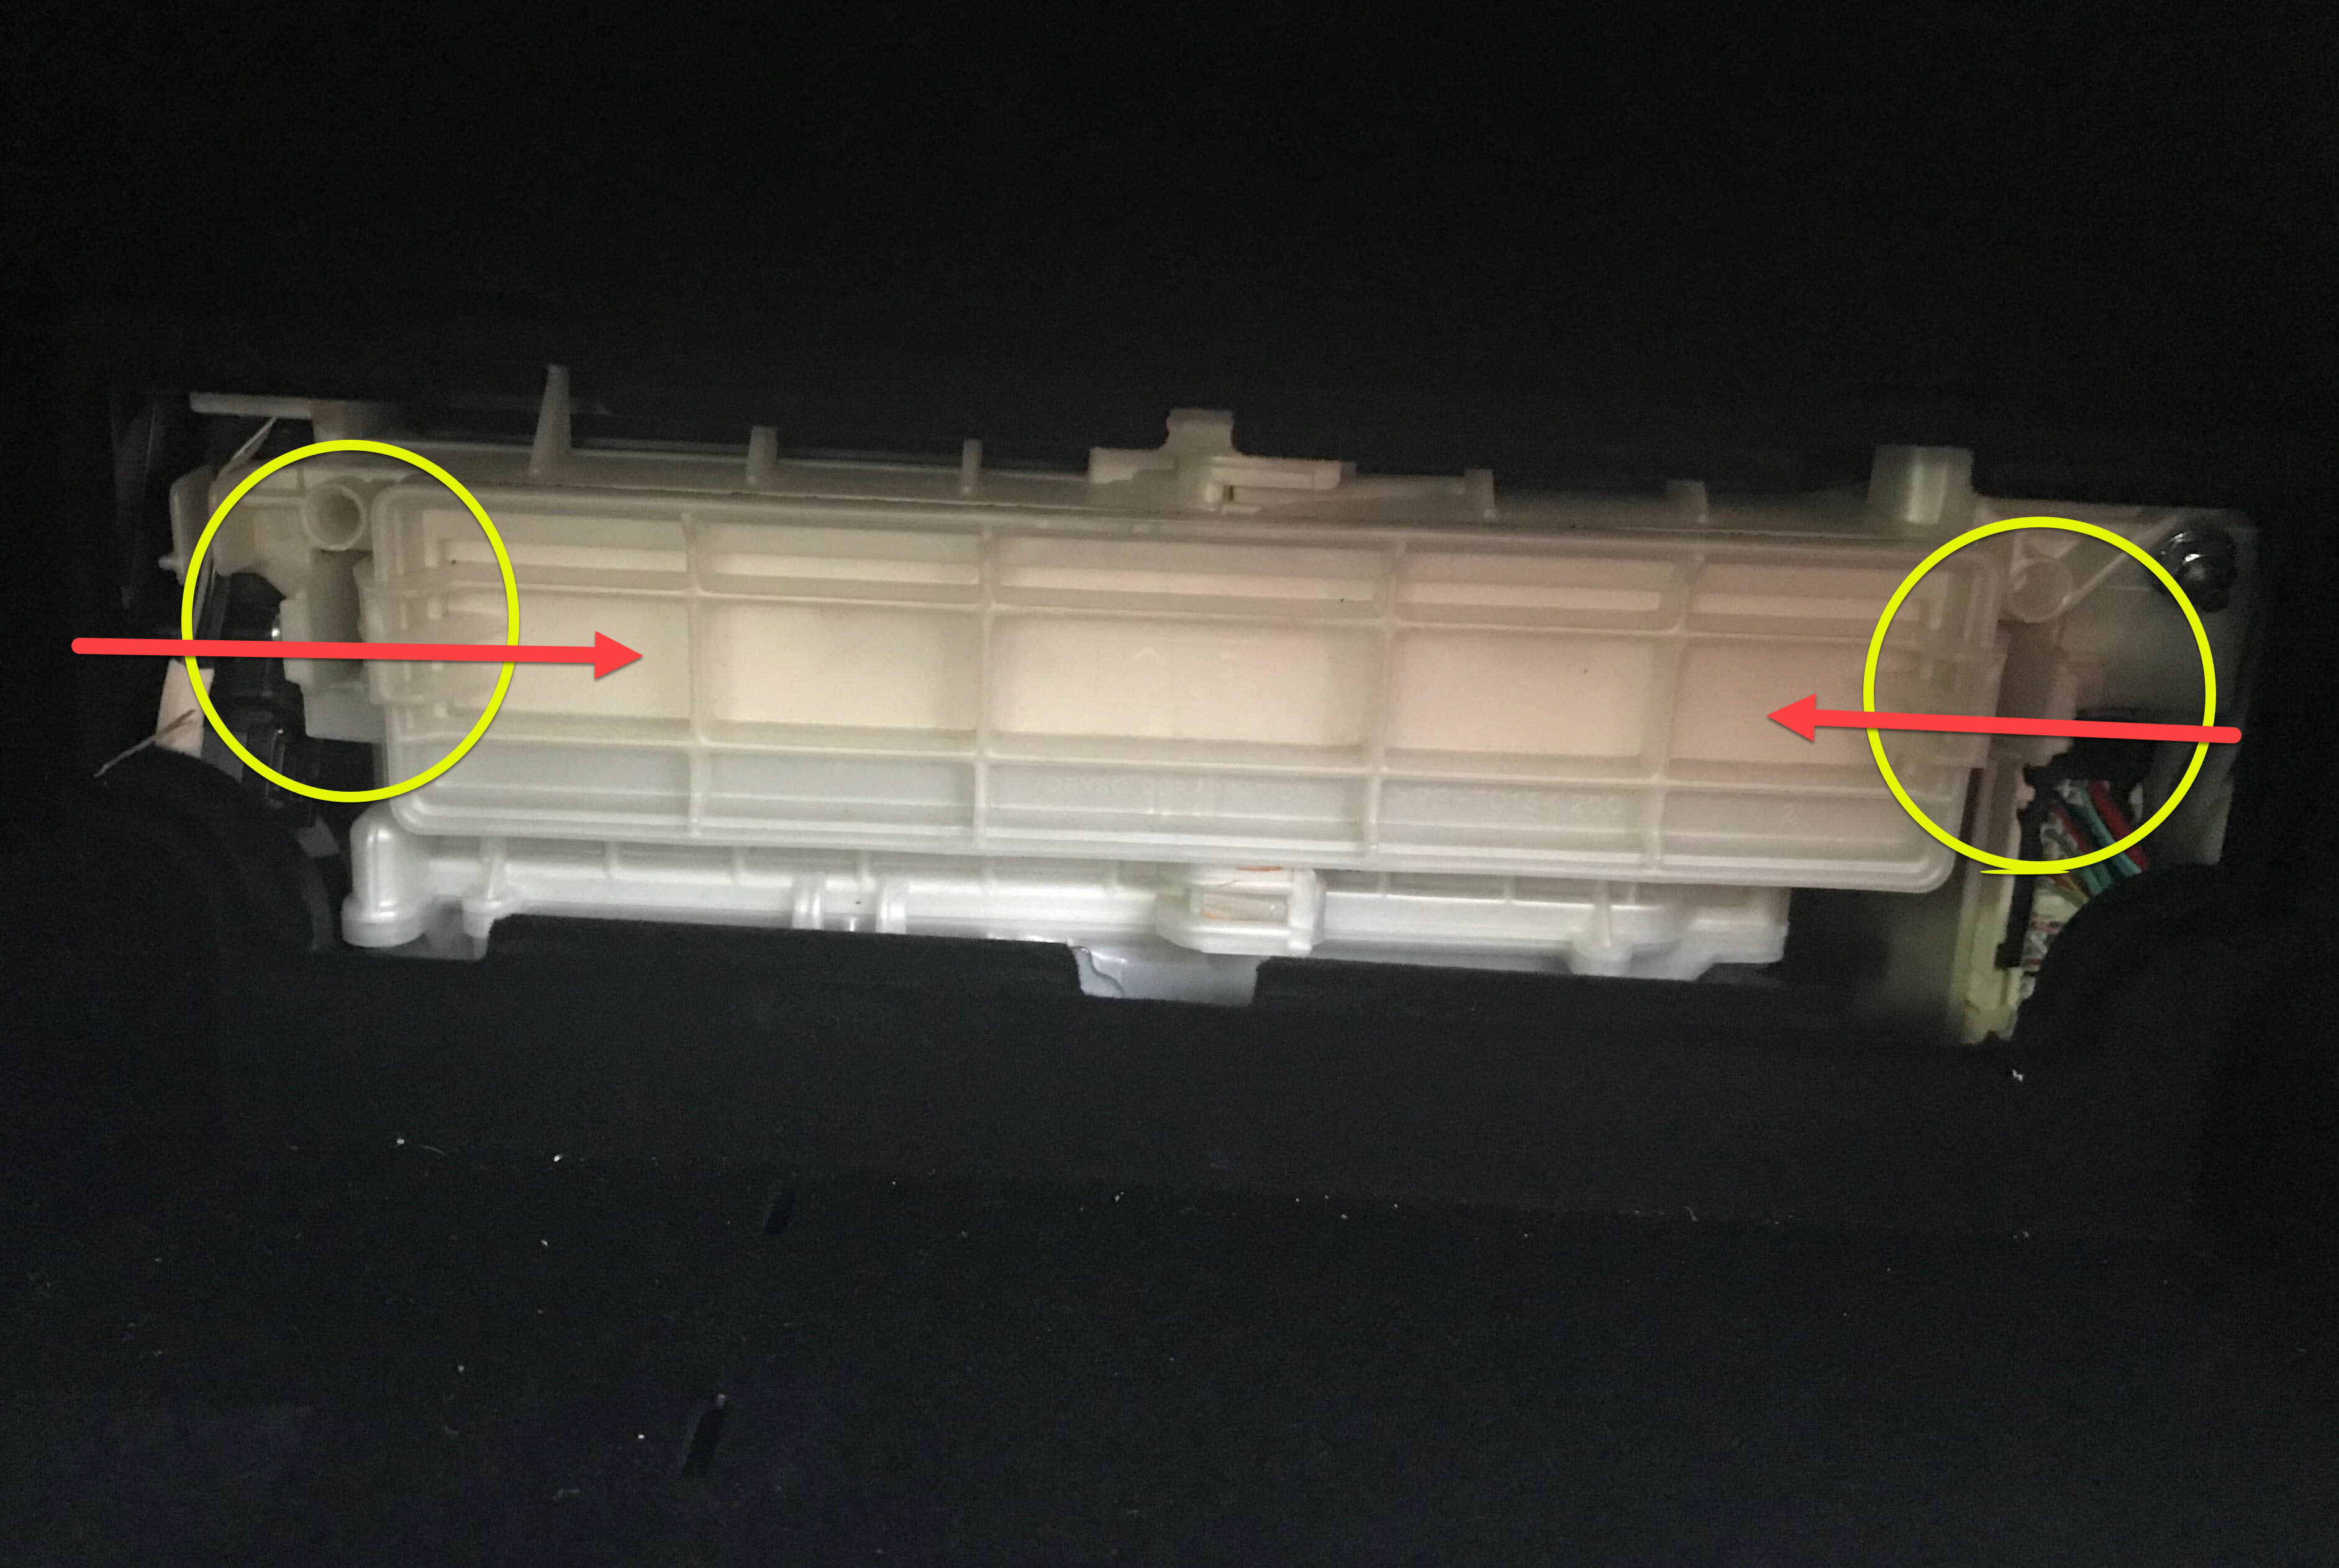
STEP 3 : Remove the cabin filter
Once the door has been removed its time to take the cabin filter our. The filter is in a carrier and the entire assembly is easily removed by pushing the two clips in on either side. Slide the carrier out with the filter. IMPORTANT – note the orientation of the filter in the carrier. These filters are directional and have an UP and DOWN. There are 4 tabs that hold the filter in the carrier, since the cabin filter is very flexible, push the filter past two of the tabs and remove.
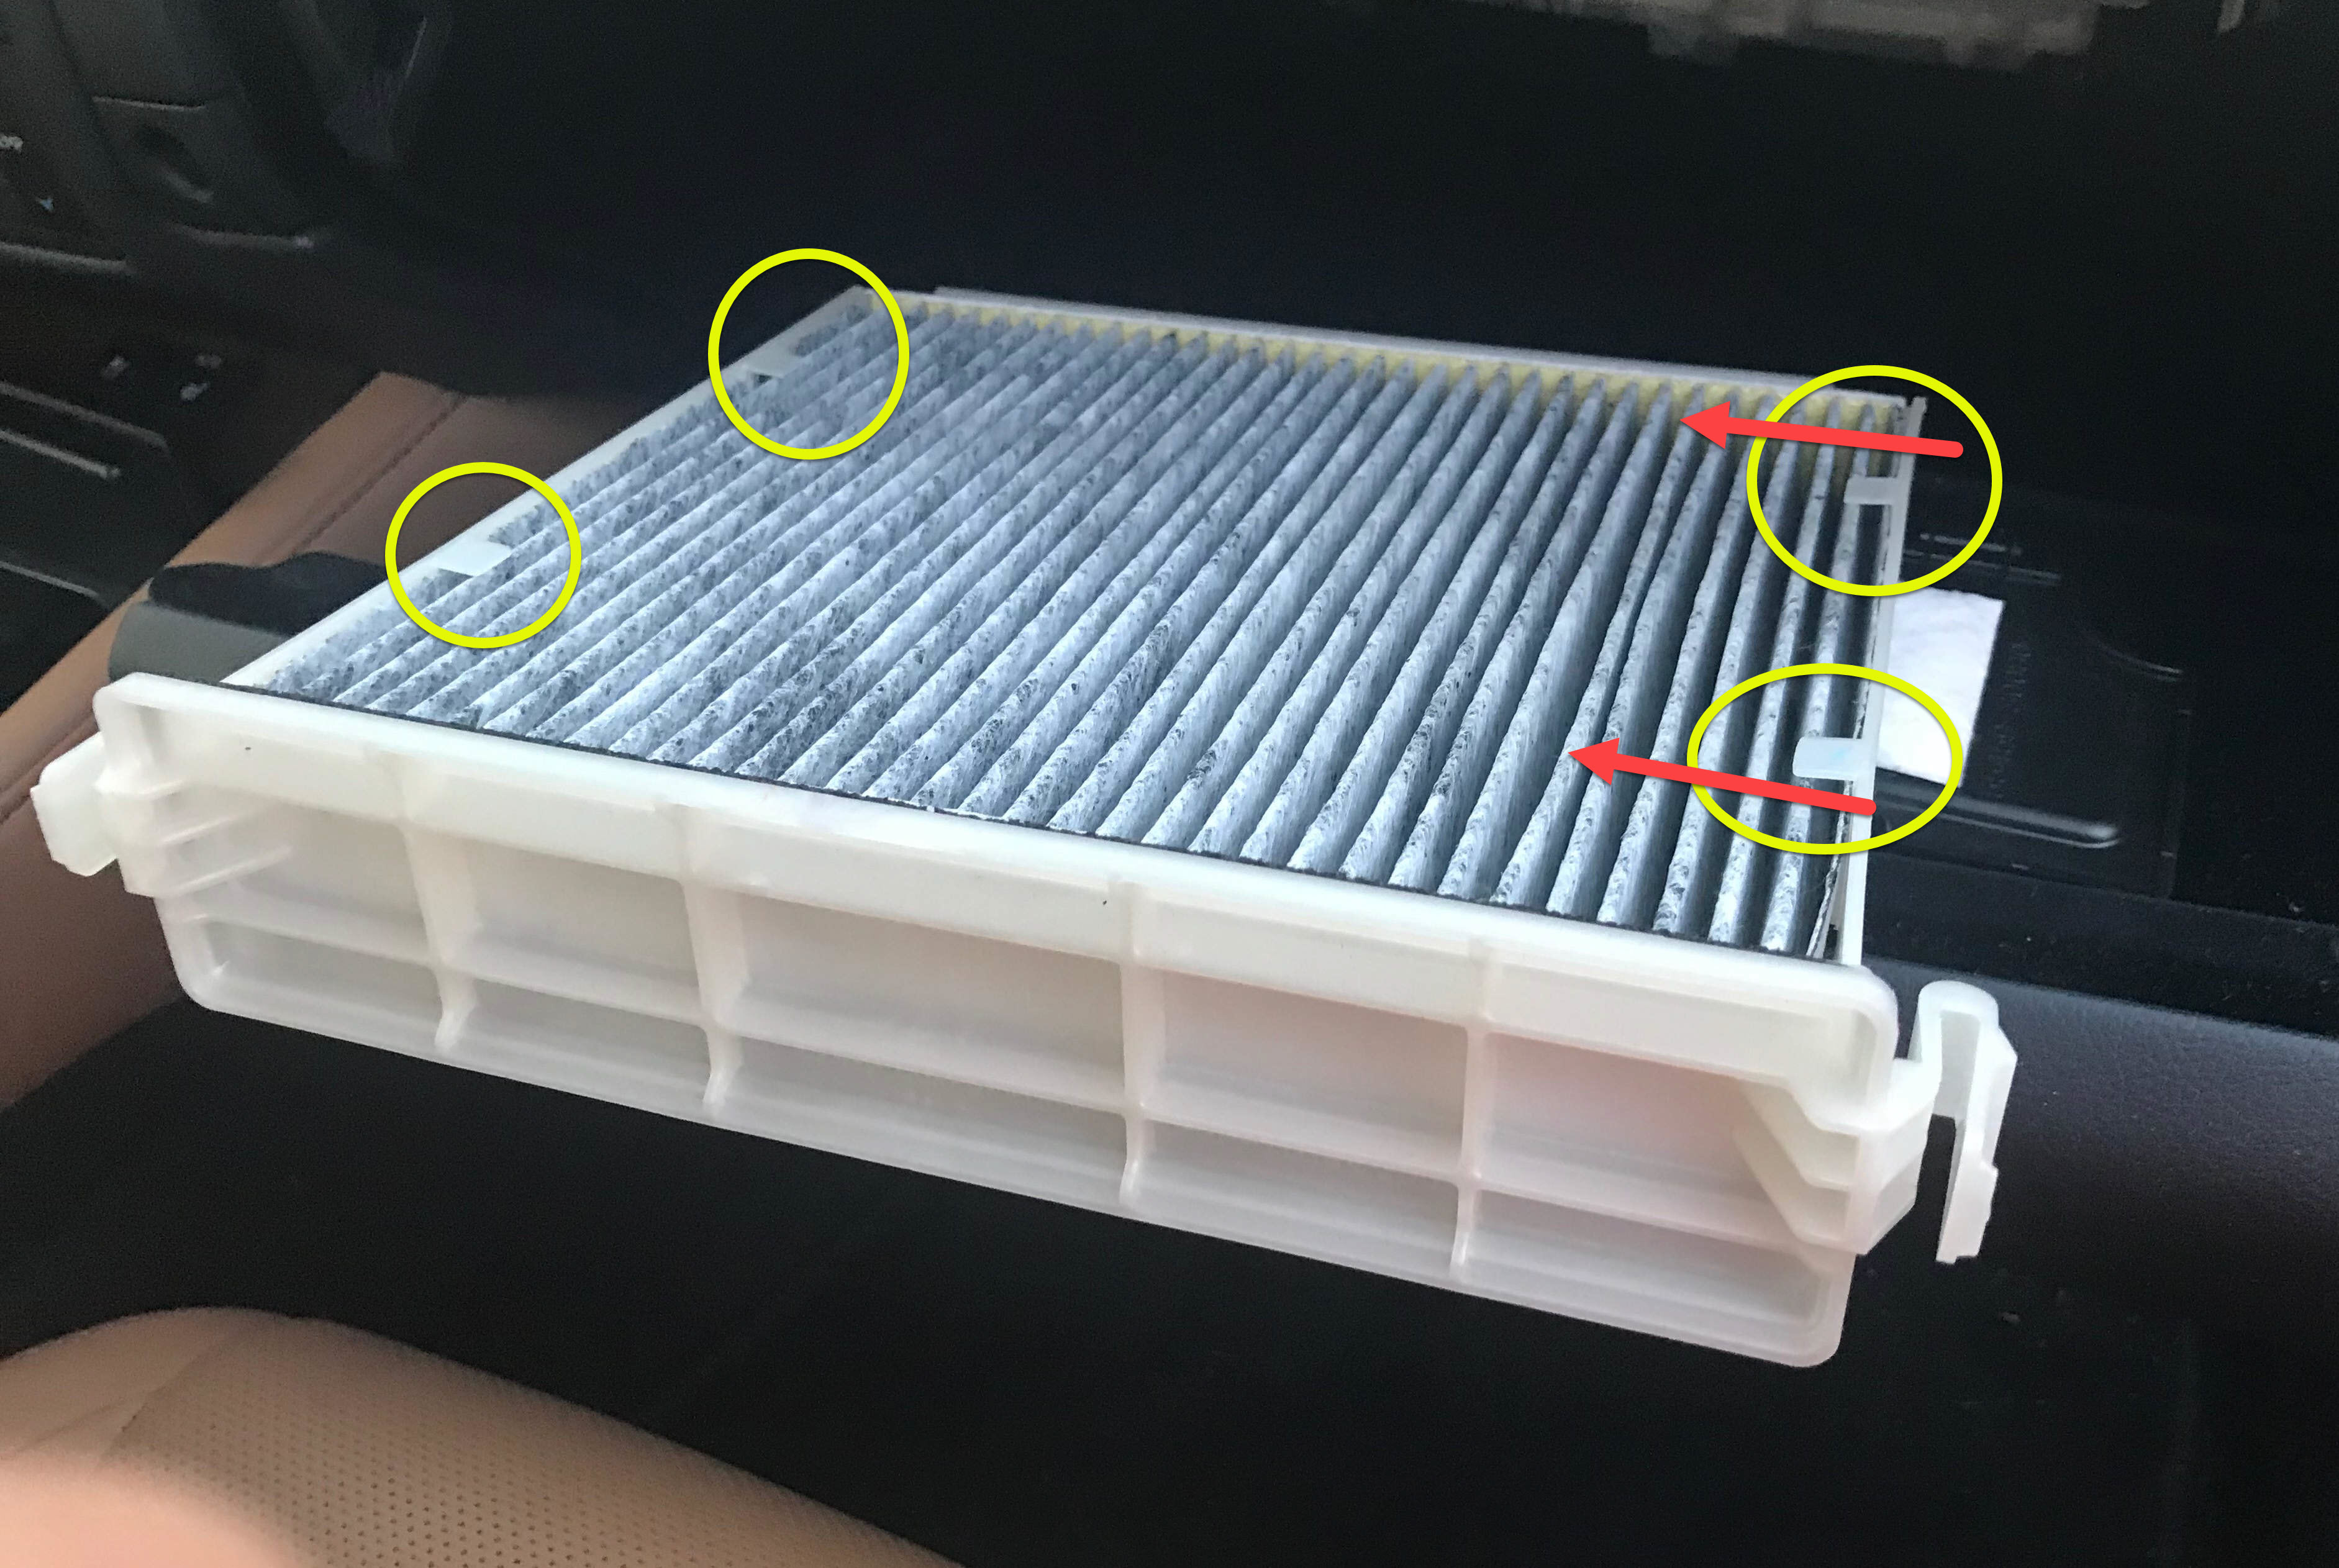
Install the new filter (note the air flow direction) and install back in the vehicle. If you notice debris in the cabin filter compartment, it may be wise to clean out before you reinstall.
Step 4: Set a maintenance reminder
The Lexus infotainment system has a provision for setting maintenance reminders. It may be a good idea to configure a reminder for the next cabin filter replacement.
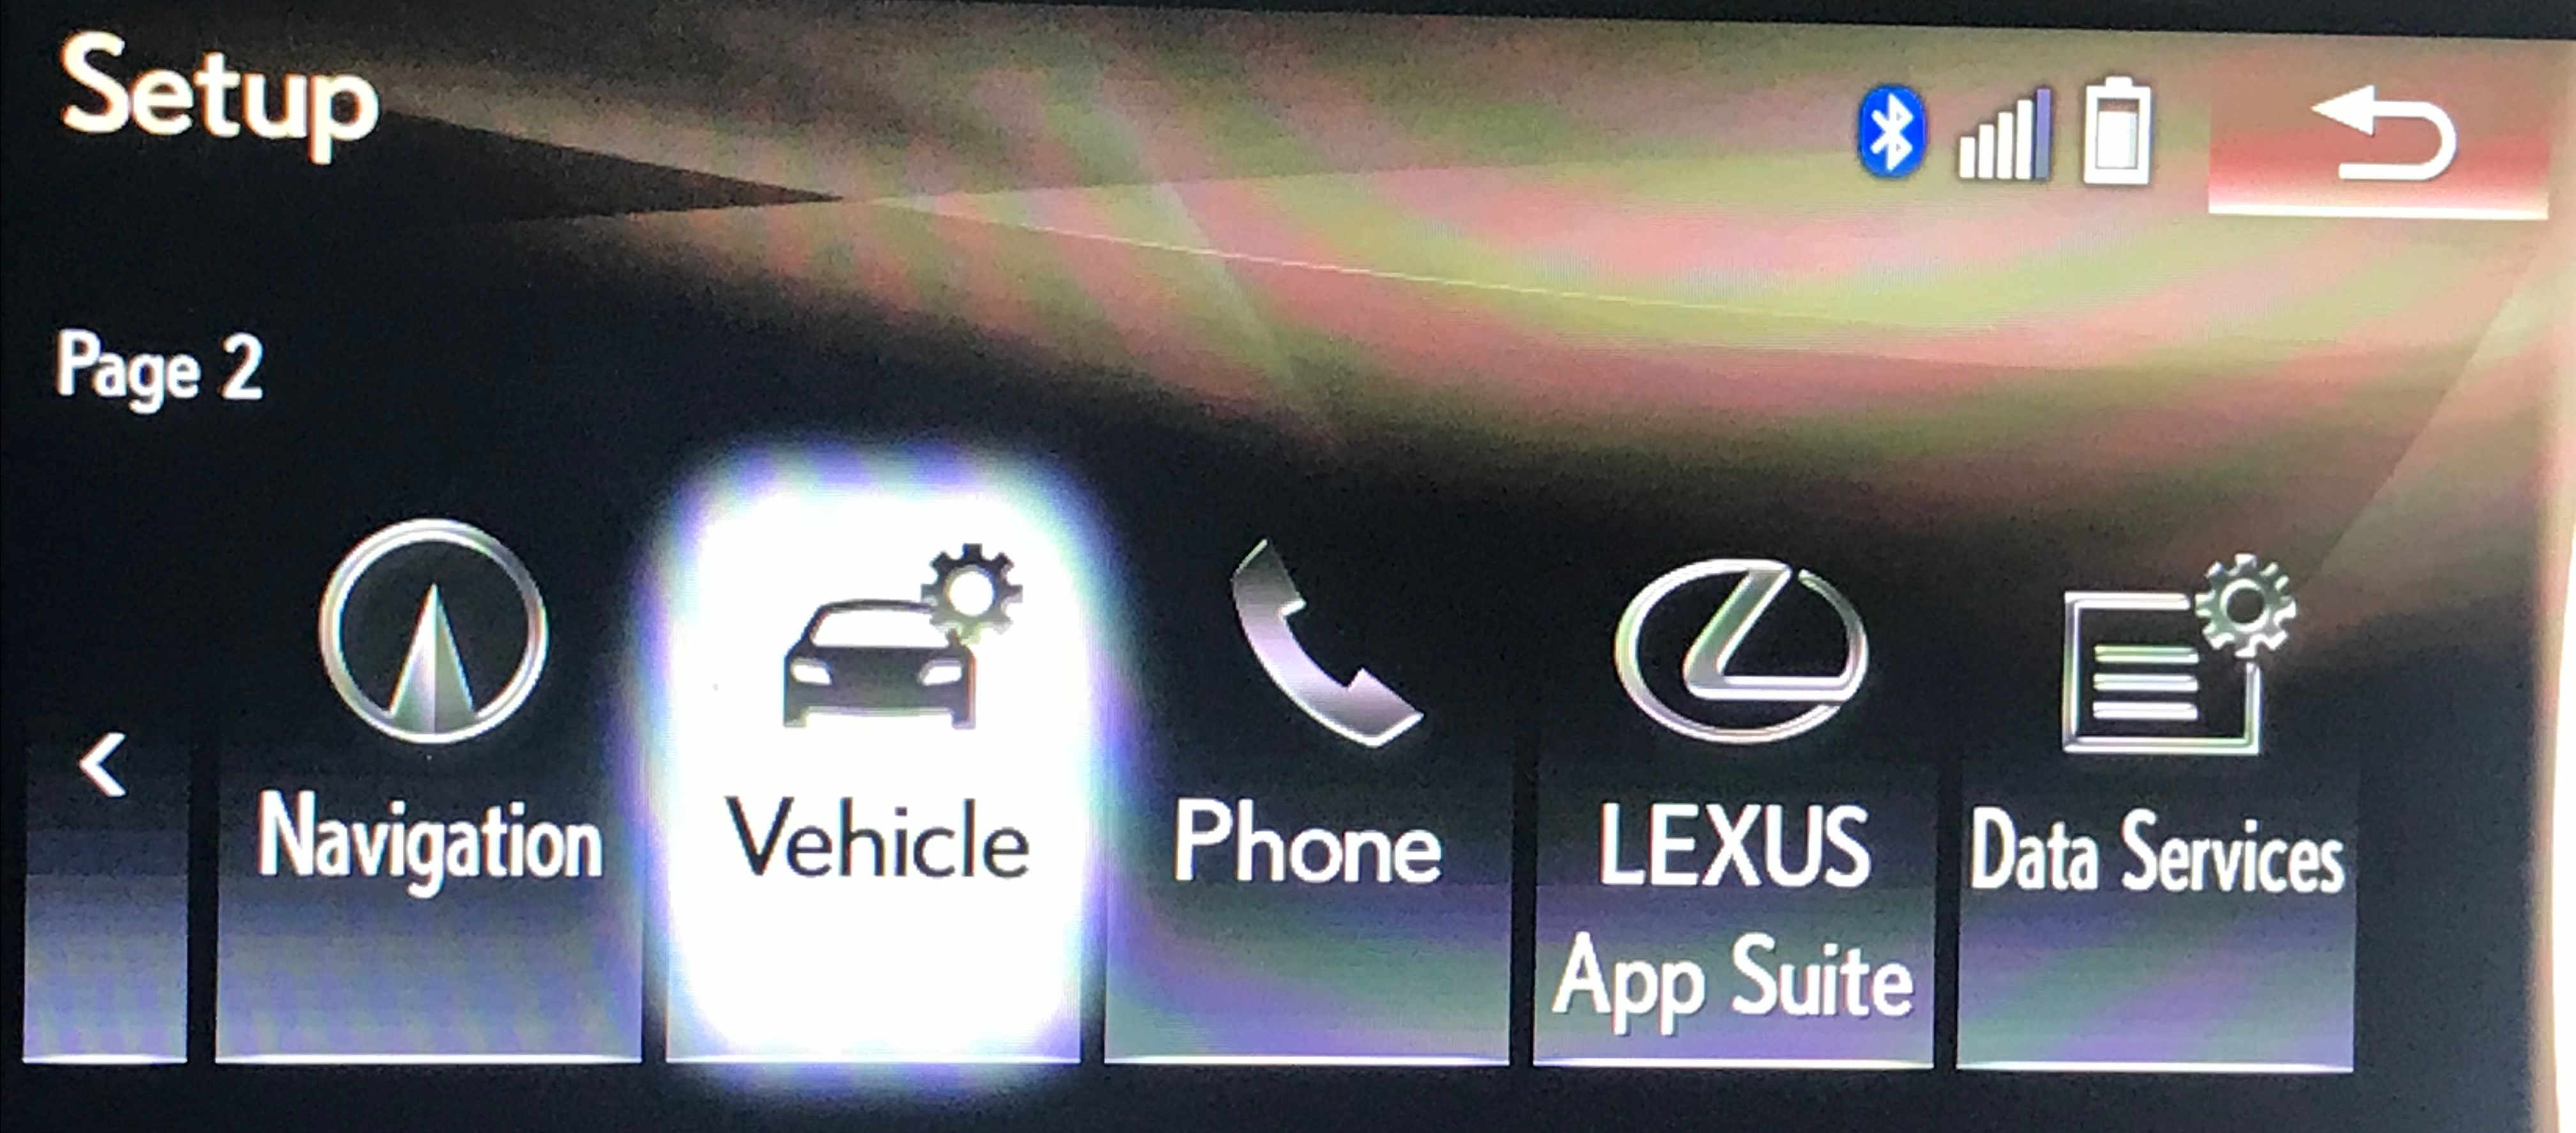
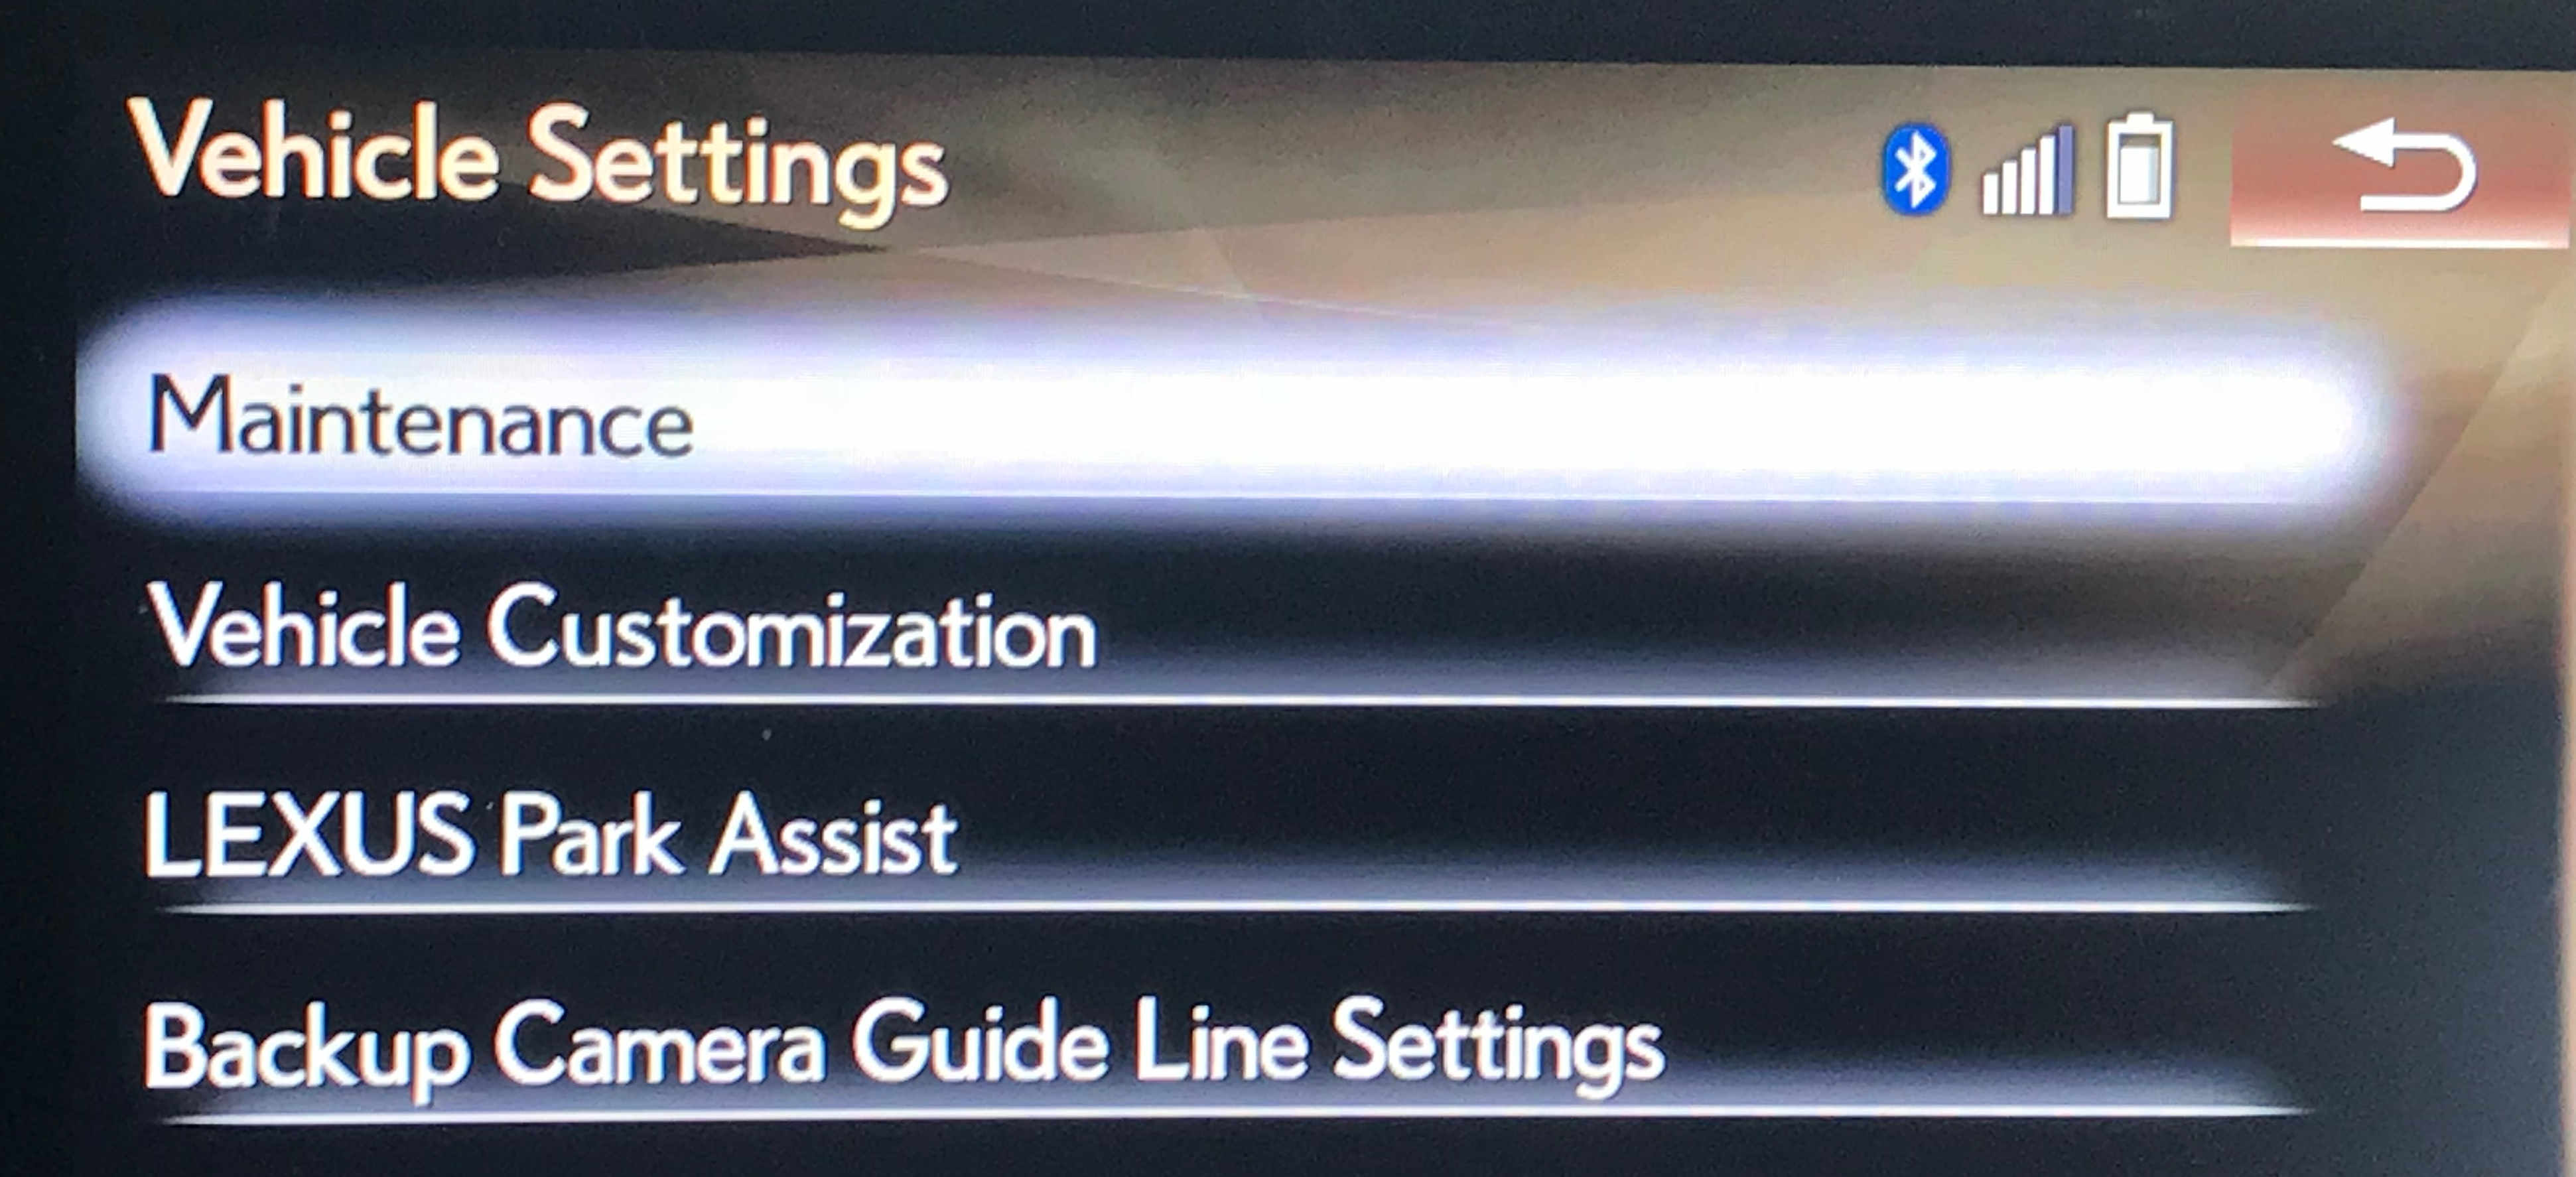
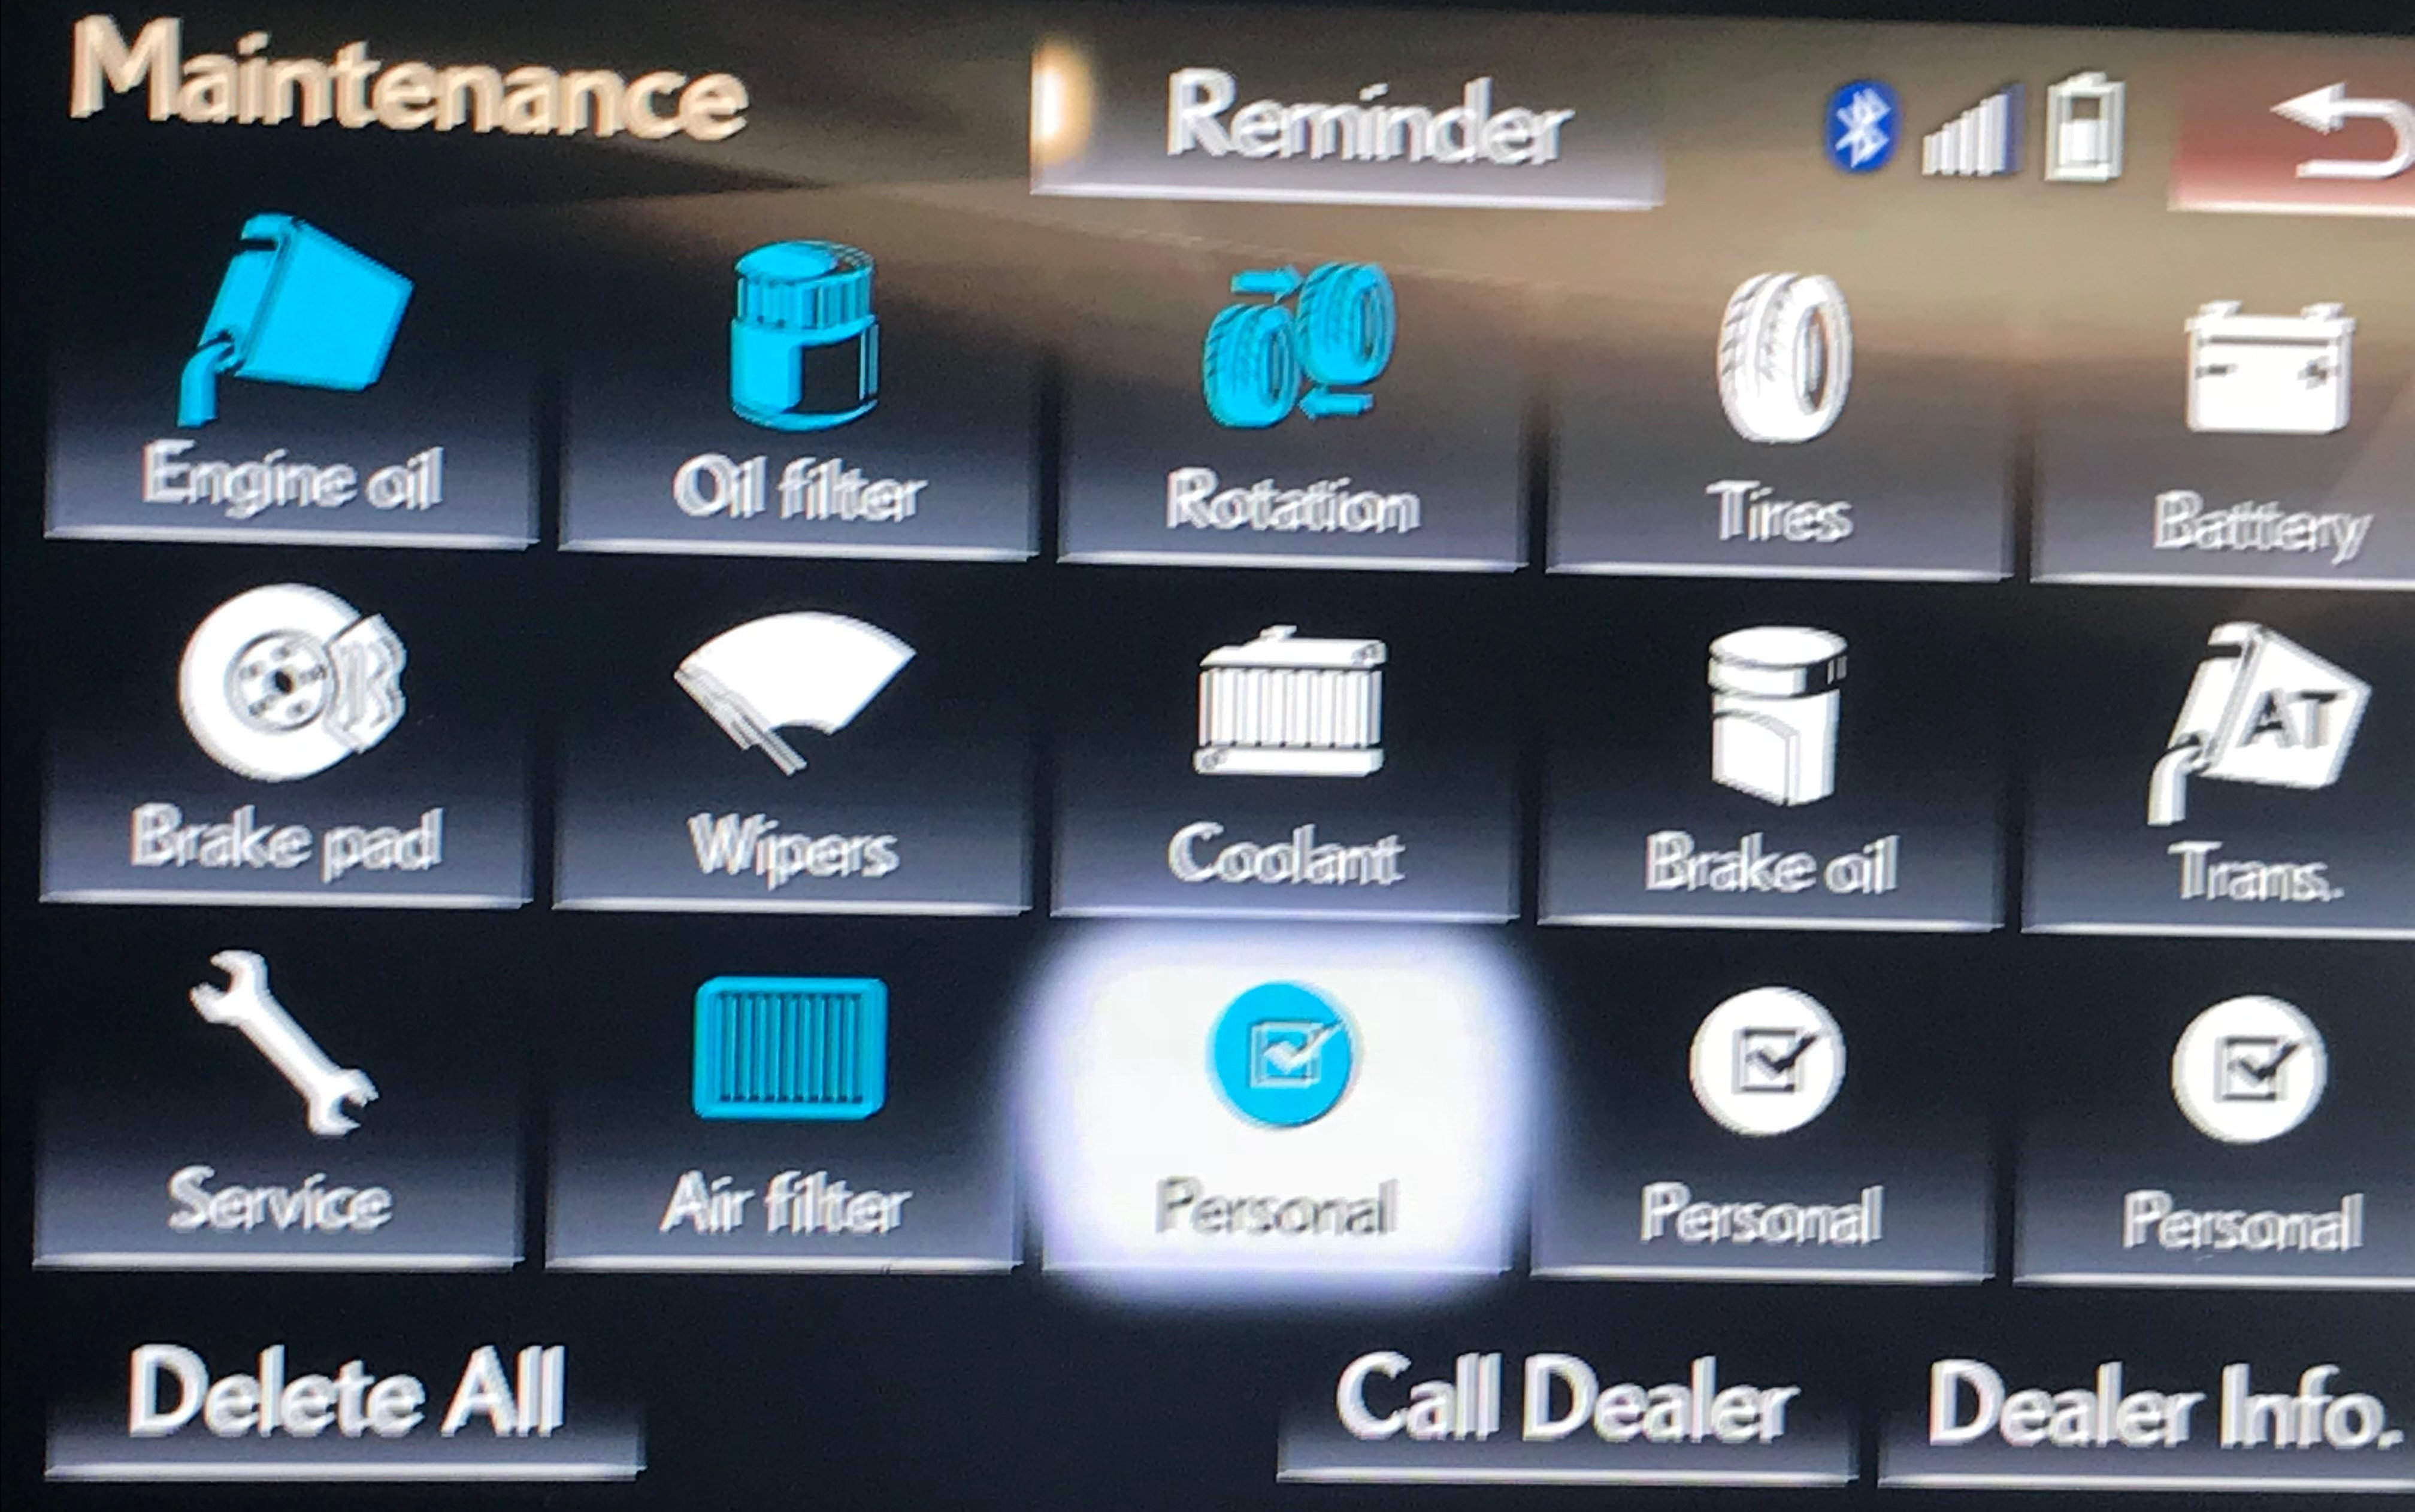
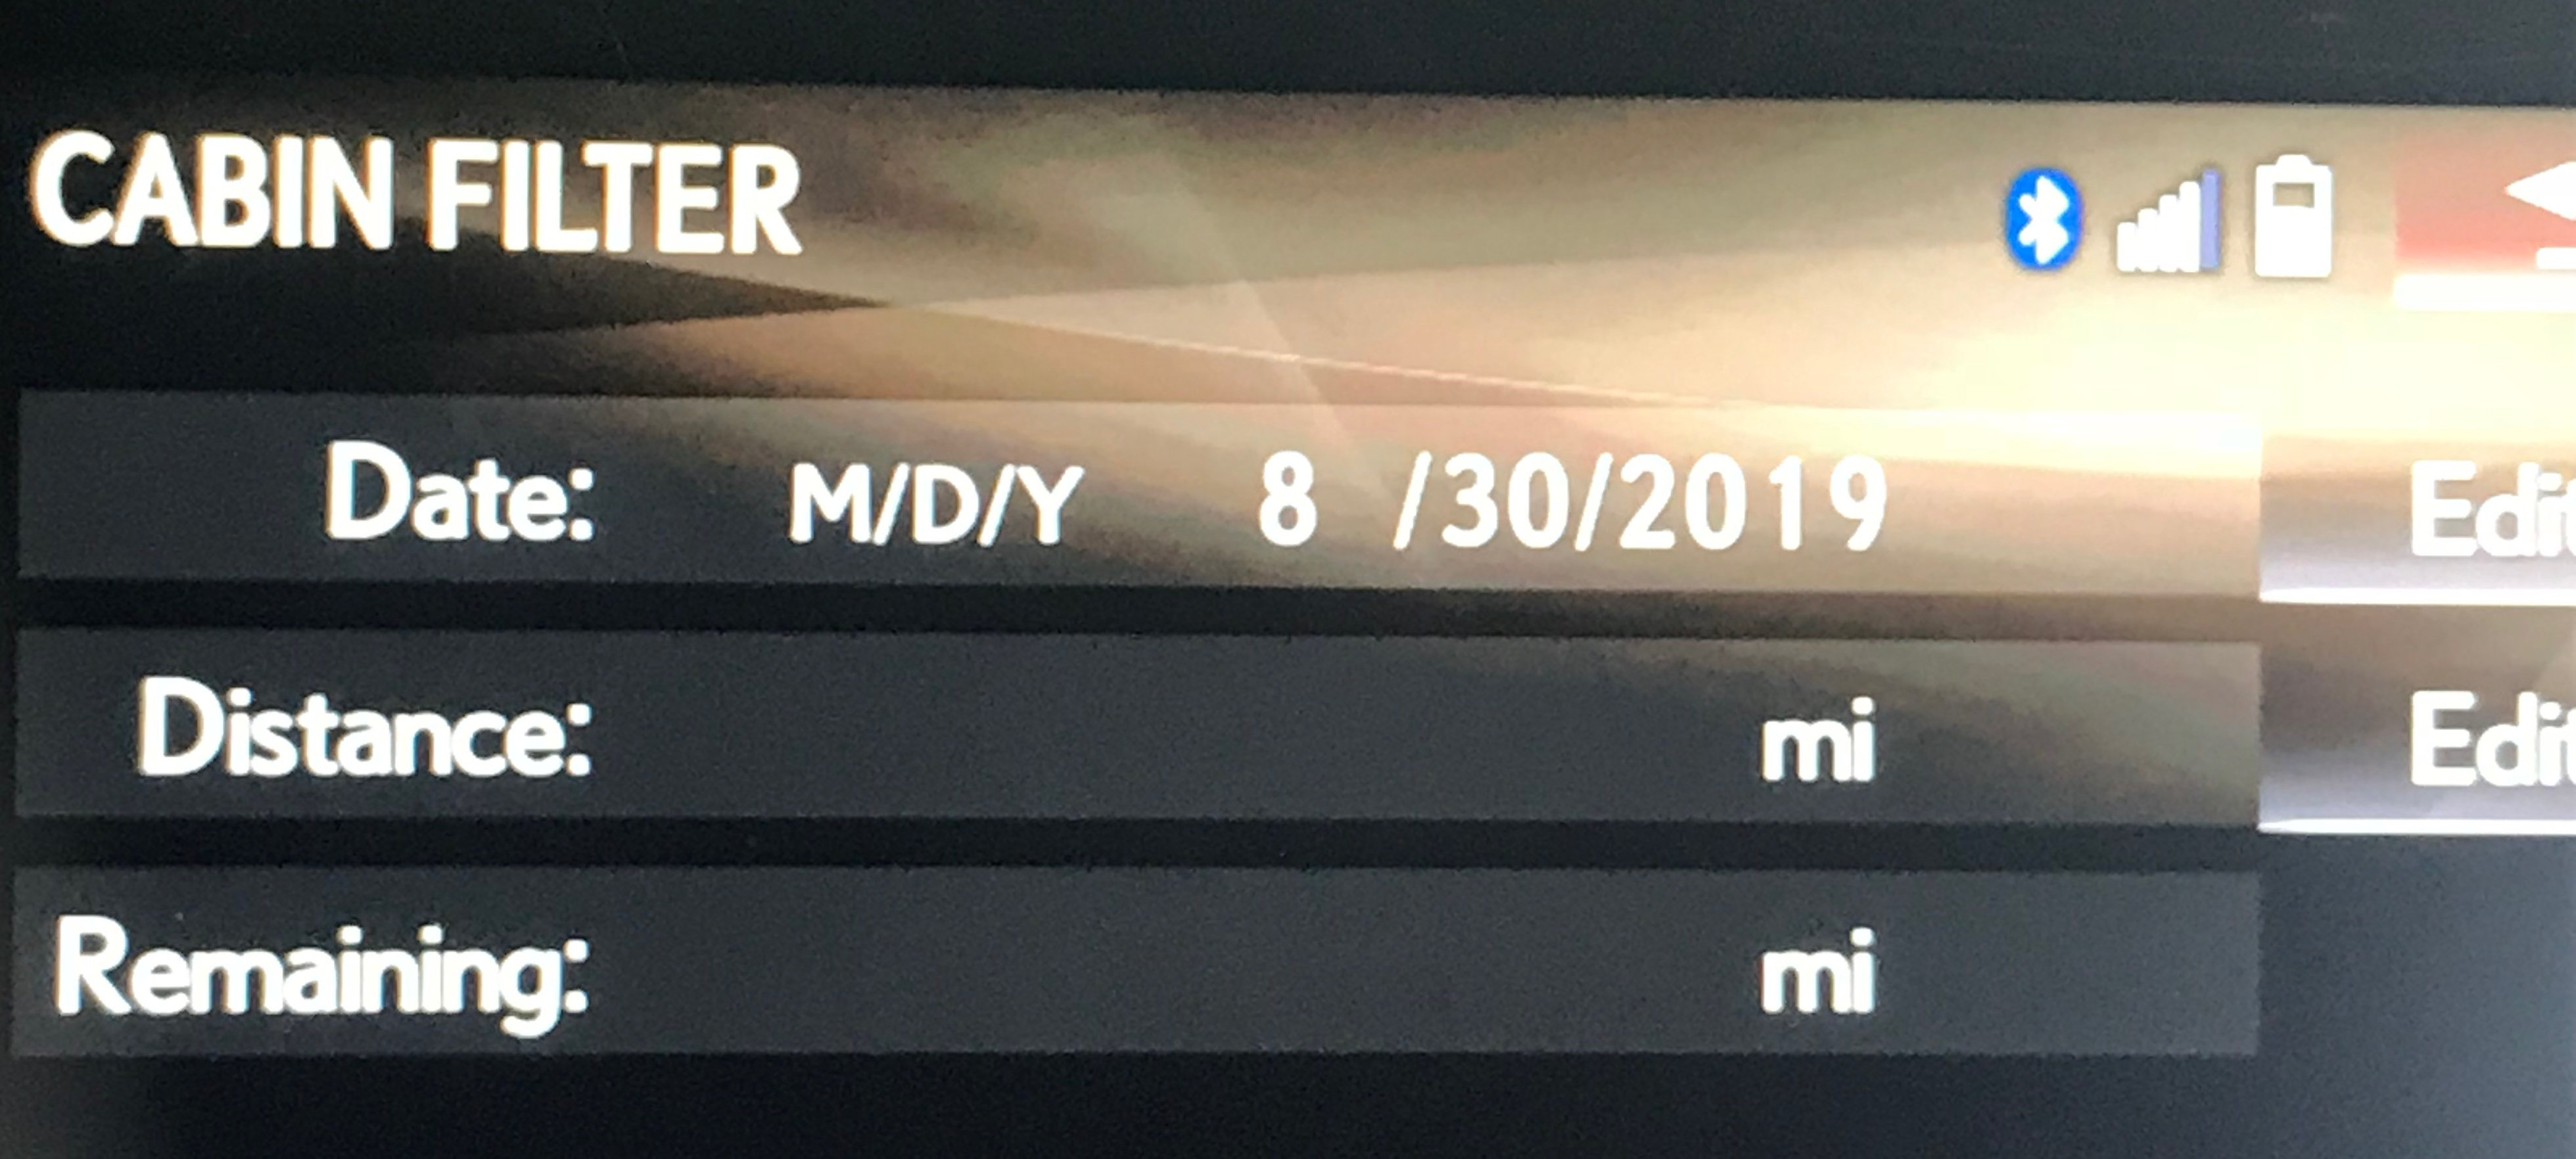
Here are the steps: From the main menu click SETUP ->Vehicle -> Maintenance -> Personal -> Set the parameters for the next change interval. I believe its recommended to change every 12,000 miles or yearly. If you’re a more visual person please see the steps below:

Another job well done! This was simple and saved you over $100 if you took the car to the dealer.
Want to change your air filter – CLICK HERE
Thanks again for reading my blog,
Joe
Don’t forget to visit my Etsy store – www.geekgearstore.com