

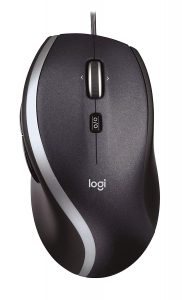
Recently a coworker of mine purchased a Logitech M500 corded mouse on Amazon. Its relatively inexpensive at $24.99 and perfect for office use. As you can see from the image below, its a nice size mouse with a few extra buttons. I believe Logitech has been selling them for years.
 Now I get why amazon has frustration free packing!
The mouse came in retail packing and upon cutting open the sealed packing he accidentally cut the USB connection off the mouse. He immediately tossed the mouse in the trash and proceeded to order a second. I saw this and said, hey don’t toss the mouse, let me attempt a repair.
Easy Mouse Repair
I considered soldering the wire back together, but that would prove to be messy and there would be a large bulge close to the base of the mouse. My second idea was simply to replace the entire USB cable from an older mouse that was sitting in my parts bin.
STEP 1 – Open the mouse
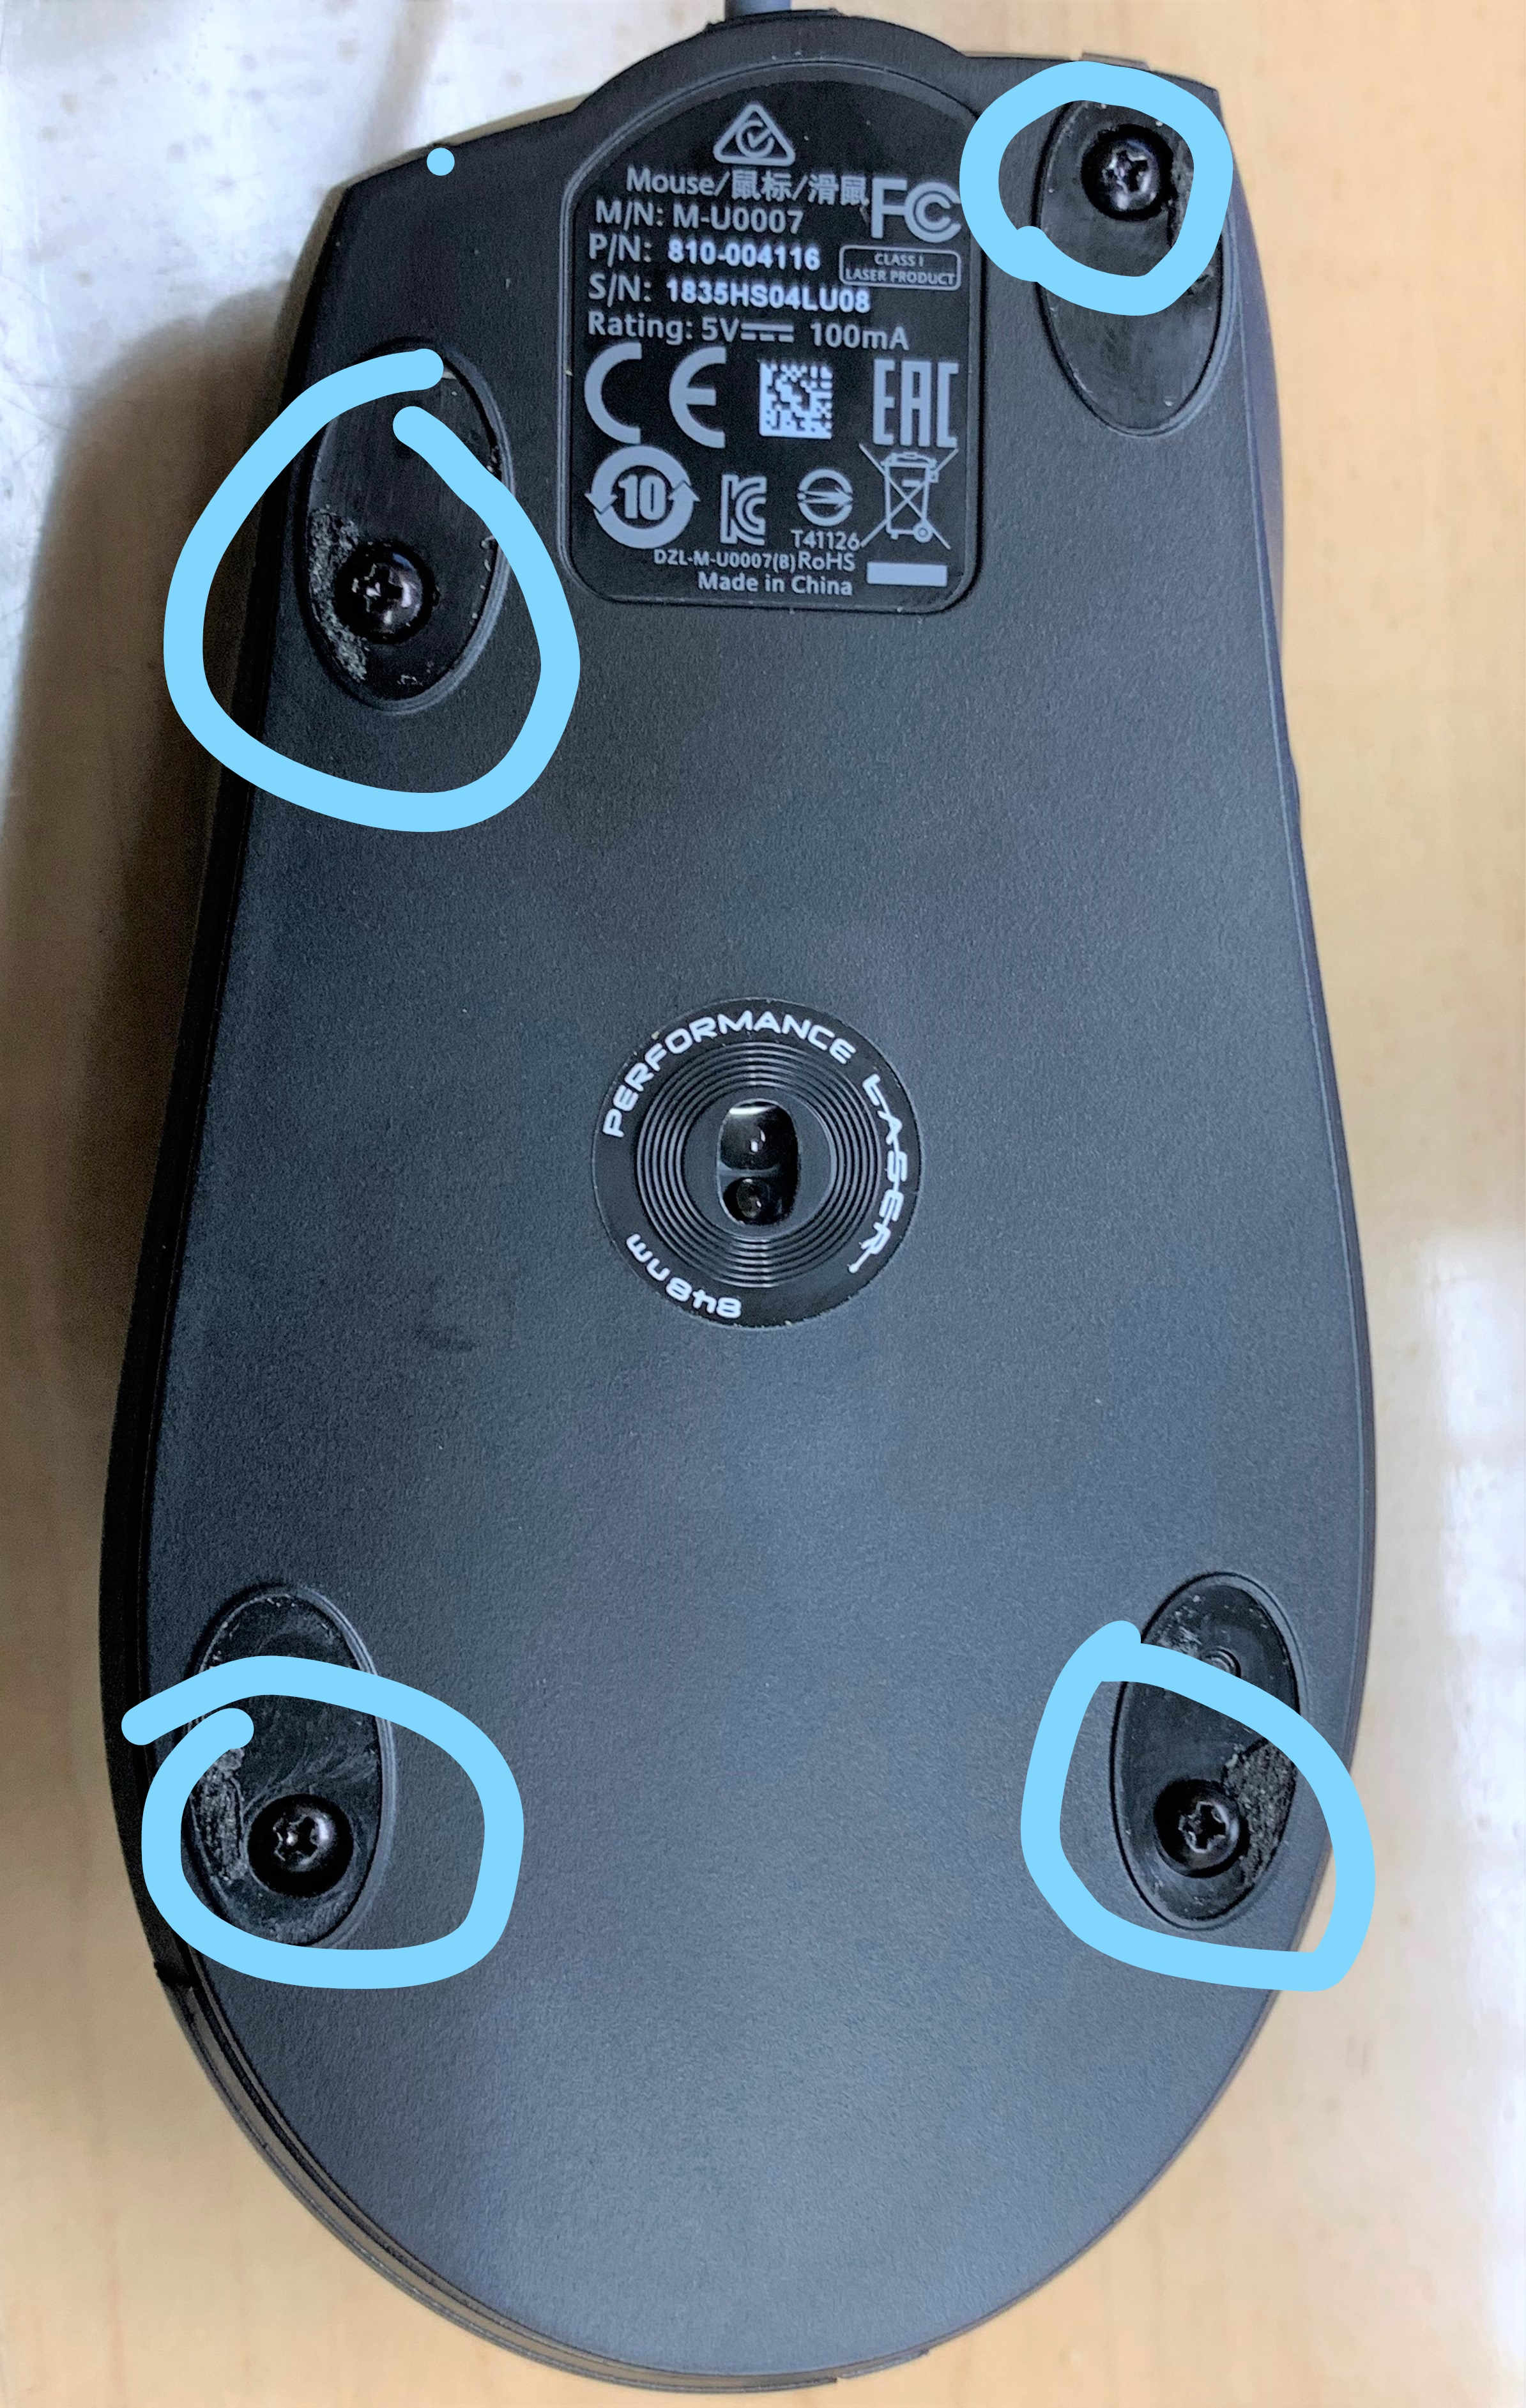 The Logitech M500 has the screws hiding under the 4 pads on the bottom of the mouse. Remove the 4 pads carefully and set aside. Then remove the 4 black screws to gain access to the mouse.
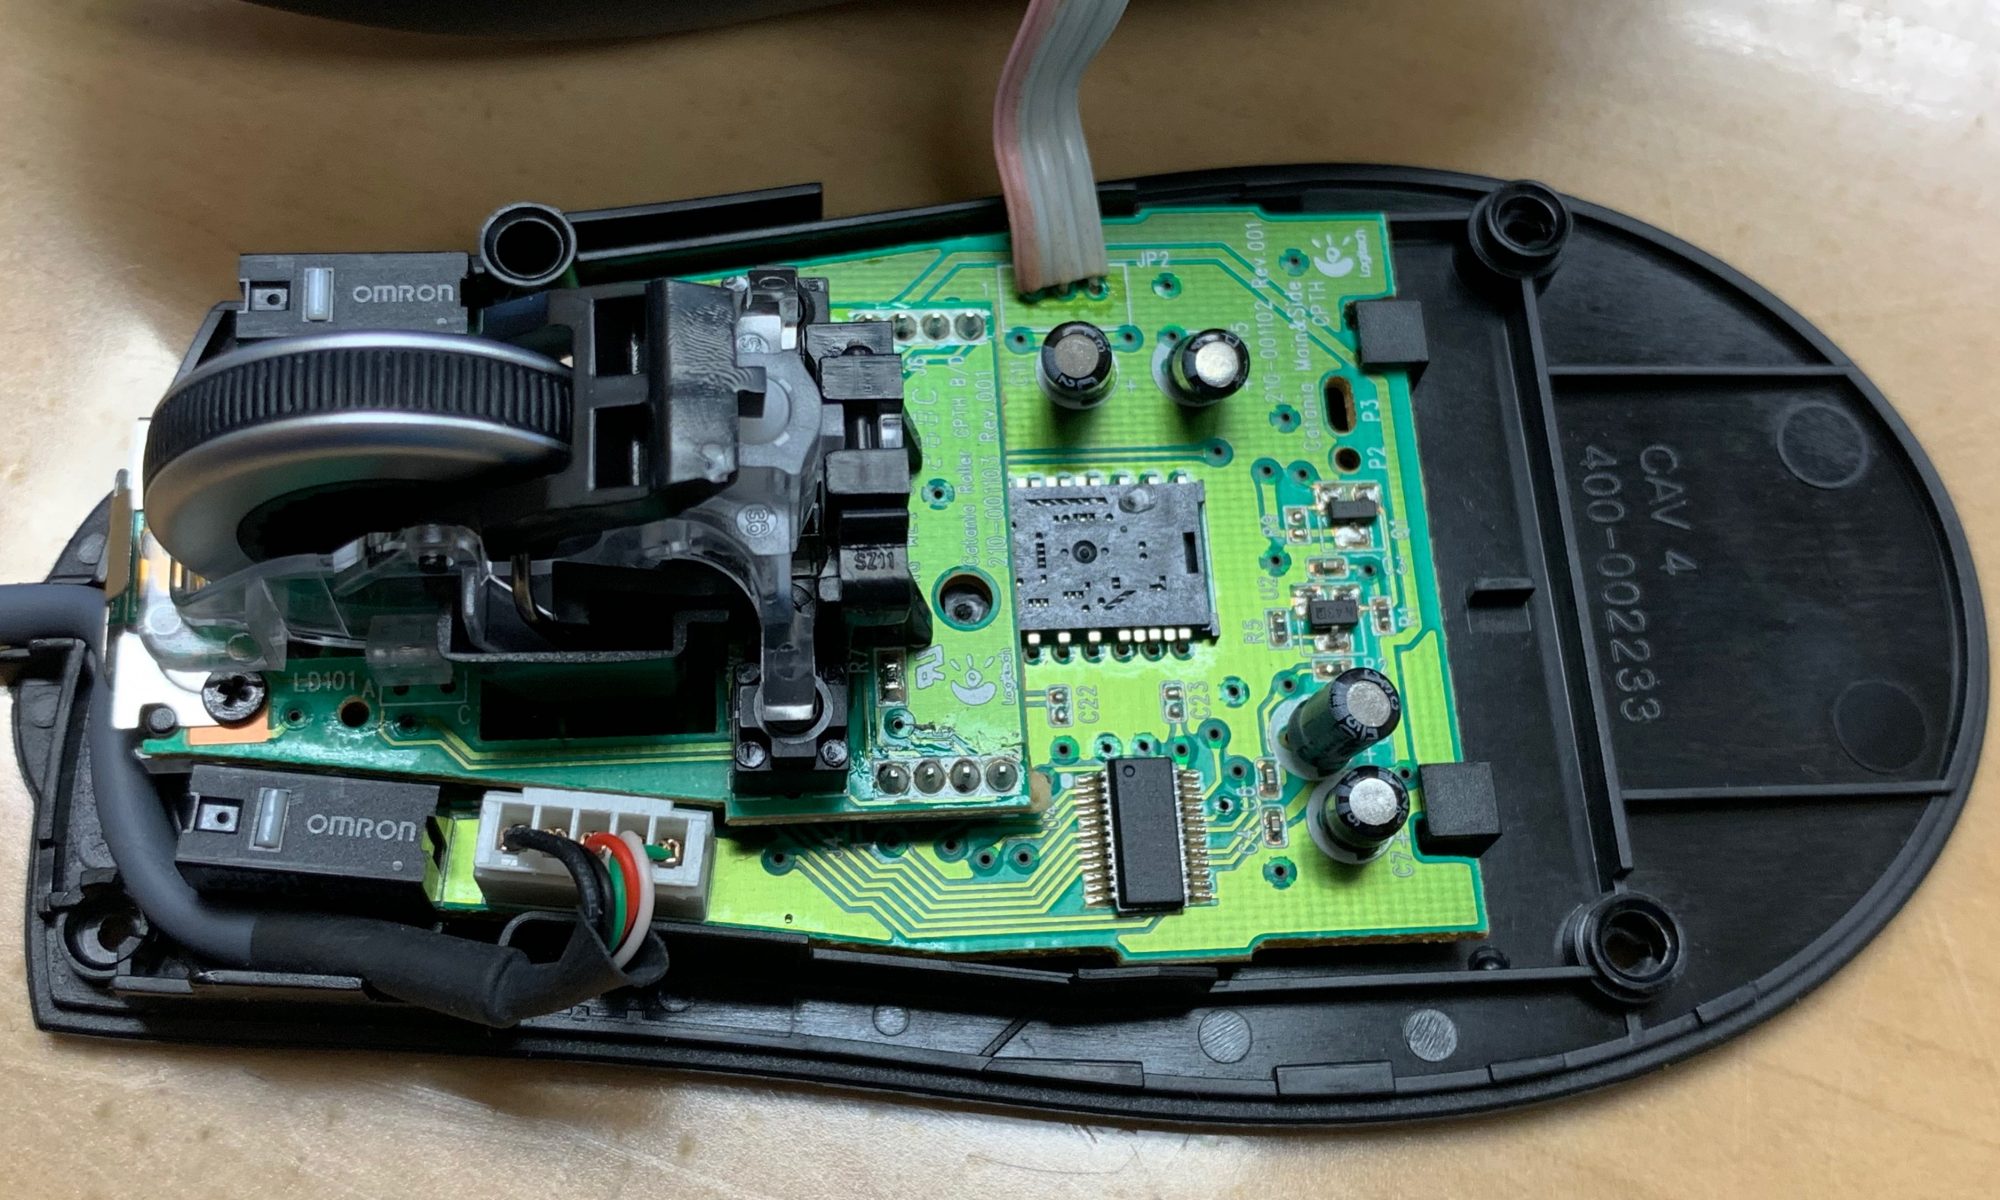
Carefully pry the top of the mouse away from the base to revile the internal components .
STEP 2 – REMOVE THE CONNECTOR
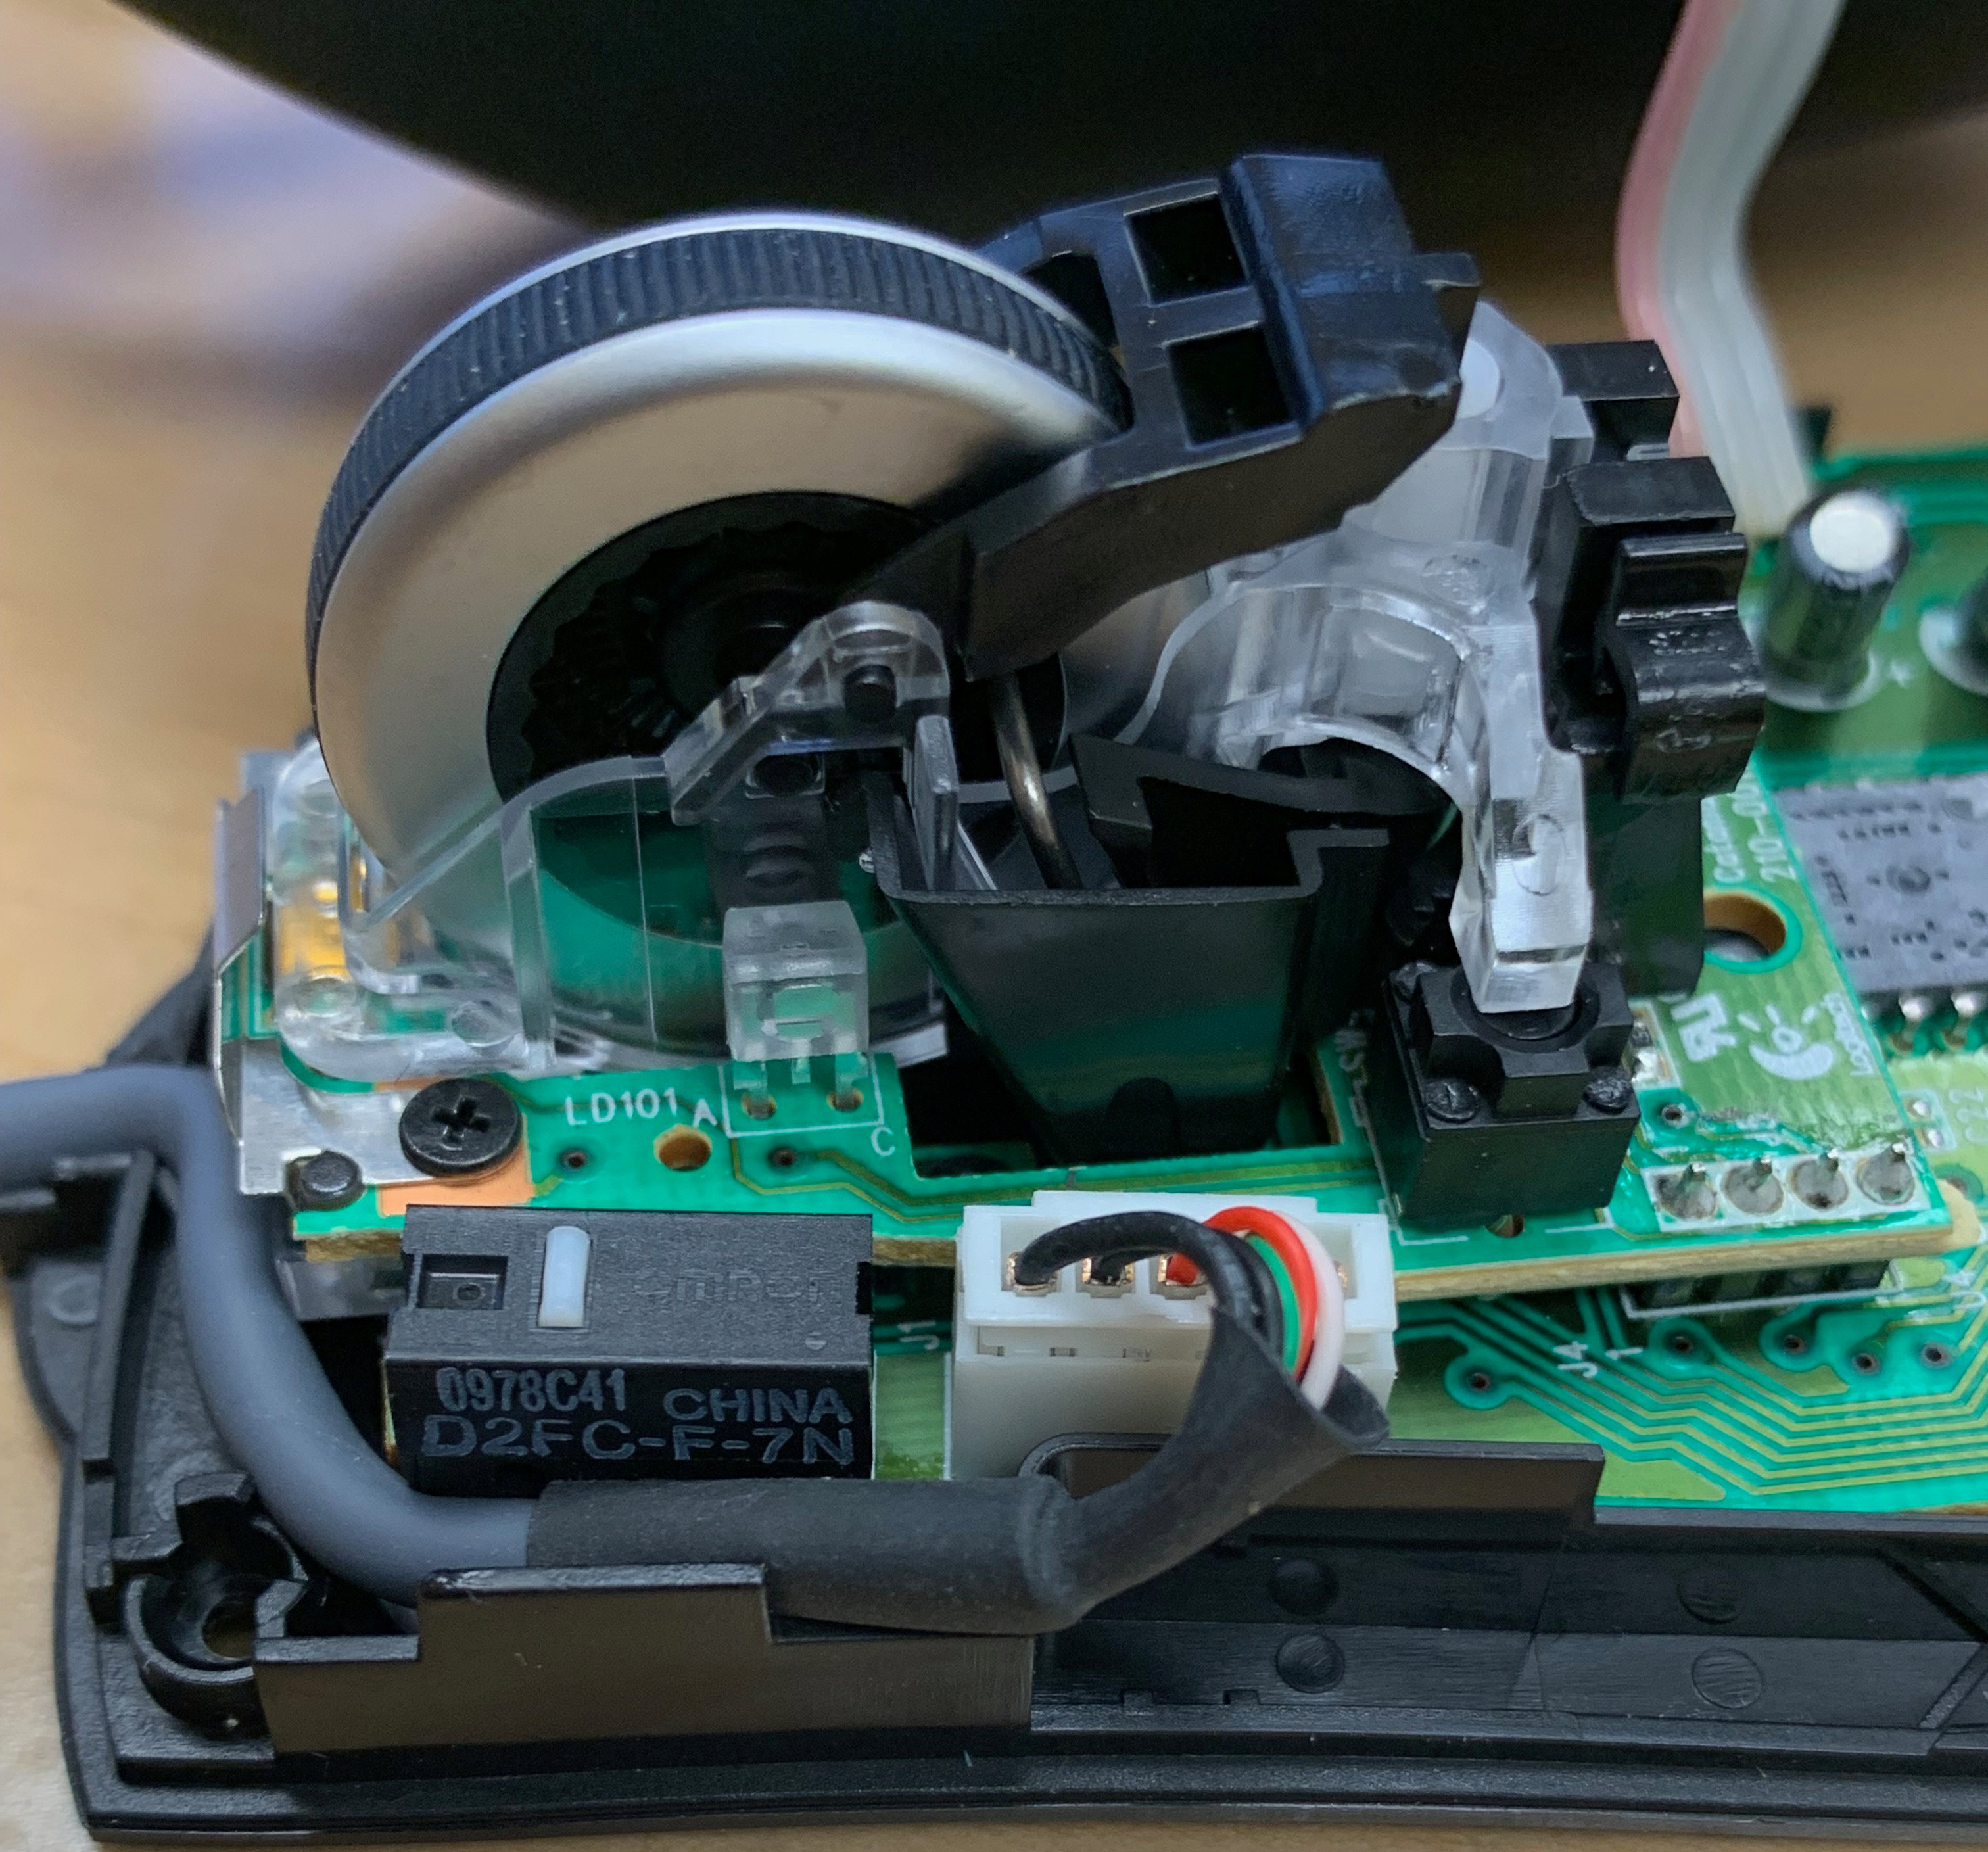
To the left of the scroll wheel you will see the white USB connector attached to the main board of the mouse. Remove the connector.
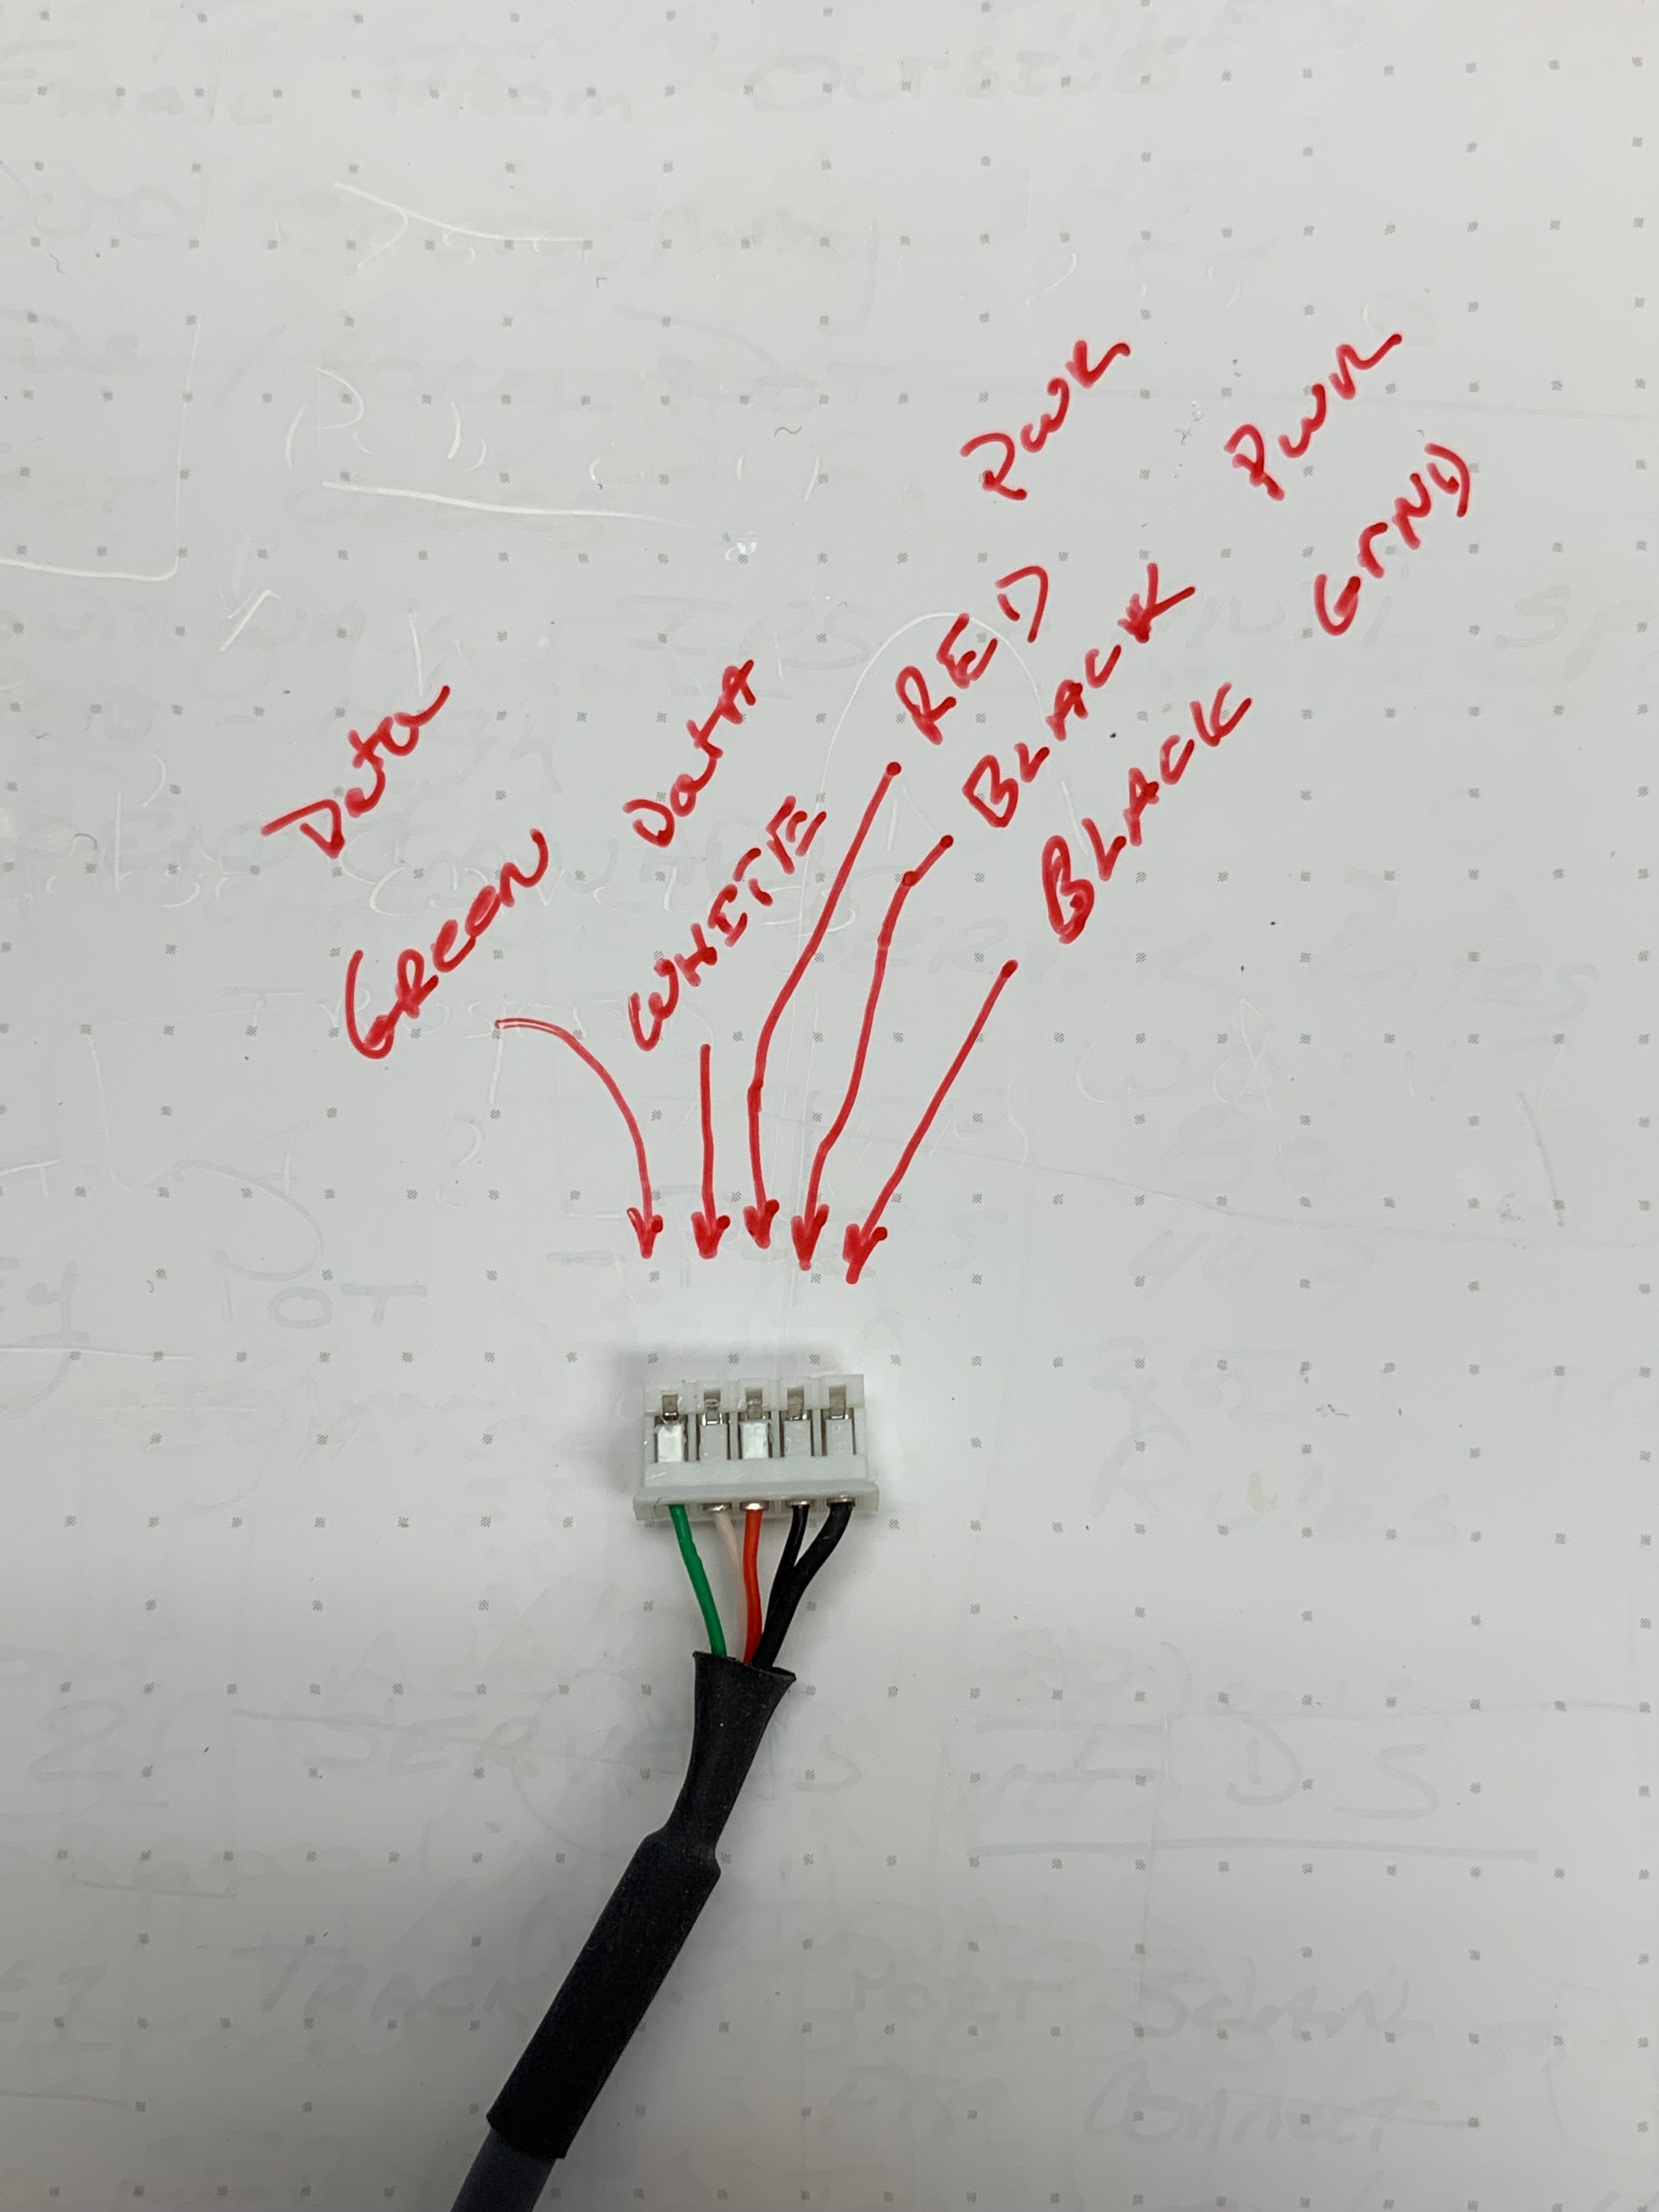 It is important to note the orientation and color of the wires on the connector!
This M500 mouse has a pin out of:
Green – Data
White – Data
Red – +V
Black – -V
Black – Ground
STEP 3 -Find a suitable donor mouse
 I found a really old Microsoft mouse in my parts bin and decided to use it as a donor for the Logitech.
Same deal here, remove the screws on the donor mouse. Pry open the case and then remove the USB cable from the connector.
Once again it is important to note the order of the pins in the cable.
STEP 4 – Adjust the cable pin out as needed
In the case of this Microsoft mouse the GREEN & RED pin were REVERSED. In order for our repair to be a success we would have to swap the pins! This could be done by cut and solder or by pulling the pins from the connector and re-inserting them.
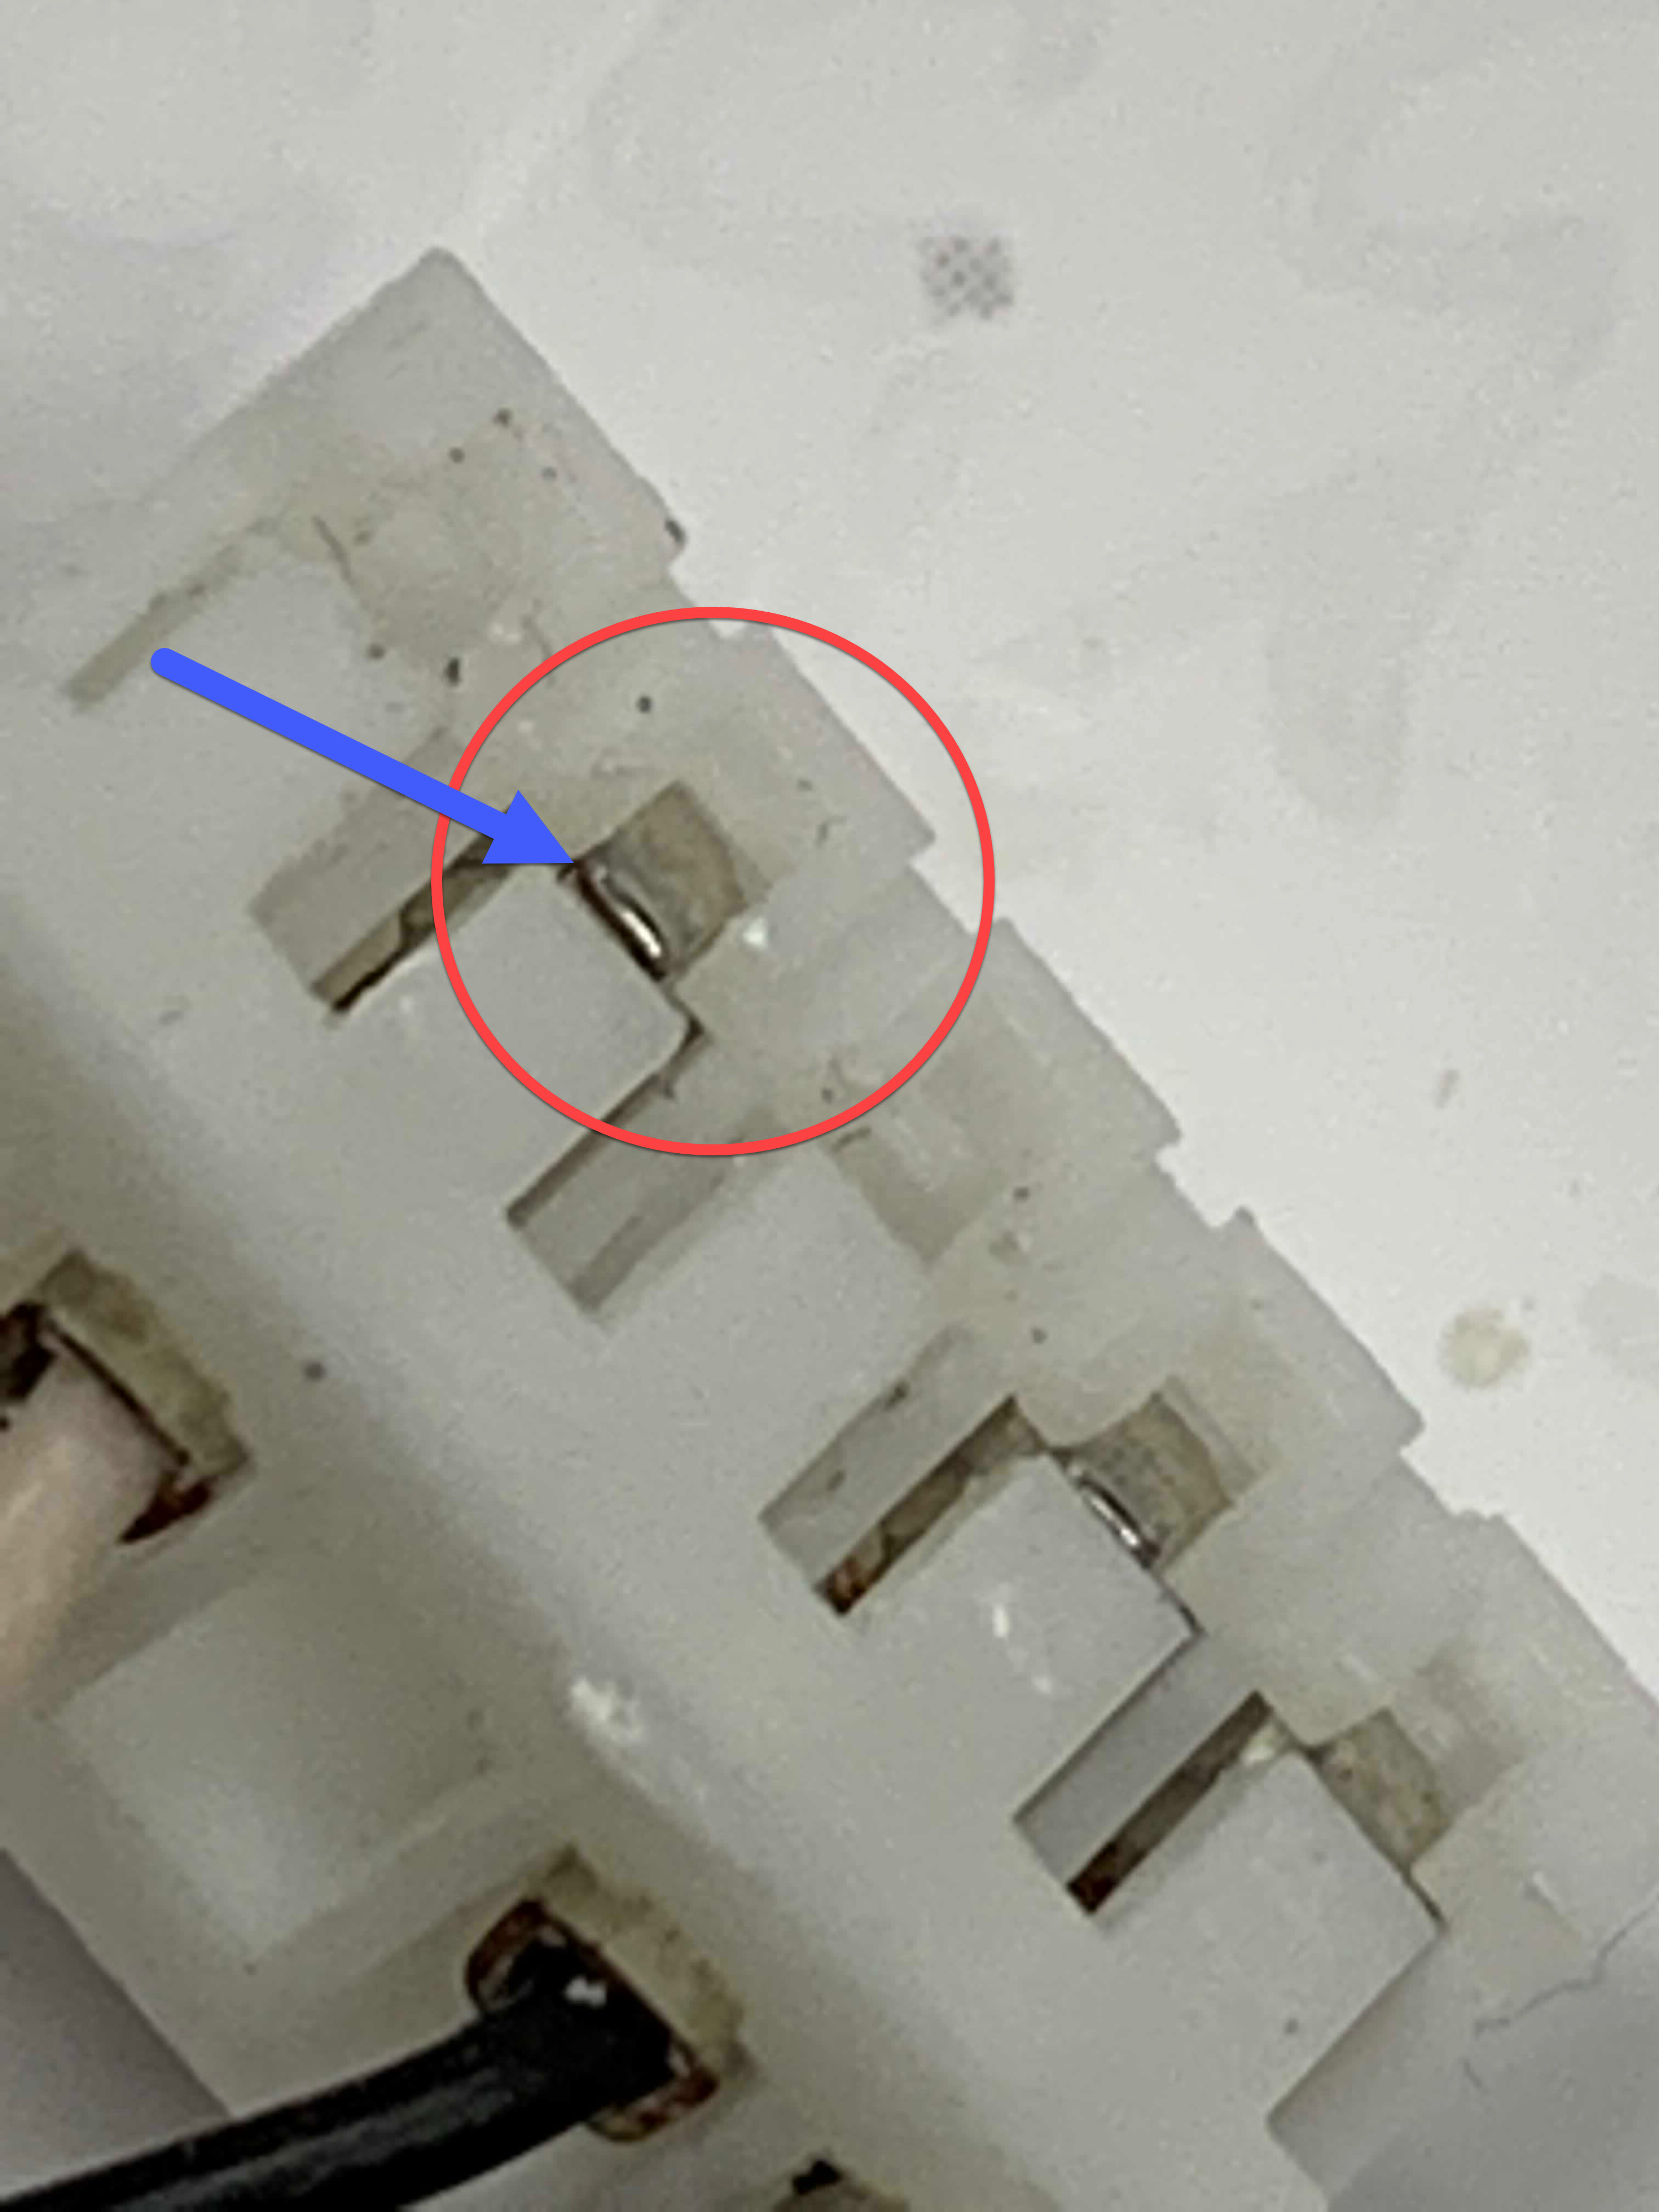
If you look at the close up image (I had already removed the two wires i needed to swap. However the pins are held in by a small metal fin that bumps up against the plastic connector. You can see it in the image to the left. Use a small tool or paper clip to push down on the metal tab (or pull up on the plastic) and gently pull the wire out .
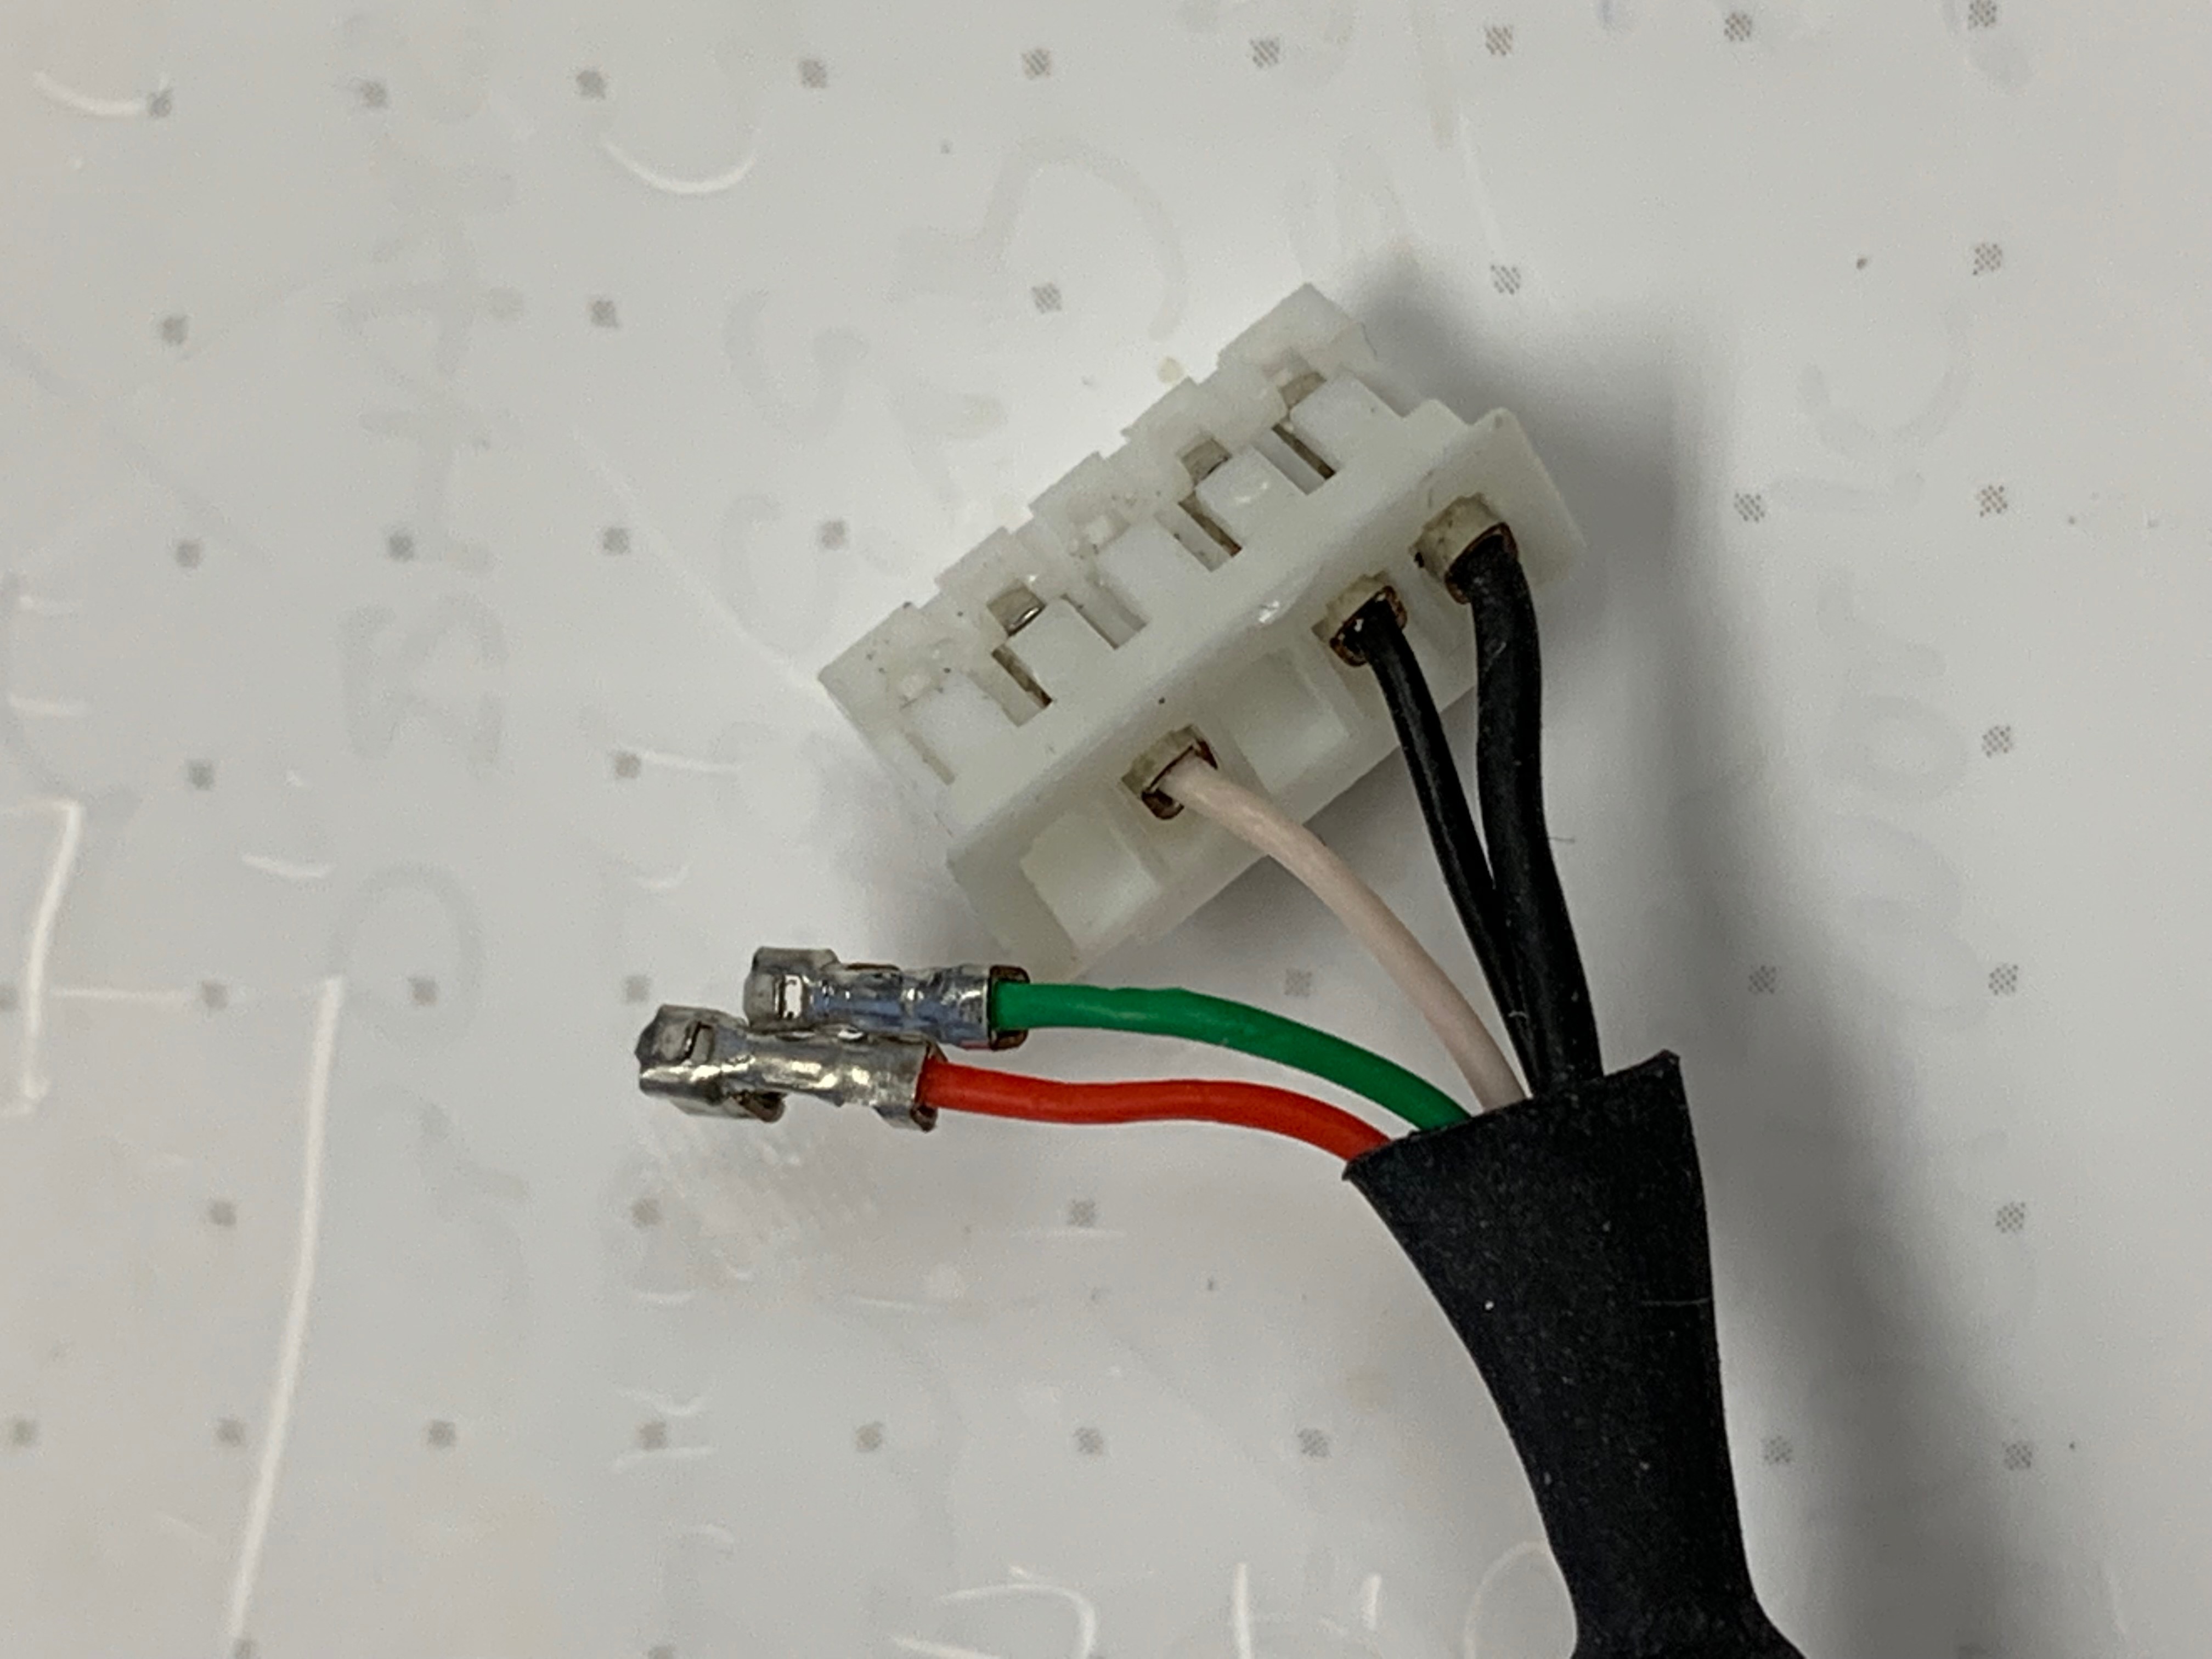 The wires will look like this once they are out of the connector.
Simply reinsert into the connector in the proper orientation and re-attach to the mouse.
STEP 5 – Reassemble and you’re done!
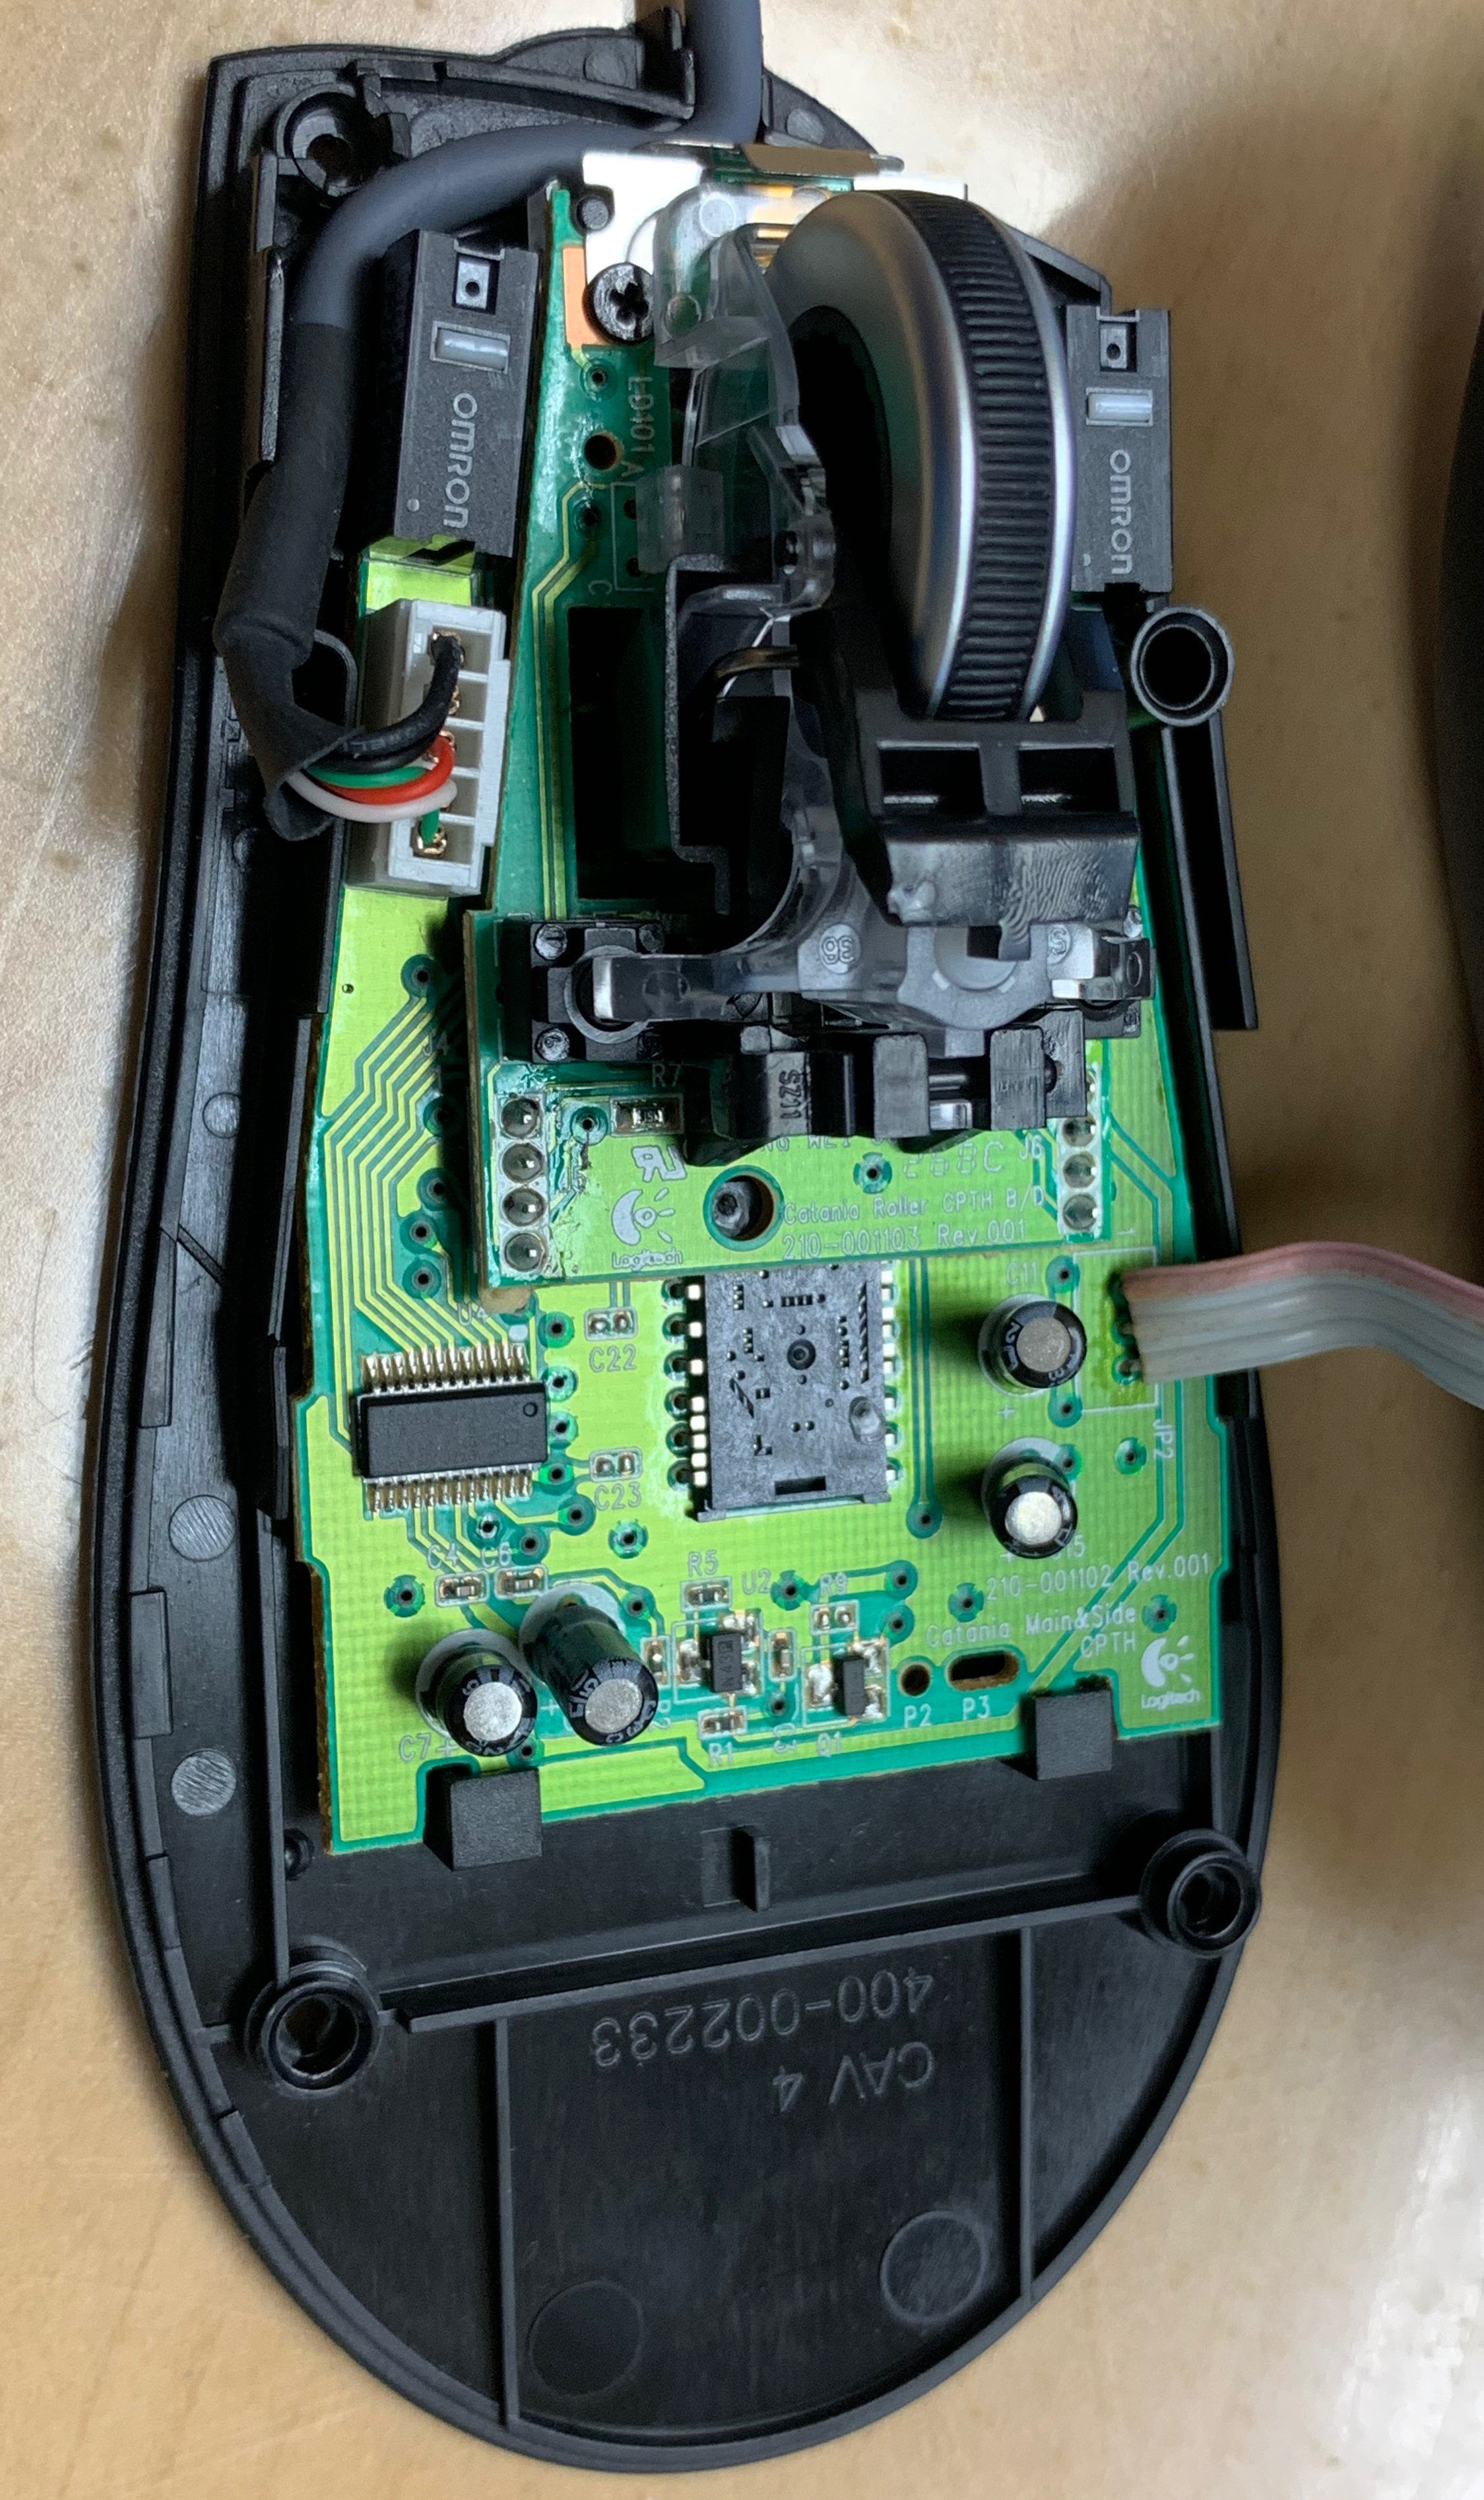 Place the connector back on the board, route the cable through the guides on the mouse and place the cover on top. Tighten the 4 screws, stick the 4 pads over the screw holes and you’re ready to test.
You should be good to go with a working mouse!
This may seem kind of trivial, why repair a $25 mouse? I have a few reasons for my motivation to do this. 1. I enjoy fixing things, 2. we throw away so much stuff, even saving one mouse from the trash is worth it (especially since it was new out of the box) 3. because i can!
I hope this article motivates you to repair your own electronics and see what you can save from the trash. However, if you’re in need of a new mouse, Logitech has a ton to choose from and Amazon stocks most of them
-> Click here
Thanks again for reading my blog.
Joe
Don’t forget to shop my store www.geekgearstore.com
RELATED READING
Protect Your Internal Network With A LOW COST Honey Pot
Build Your Own Google Home Assistant – Google AIY & Raspberry Pi