


The weather is starting to look good here in the north east, time to pack the family into the car for some day trips to the shore. Before you go let’s do some minor maintenance to replace the cabin filter on your vehicle to keep you breathing the freshest of air.
Replace the cabin filter
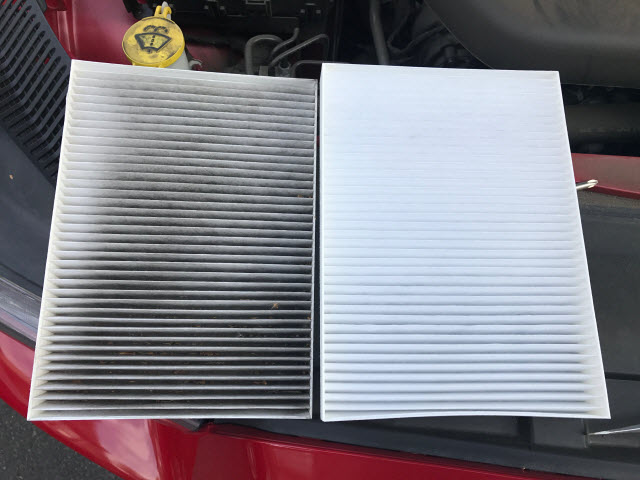
 Back in the early 2000s car manufacturers thought it would be a good idea to filter the air we breath. They began installing filters inside the HVAC ducts of our cars to filter out pollen, dust and other contaminants. Are they effective? Yes, they do work but at the same time you open your door and windows to allow the same dust and pollen in the filter is trying to remove.
If you have one it should be replaced as the manufacture of your vehicle recommends. Automobile dealers can charge upwards of $100 to replace the filters. For many this may sound reasonable, but just know that you can change the filter yourself for under $20.00 and in about 5 minutes.
Where can I find the cabin filter?
The best resources for the cabin filter replacement in your car is YouTube. Somewhere in the world someone has changed the filter on your card and most likely made a video too.
I have two cars that I’m going to show the procedure. A 2014 Dodge Charger and a 2011 Lexus ES350. The Dodge has the filter on the outside of the car while the Lexus has the filter inside the car.
Dodge Charger: TYC 800165P FILTER $9.00
This should take no more than 5 minutes –
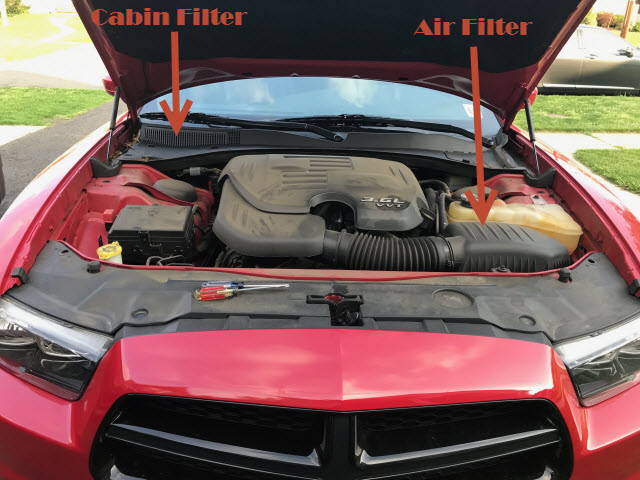
On my 2014 Dodge Charger the filter is located on the passenger side just below the windshield.
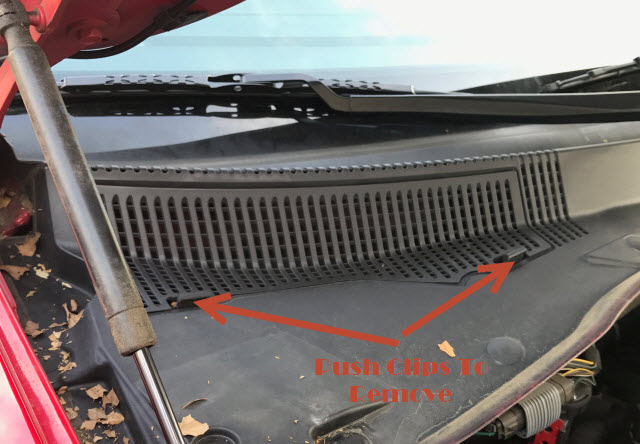
You will see a drain cover with two tabs. gently push each of the tabs toward the windshield to release and remove the cover.
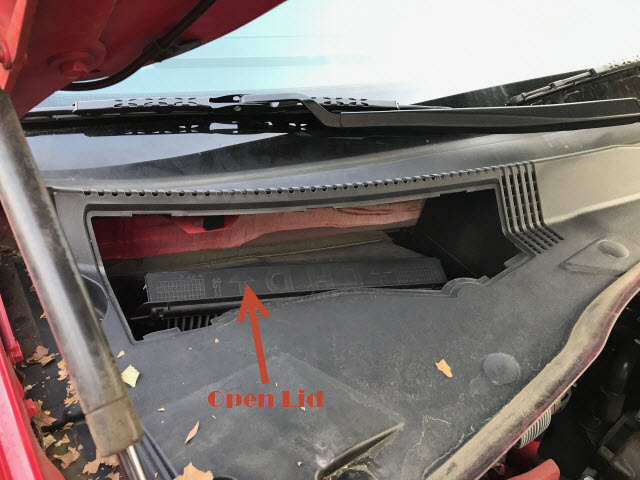
Next, you need to open the filter housing. Its attached to the car and can not be removed. Gently pull up and open at the front. (its hinged at the back) Use care at this step not to be too forceful or you could break the cover
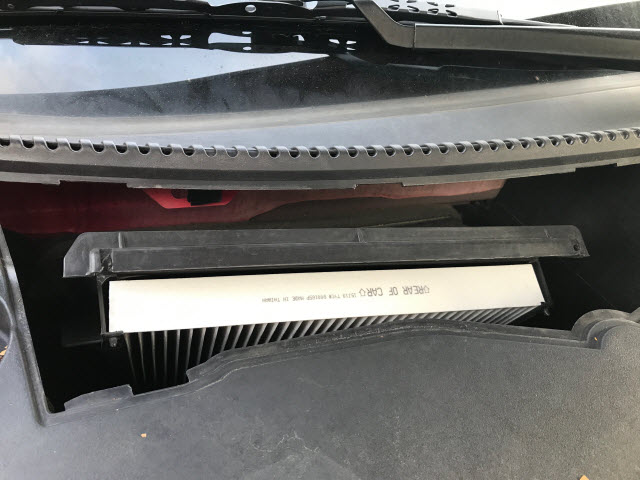
Once the cover is open you can then access the old filter, just pull it up to remove
Follow all the steps in reverse to install the new filter. Some filters like to be installed in a certain way. Take note on the side of the filter for any specific instructions “Rear of car” or “This end up”
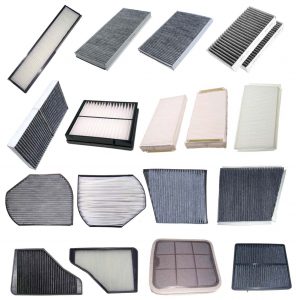
FIND THE CORRECT FILTER FOR YOUR CAR HERE
That was easy! Plus it saved you more that $50
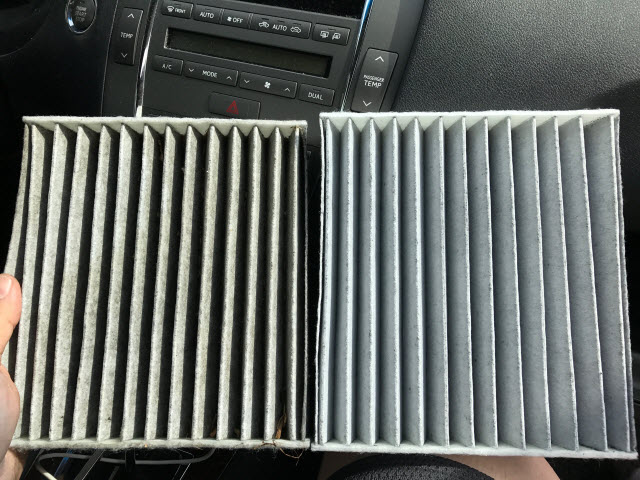
Lexus ES 350: FRAM CF10285 CABIN FILTER $17.00
Many Toyota products have their cabin filter on the inside of the car. My 2011 Lexus ES will most likely be the same for most Toyota 3.5L V6 drive train setups, and have the filter access panel inside the glove compartment. Now would be a good time to empty out the glove box and toss all your expired insurance cards.
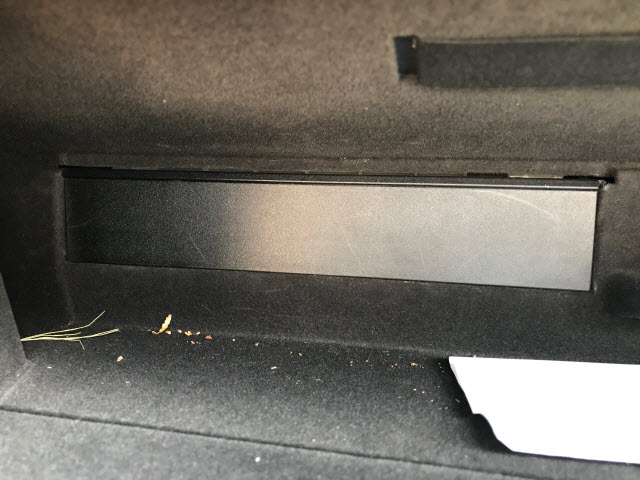
Clear out your glove compartment to gain access to the rear panel. This is just a trim plate and pulls down from the top. Be gentle not to break off the tabs that hold it in place.
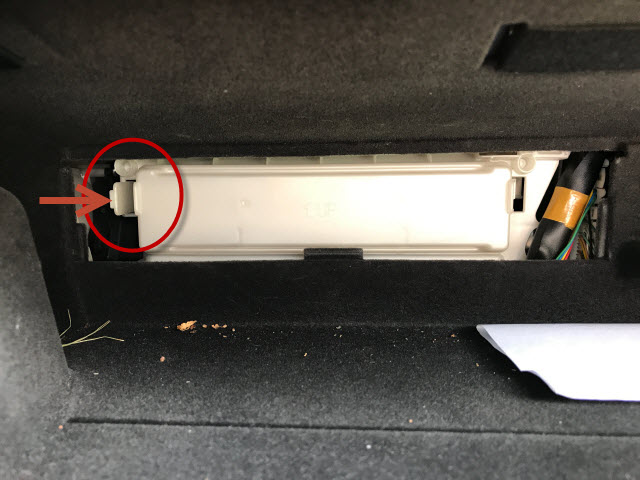
Once the trim plate is off it will reveal a white filter access door. The door has a release tab/clip on the left side. Push the tab to the right and pull the door off.
The cabin filter will be right behind the door and can be easily pulled out.
Follow all the steps in reverse to install the new filter. Some filters like to be installed in a certain way. Take note on the side of the filter for any specific instructions “Rear of car” or “This end up”
FIND THE CORRECT FILTER FOR YOUR CAR HERE
Done!
The Lexus dealer will charge you between $100 and $125 to replace this filter.
I hope you have found this information helpful.
Thank you for reading my blog
-Joe
Don’t forget to stop by my Etsy store.
www.GeekGearStore.com
One Reply to “Weekend Project – Cabin filter Replacement (2014 Dodge Charger & 2011 Lexus ES350)”