

Welcome to part two of my post. Previously I spoke about building a security system using a Raspberry Pi Zero and MotioneyeOS. (Read Here) I built and installed the system in February and it was working great. I even caught some Ass-Hat driving over my lawn and trash (Read Here). I ran into one issue with this system. Once Summer was here and the outside temperatures hit 90° (32°c) The processor temperature of the Pi Zero was topping 161° (72°C) and lack of cooling was causing my Pi Zeros to crash
According to the Raspberry Pi foundation the boards are specked to approach 80°C but mine were failing in the mid 70’s. So now to work on a solution.
How to cool your outdoor Motioneye camera
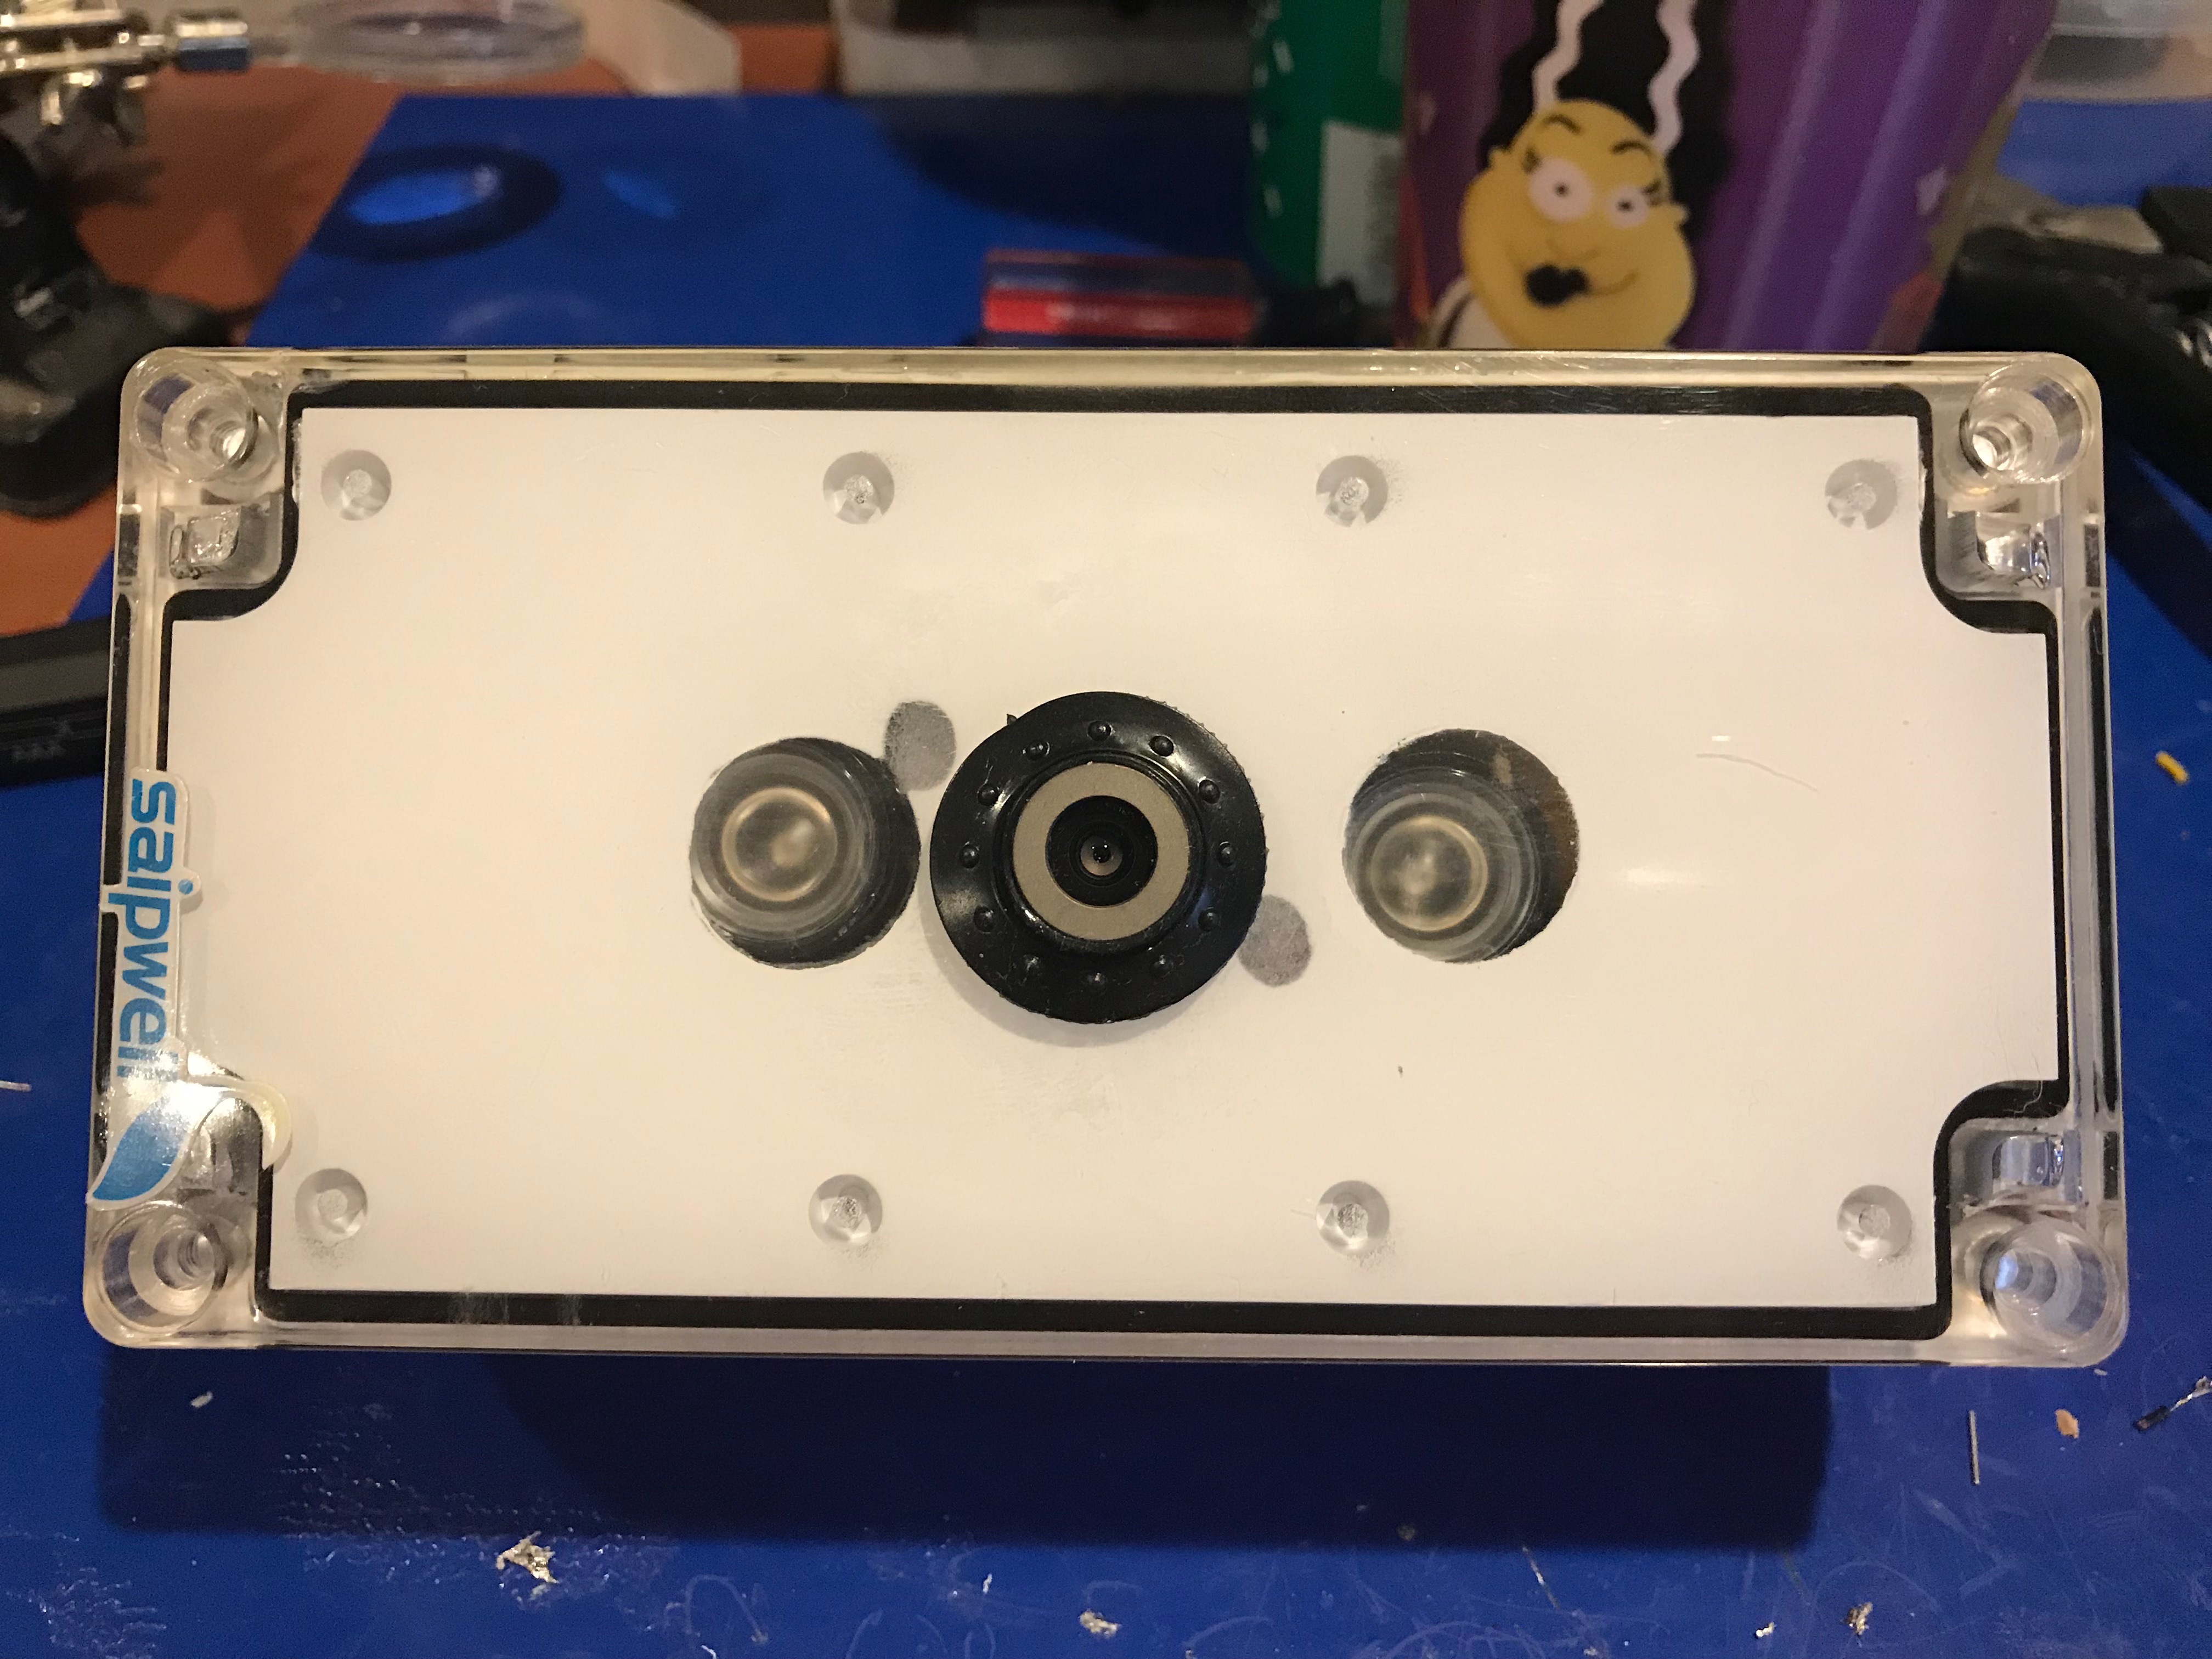
My first attempt was an obvious one – Paint the camera white.
The waterproof boxes I was using to house the camera had a clear cover. To reduce the amount of sunlight, I simply painted the box white
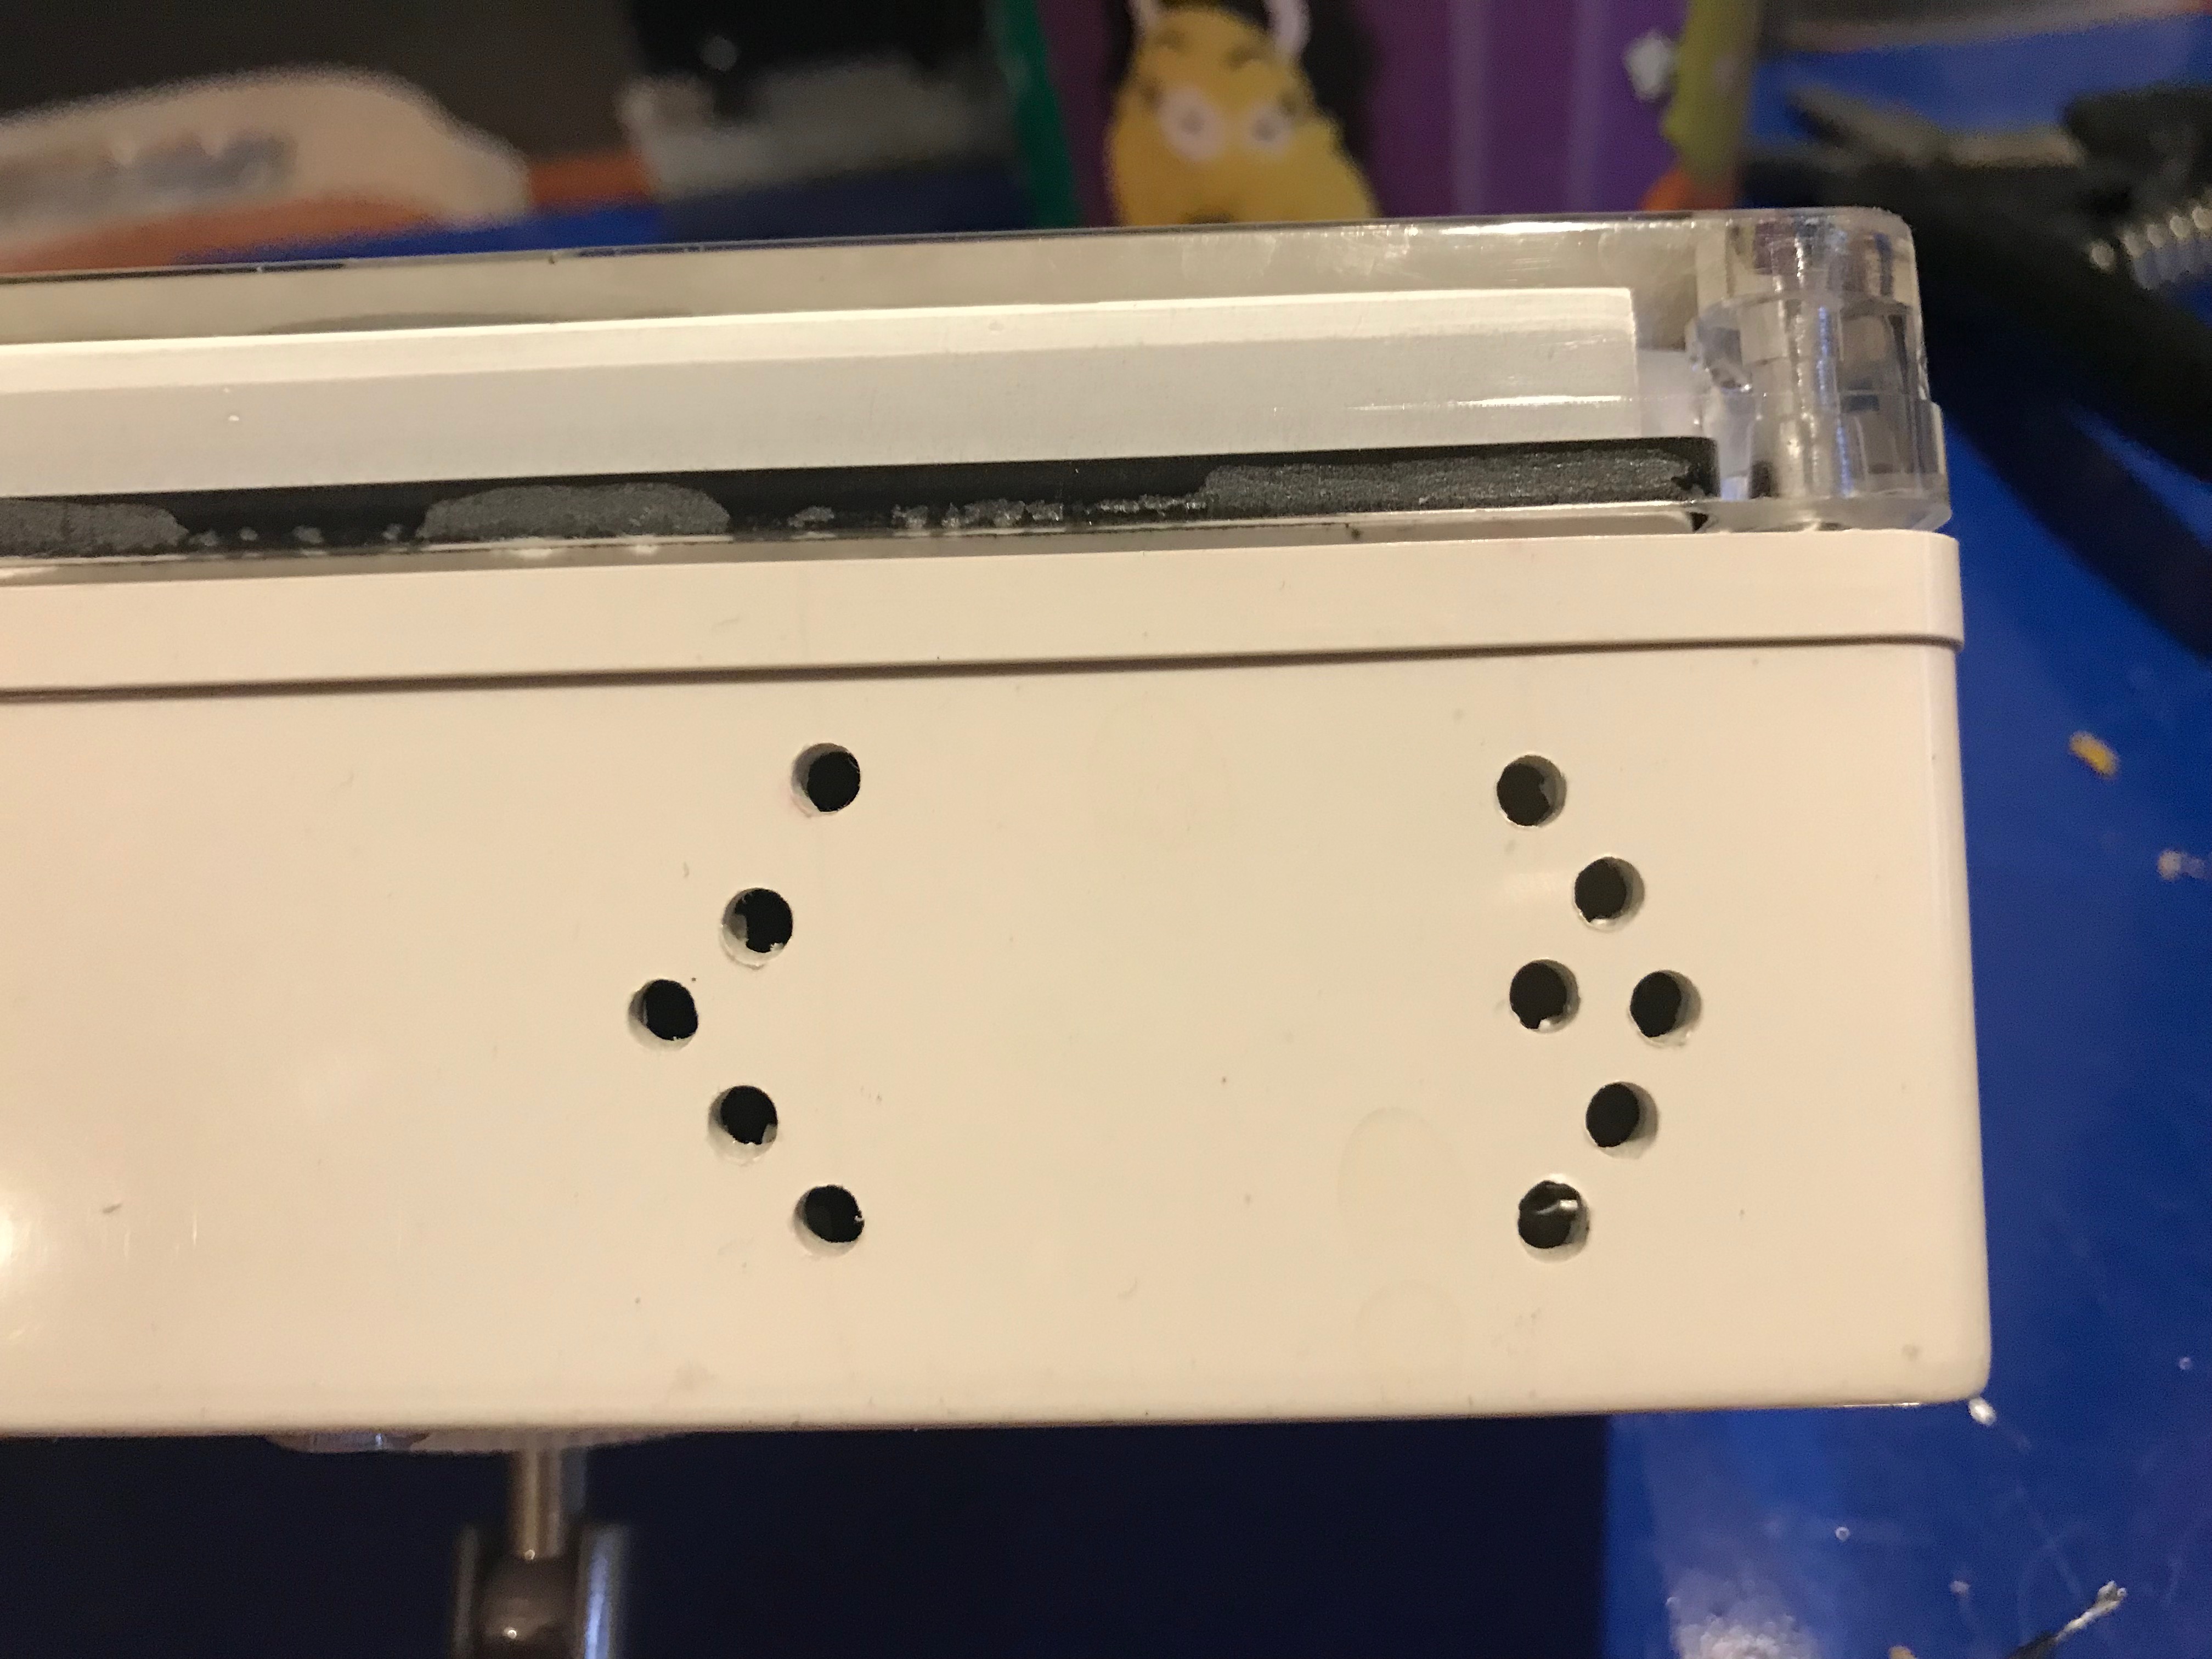
Painting the box was helpful and kept the system cooler , but it still wasn’t enough. The next step was to vent the box simply by drilling a few small holes at the bottom. I know this compromises my “waterproof” concept, but I am hedging my bets if any rain water was to enter the box, it would remain at the bottom and not touch the electronics.
Still not good enough! I want to add a fan, but I only want the fan to run when the CPU hits a specific temperature. There is no need to run the fan on cool nights or during the winter. So I decided to use the GPIO pins on the PI Zero to control the fan.
Controlling the cooling fan via GPIO pins
Parts List
- 5 Volt cooling fan
- 1 NPN Transistor
- 1 1KΩ Resistor (or equivalent)
- Small breadboard
- Soldering iron / solder
How to assemble
Its probably not a good idea to connect a fan directly to one of the GPIO pins, so I used a simple transistor and resistor to help limit the current being drawn via the pin
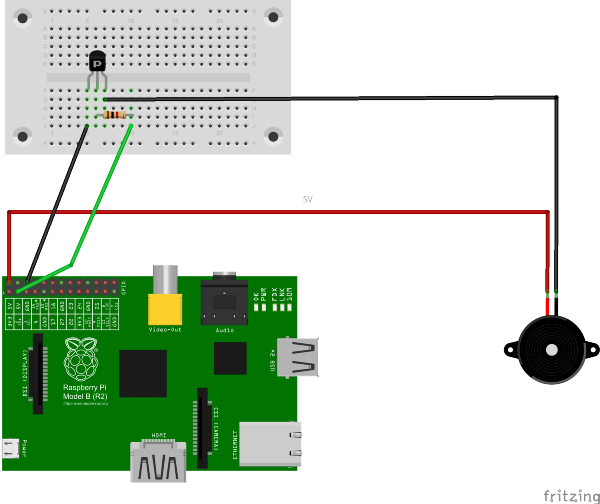
The Pi Zero has the same pin configuration as its big brother.
The 5V pin connects directly to the fan, while the ground pin connects from the Pi through the emitter and collector of the transistor out to the fan. Finally the base of the transistor is connected via the resistor back to GPIO2 on the Pi.
When you power up the Pi the fan should start to run
You will need to execute the following code to test the fan, this will enable GPIO 2
echo ”2”>/sys/class/gpio/export
echo ”out”>/sys/class/gpio/gpio2/direction
The following commands will turn the fan on and off
echo ”1”>/sys/class/gpio/gpio2/value
echo “0”>/sys/class/gpio/gpio2/value
How do we automate this?
If you’re running a MotioneyeOS image the filesystem is mounted read only. We need to allow read/write
mount -o remount,rw /
We are going to need to edit a few files, make sure NANO is installed
(If you used the MotioneyeOS image you can SKIP this step)
apt-get update && apt-get upgrade
apt-get install nano
Also, set up a folder to place our automated script
mkdir /home/fan
cd /home/fan
Lets make the script in the “fan” folder
nano /home/fan/fan.sh
#!/bin/sh
timestamp() {
date +”%Y-%m-%d %T”
}
LOGDIR=”/var/log/fan.log”
VALUE=55
TEMP=`vcgencmd measure_temp | cut -c6,7`
STATUS=`cat /sys/class/gpio/gpio2/value`
echo `timestamp` ” Info: Temperature: $TEMP”>>$LOGDIR
if [ $TEMP -ge $VALUE ] && [ $STATUS -eq 0 ]
then
echo `timestamp` ” Warning: Fan started.”>>$LOGDIR
echo ”1”>/sys/class/gpio/gpio2/value
elif [ $TEMP -le $VALUE ] && [ $STATUS -eq 1 ]
then
echo `timestamp` ” Warning: Fan stopped.”>>$LOGDIR
echo ”0”>/sys/class/gpio/gpio2/value
fi
Set the value to what temp you would like the fan to run at. I set mine at 55°C and it appears to be working out OK. Save the script and now would be a good time to test.
On the command line try this
sh /home/fan/fan.sh
Depending on the current temp of the Pi the fan may start or stop. Play with this for a few moments by editing the script and setting different values.to make sure the script is working.
You are also going to have to set your fan.sh script to execute.
chmod +x /home/fan/fan.sh
Now we need to set a cron job to execute our script once per minute
Run the command to edit the cron job
crontab -e
Then add this to the file
* * * * * /home/fan/sh
Save the file
One last piece of house keeping at the very start you typed two echo commands to enable GPIO2. We need these commands to run at boot anytime the camera reboots.
Edit this file
nano /var/init.d/S99showinfo
Then paste this at the top of the file (just below #!/bin/bash)
echo ”2”>/sys/class/gpio/export
echo ”out”>/sys/class/gpio/gpio2/direction
REBOOT and it should all be working! Thoroughly test and make sure the fan starts and stops at the preset temp.
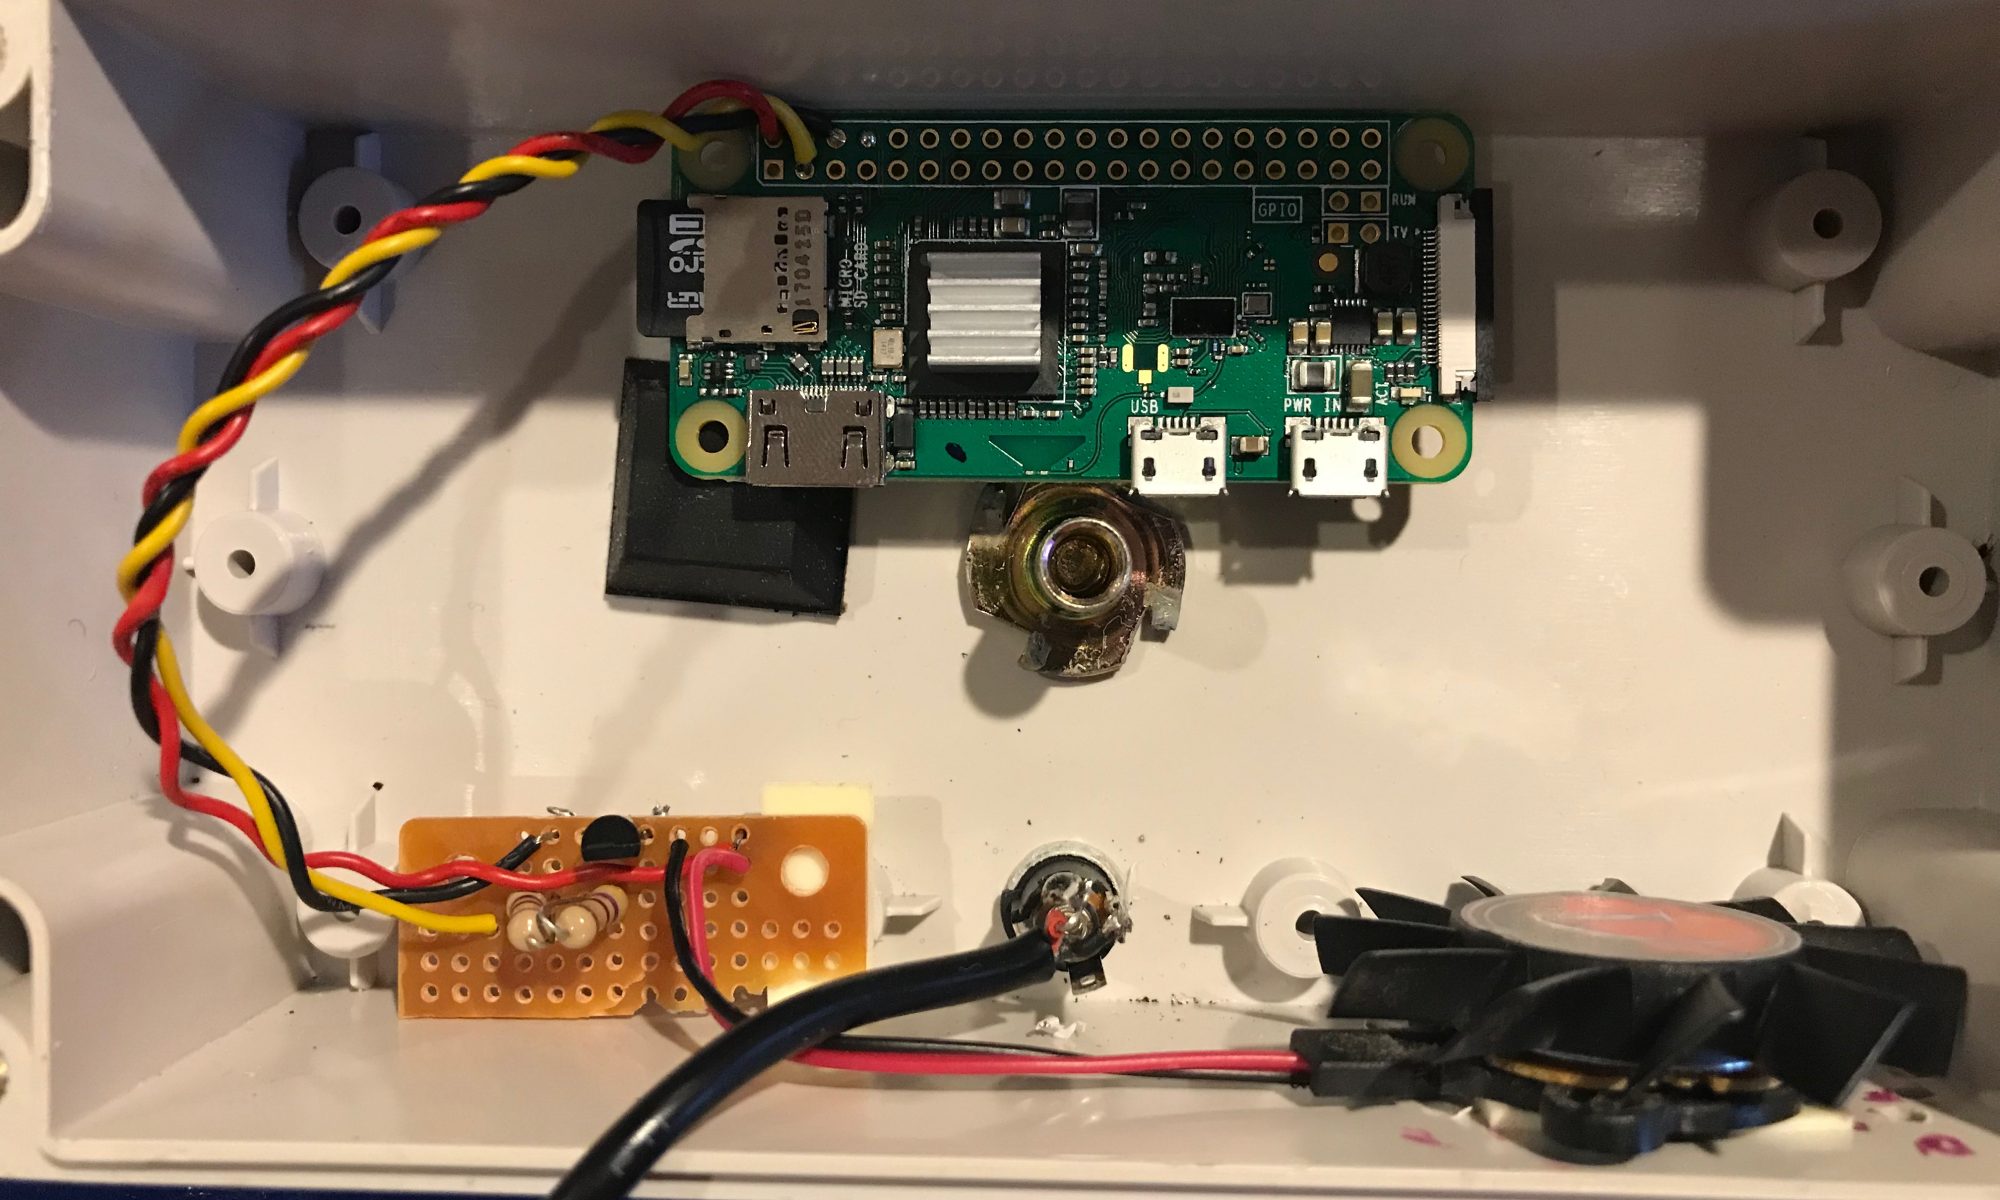
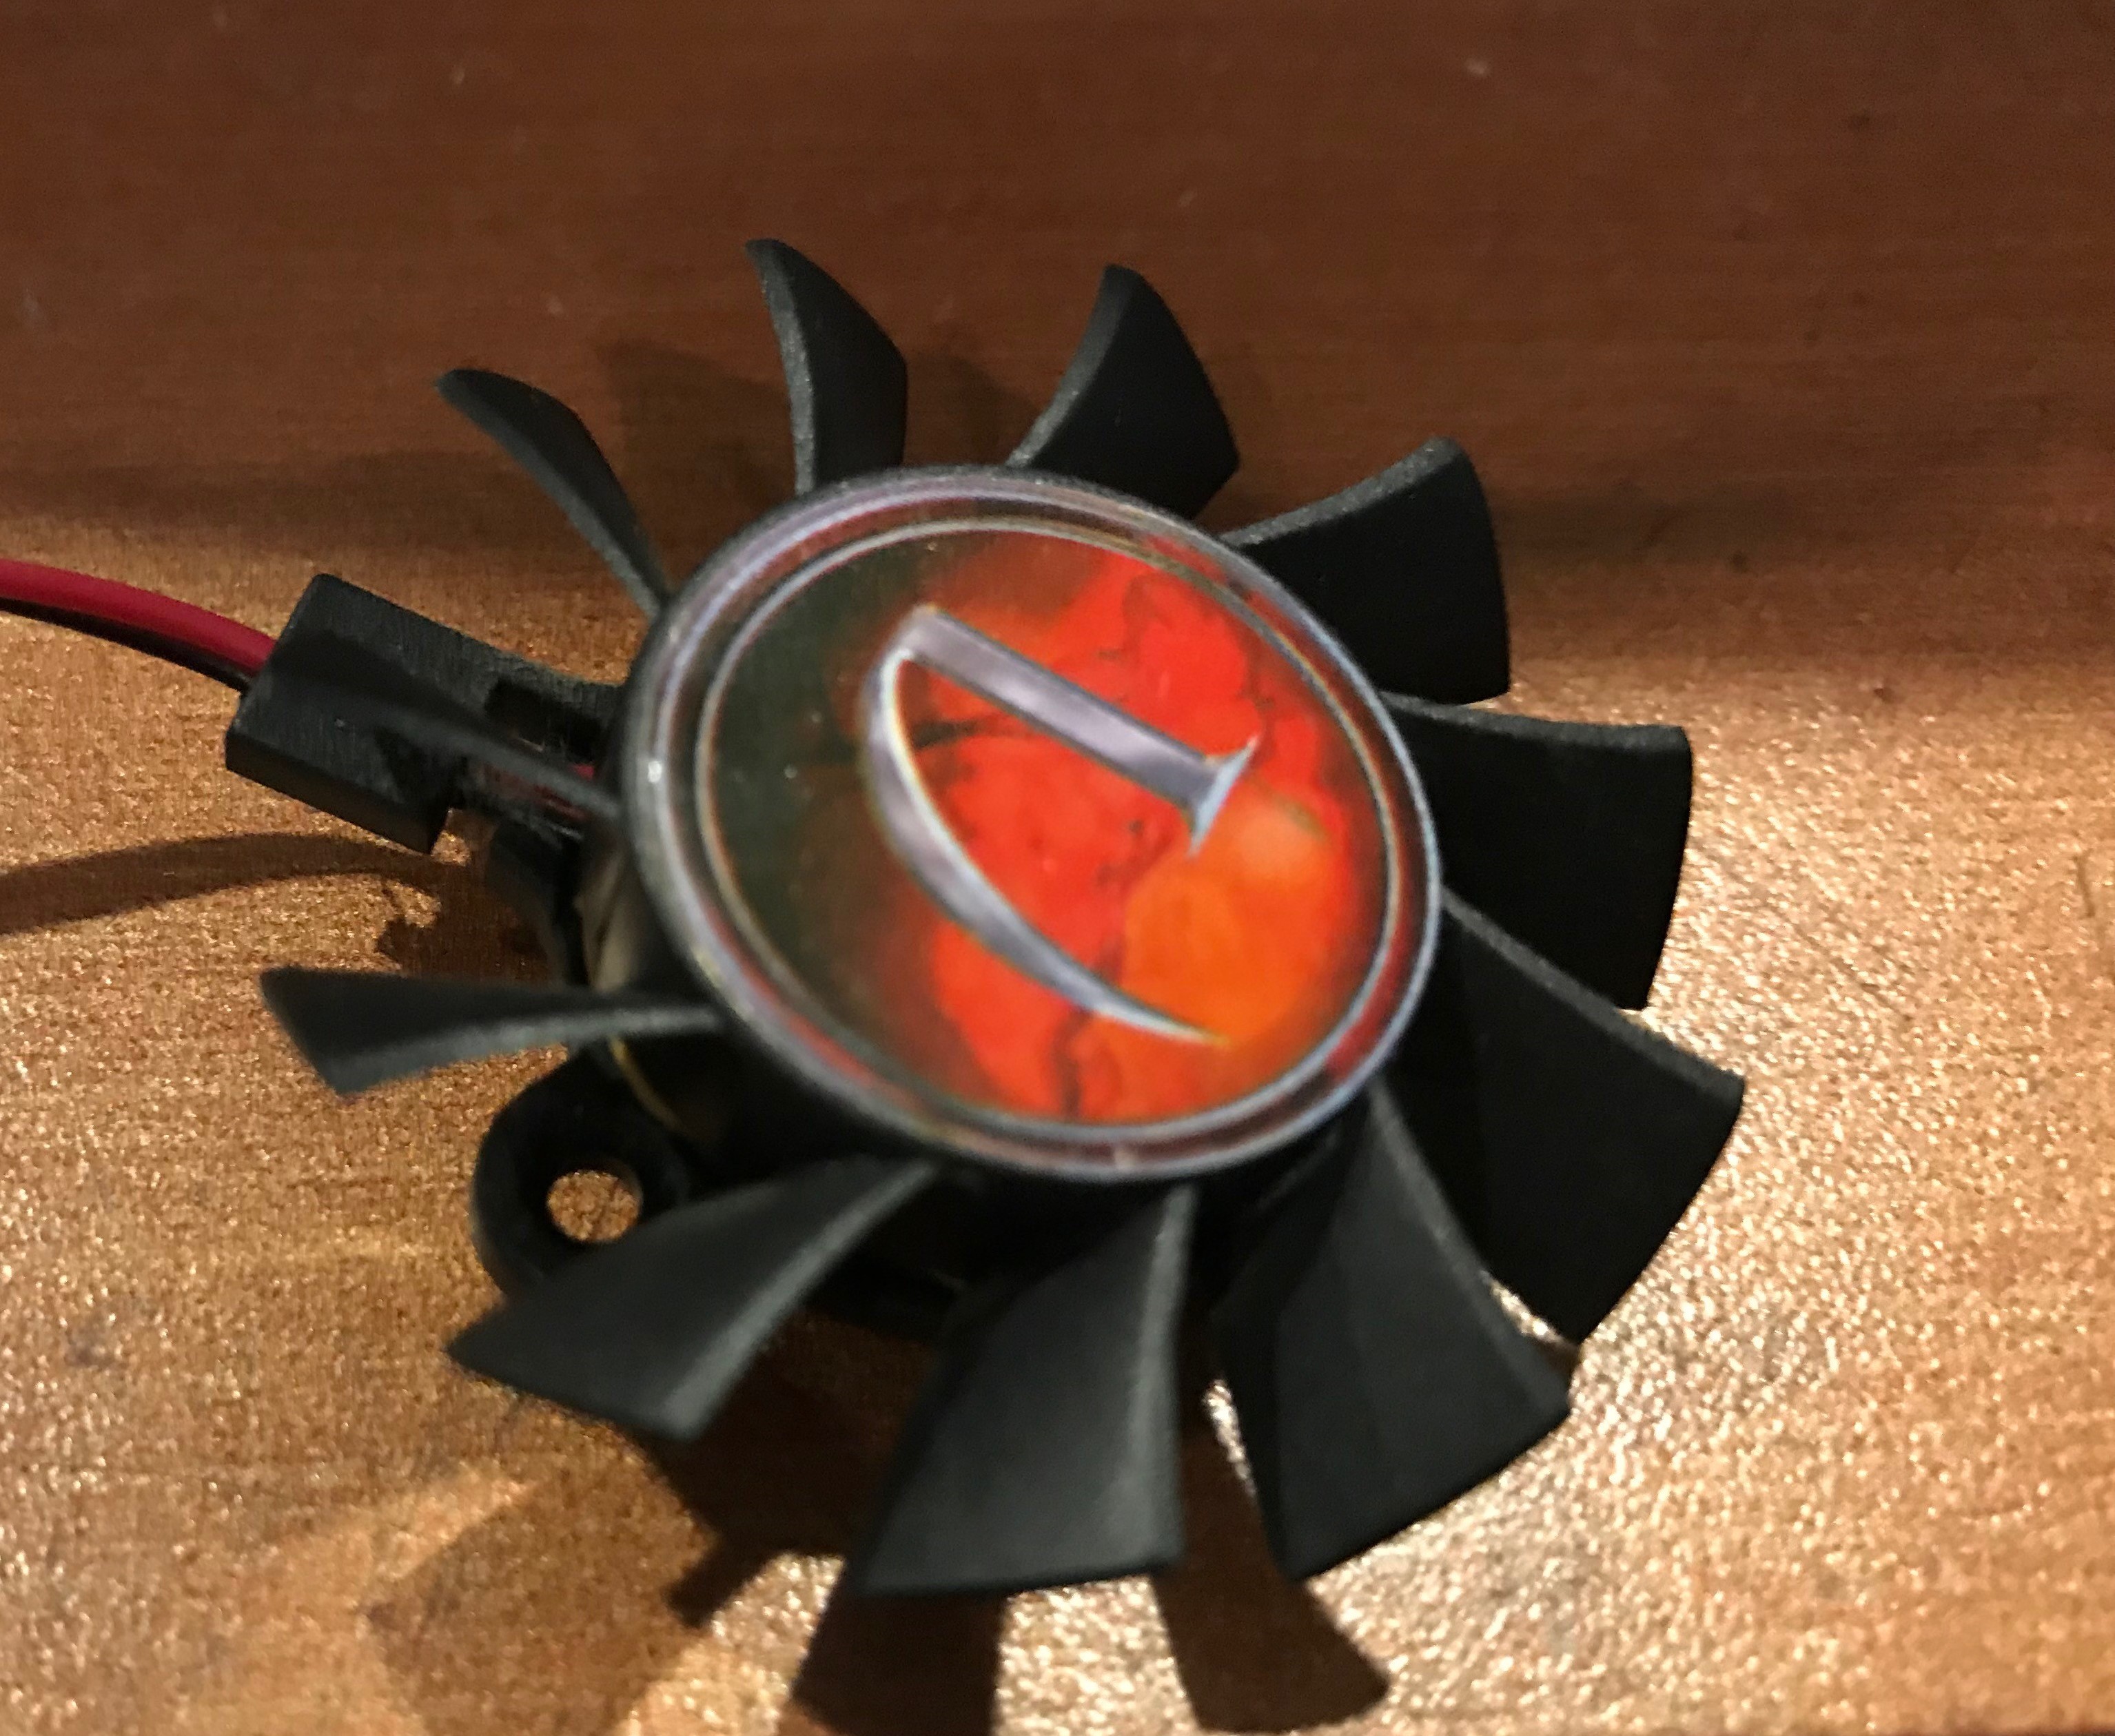
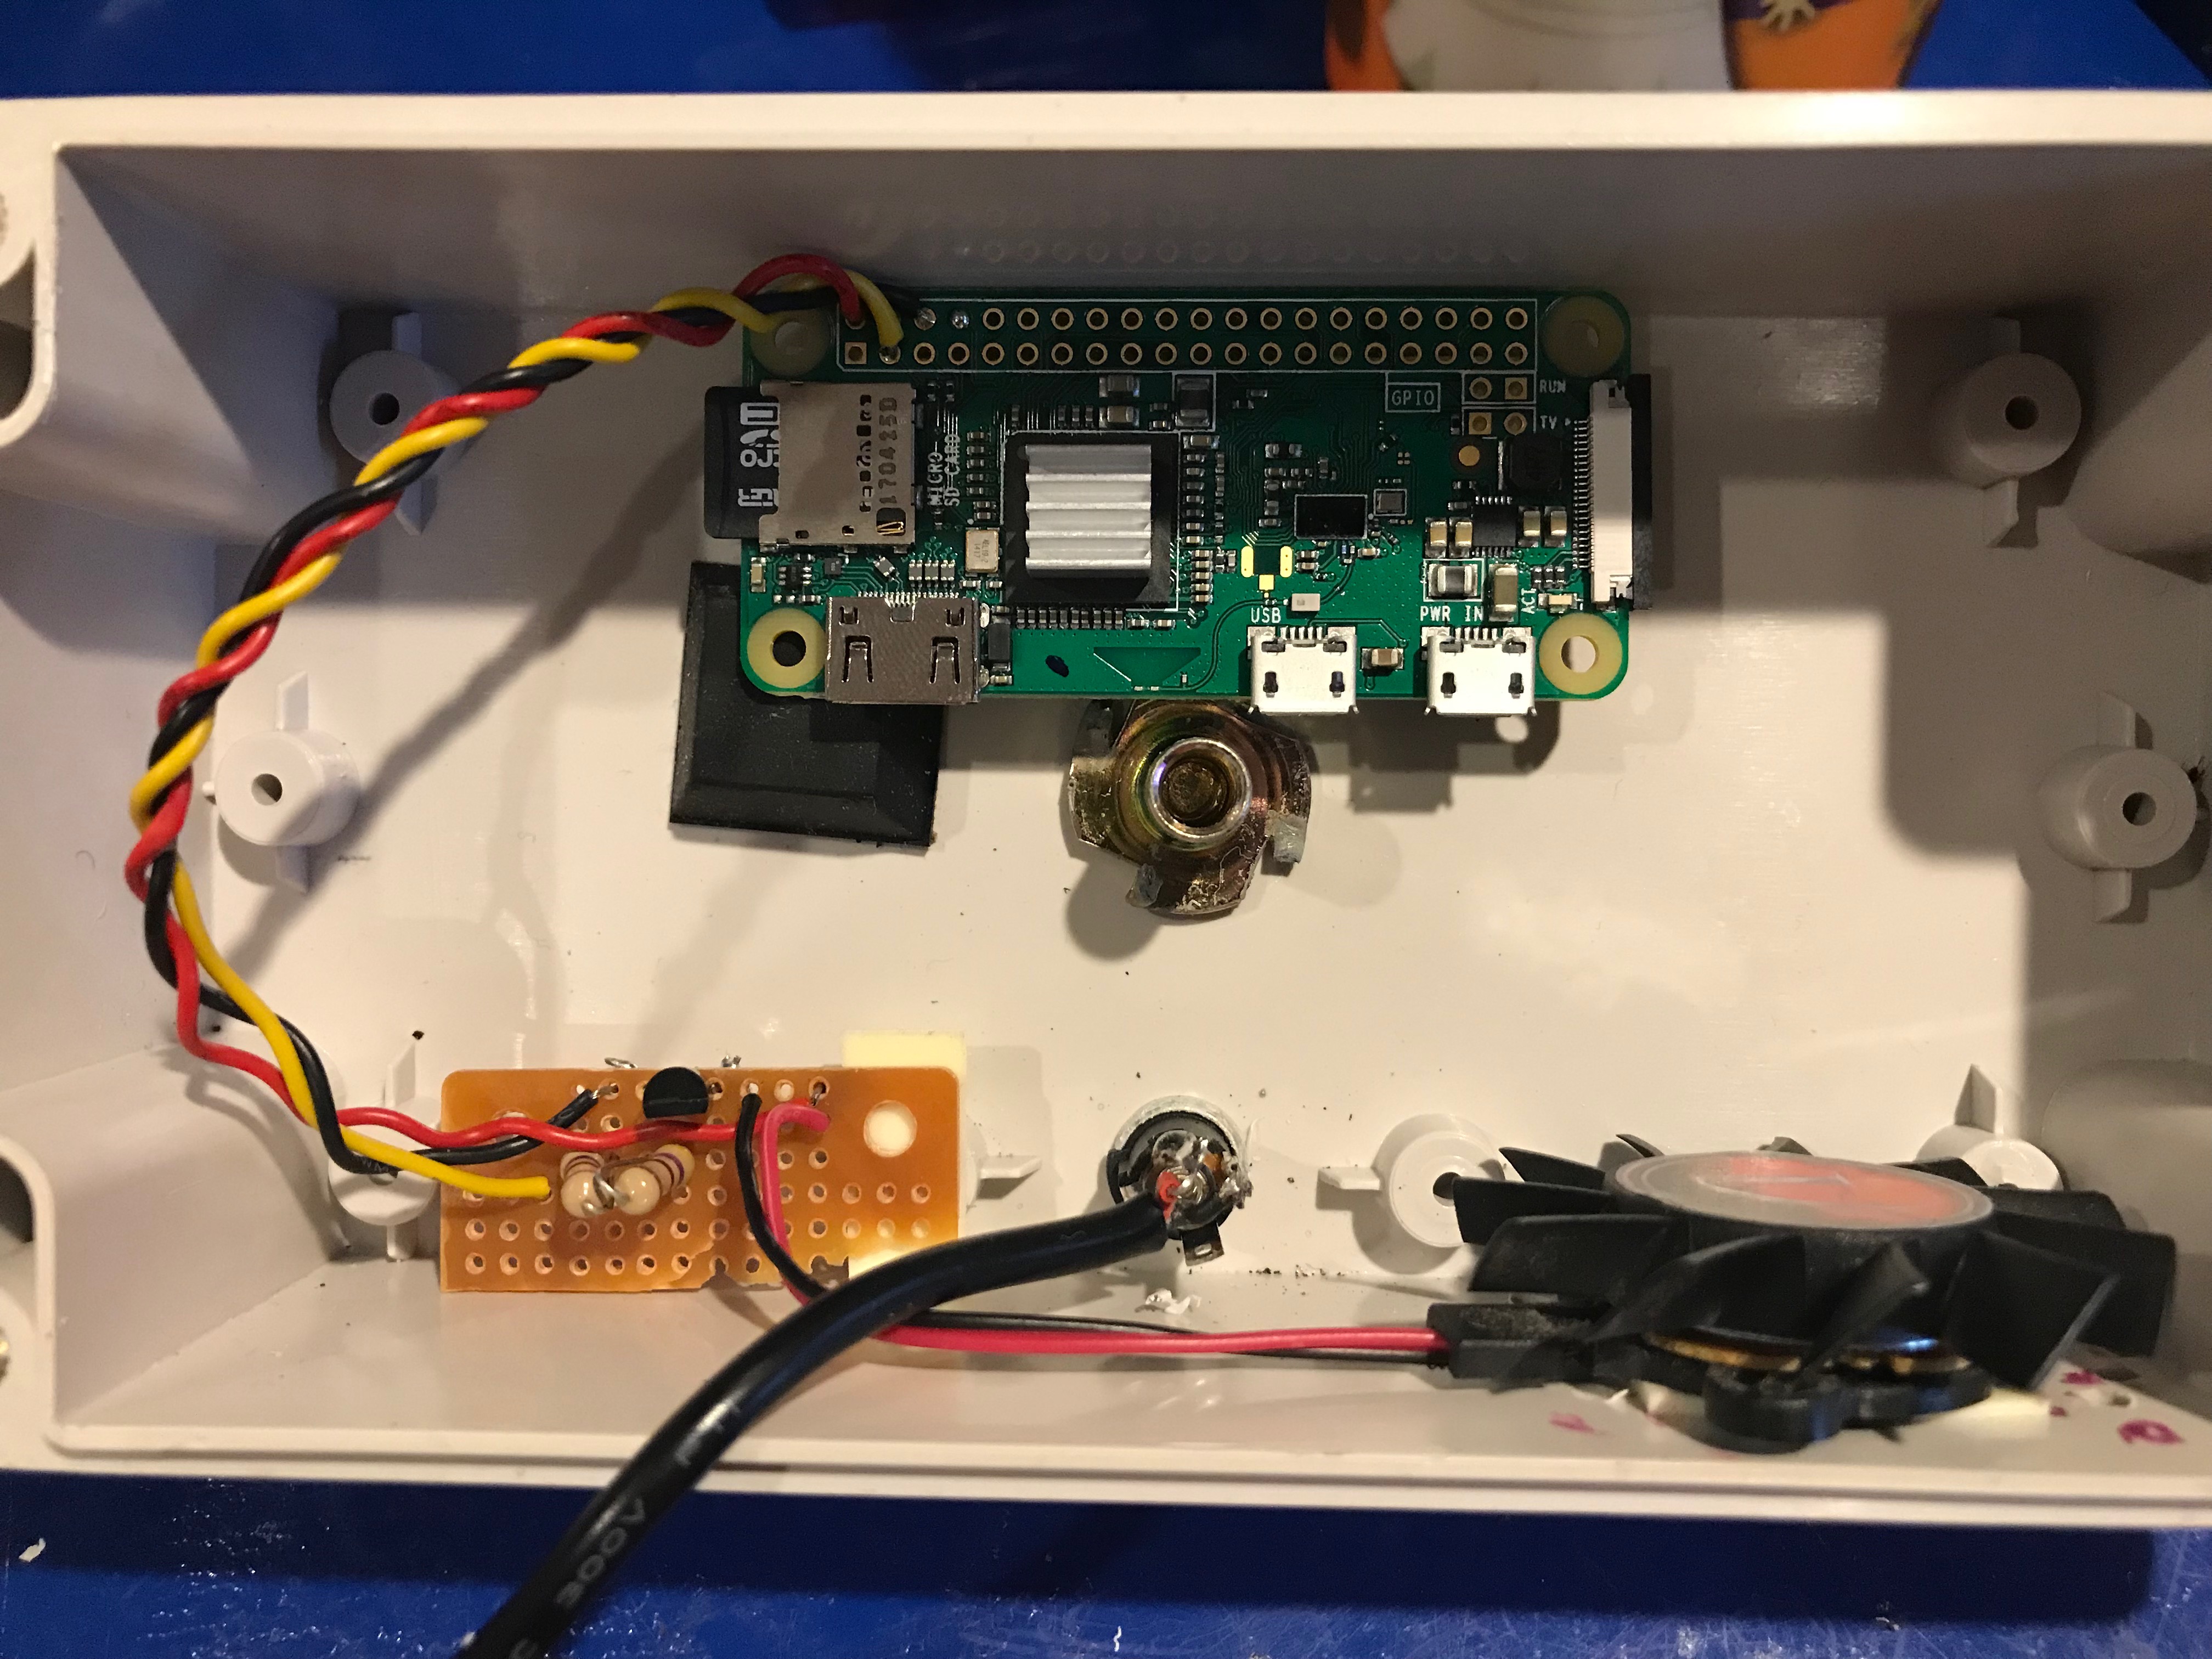
What does my setup look like?
I salvaged a 5v fan from an old video card
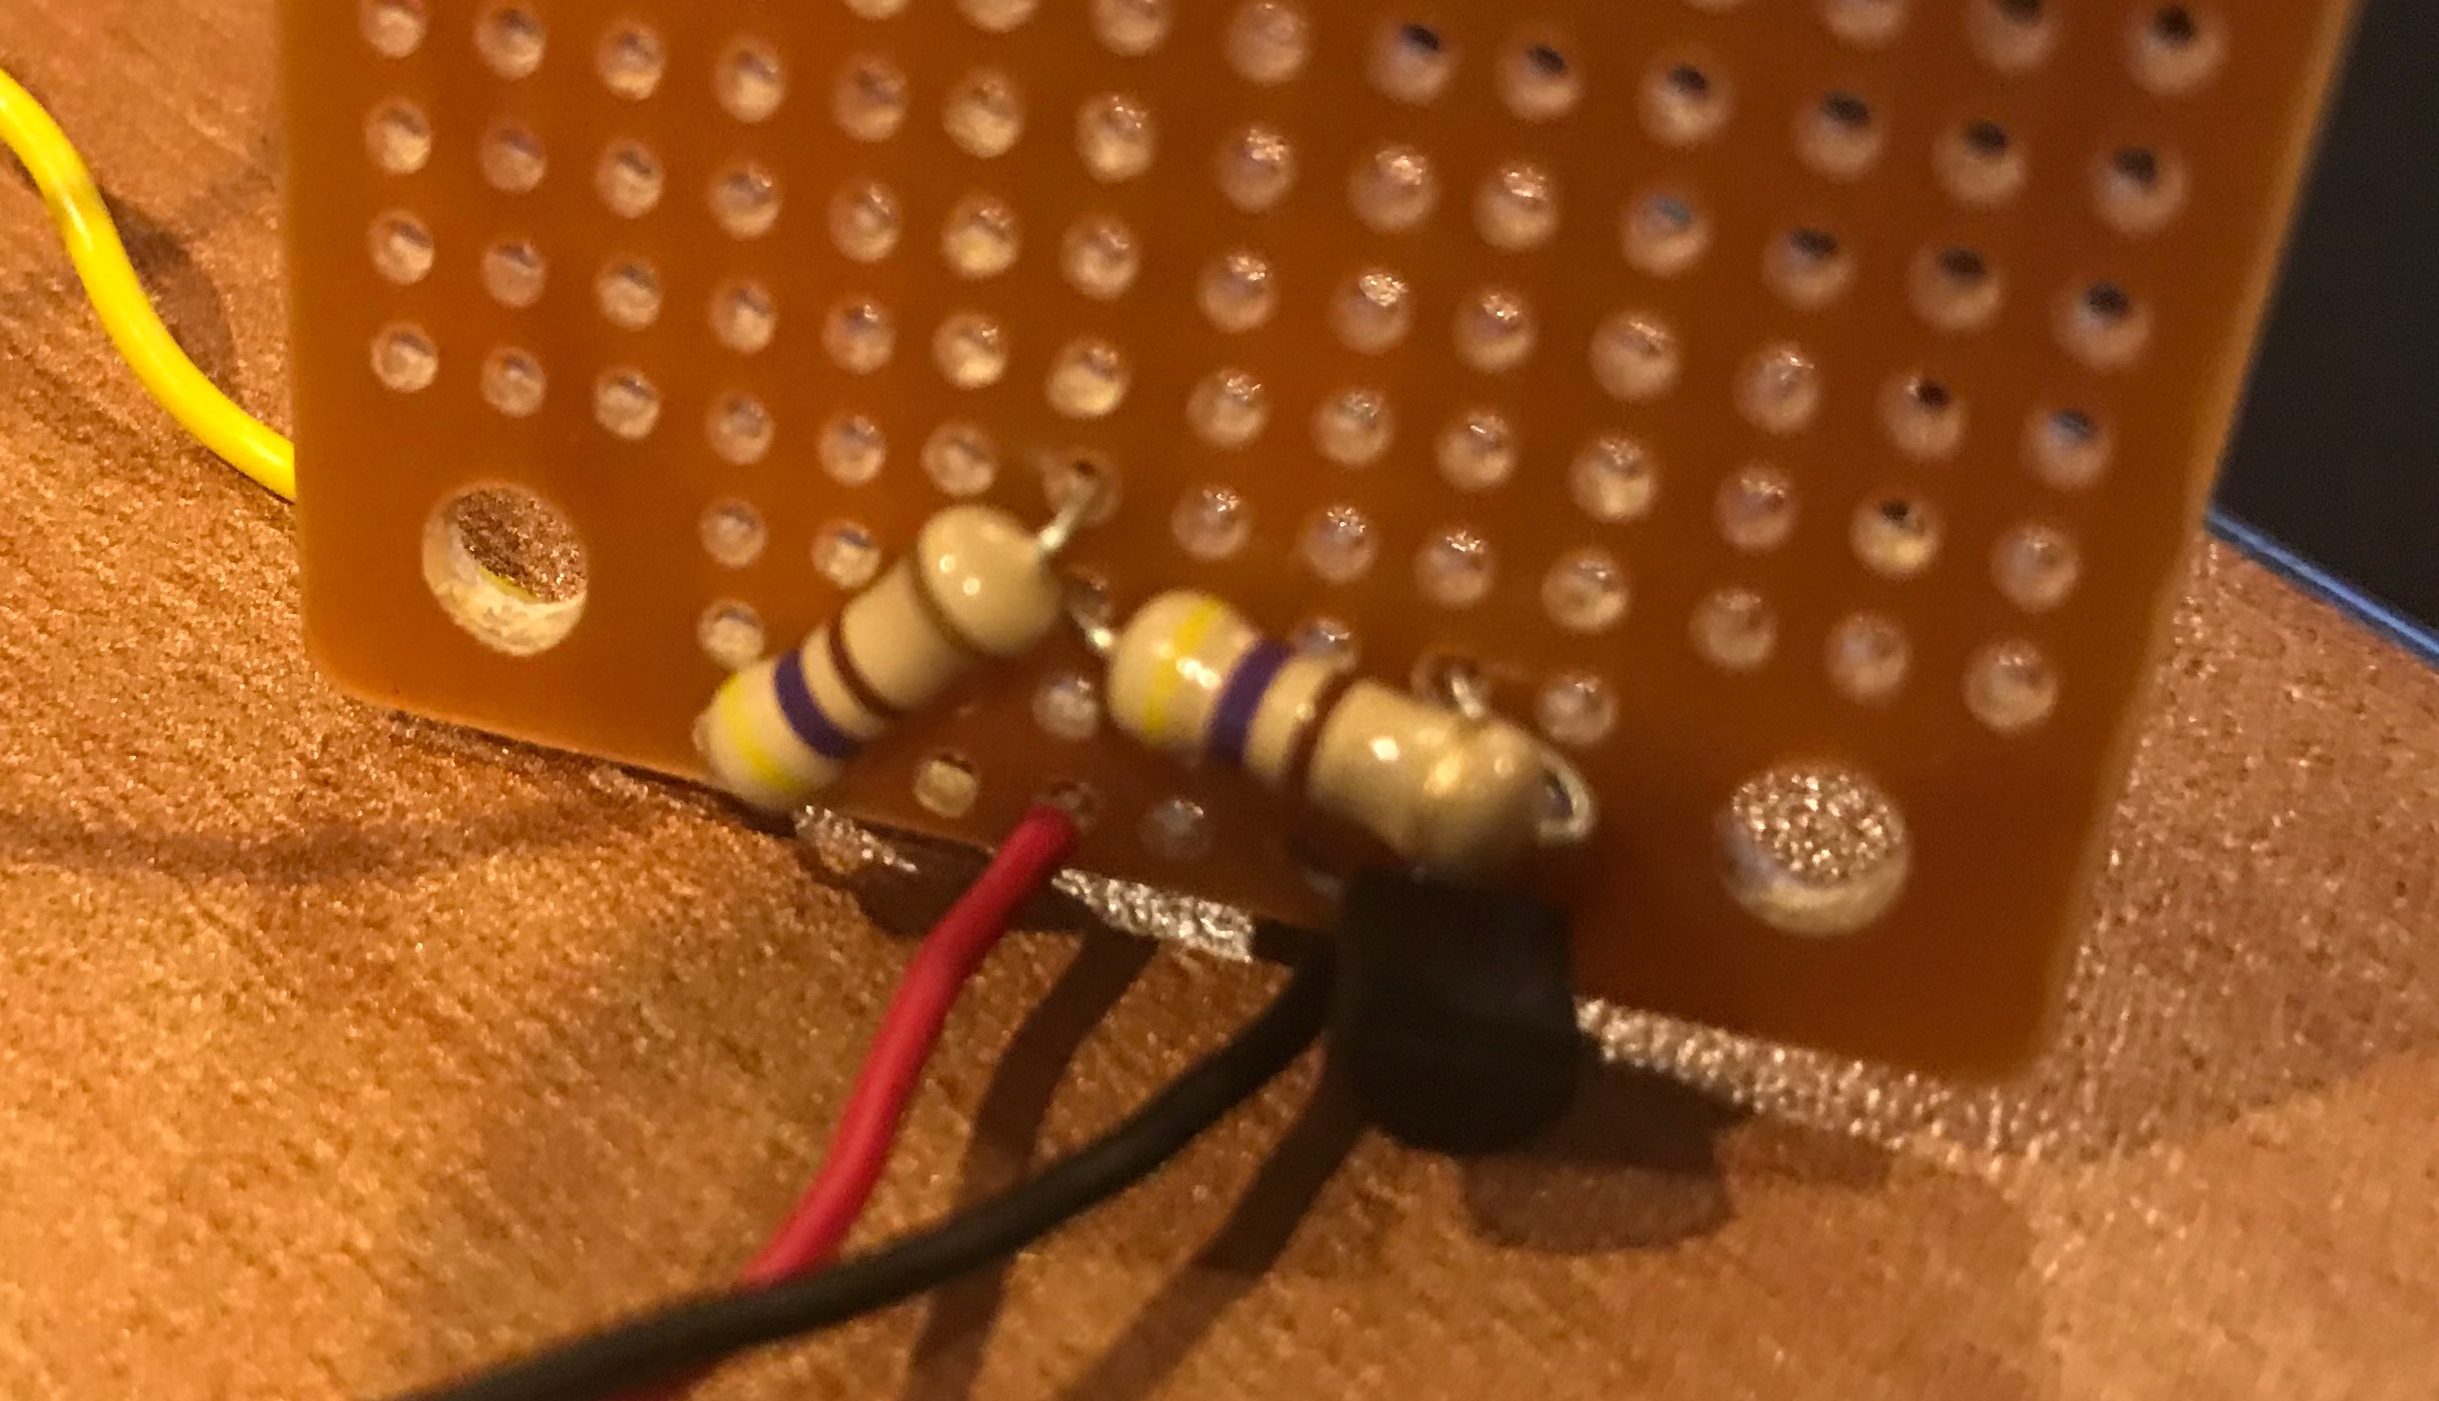
soldered it to a scrap bread board
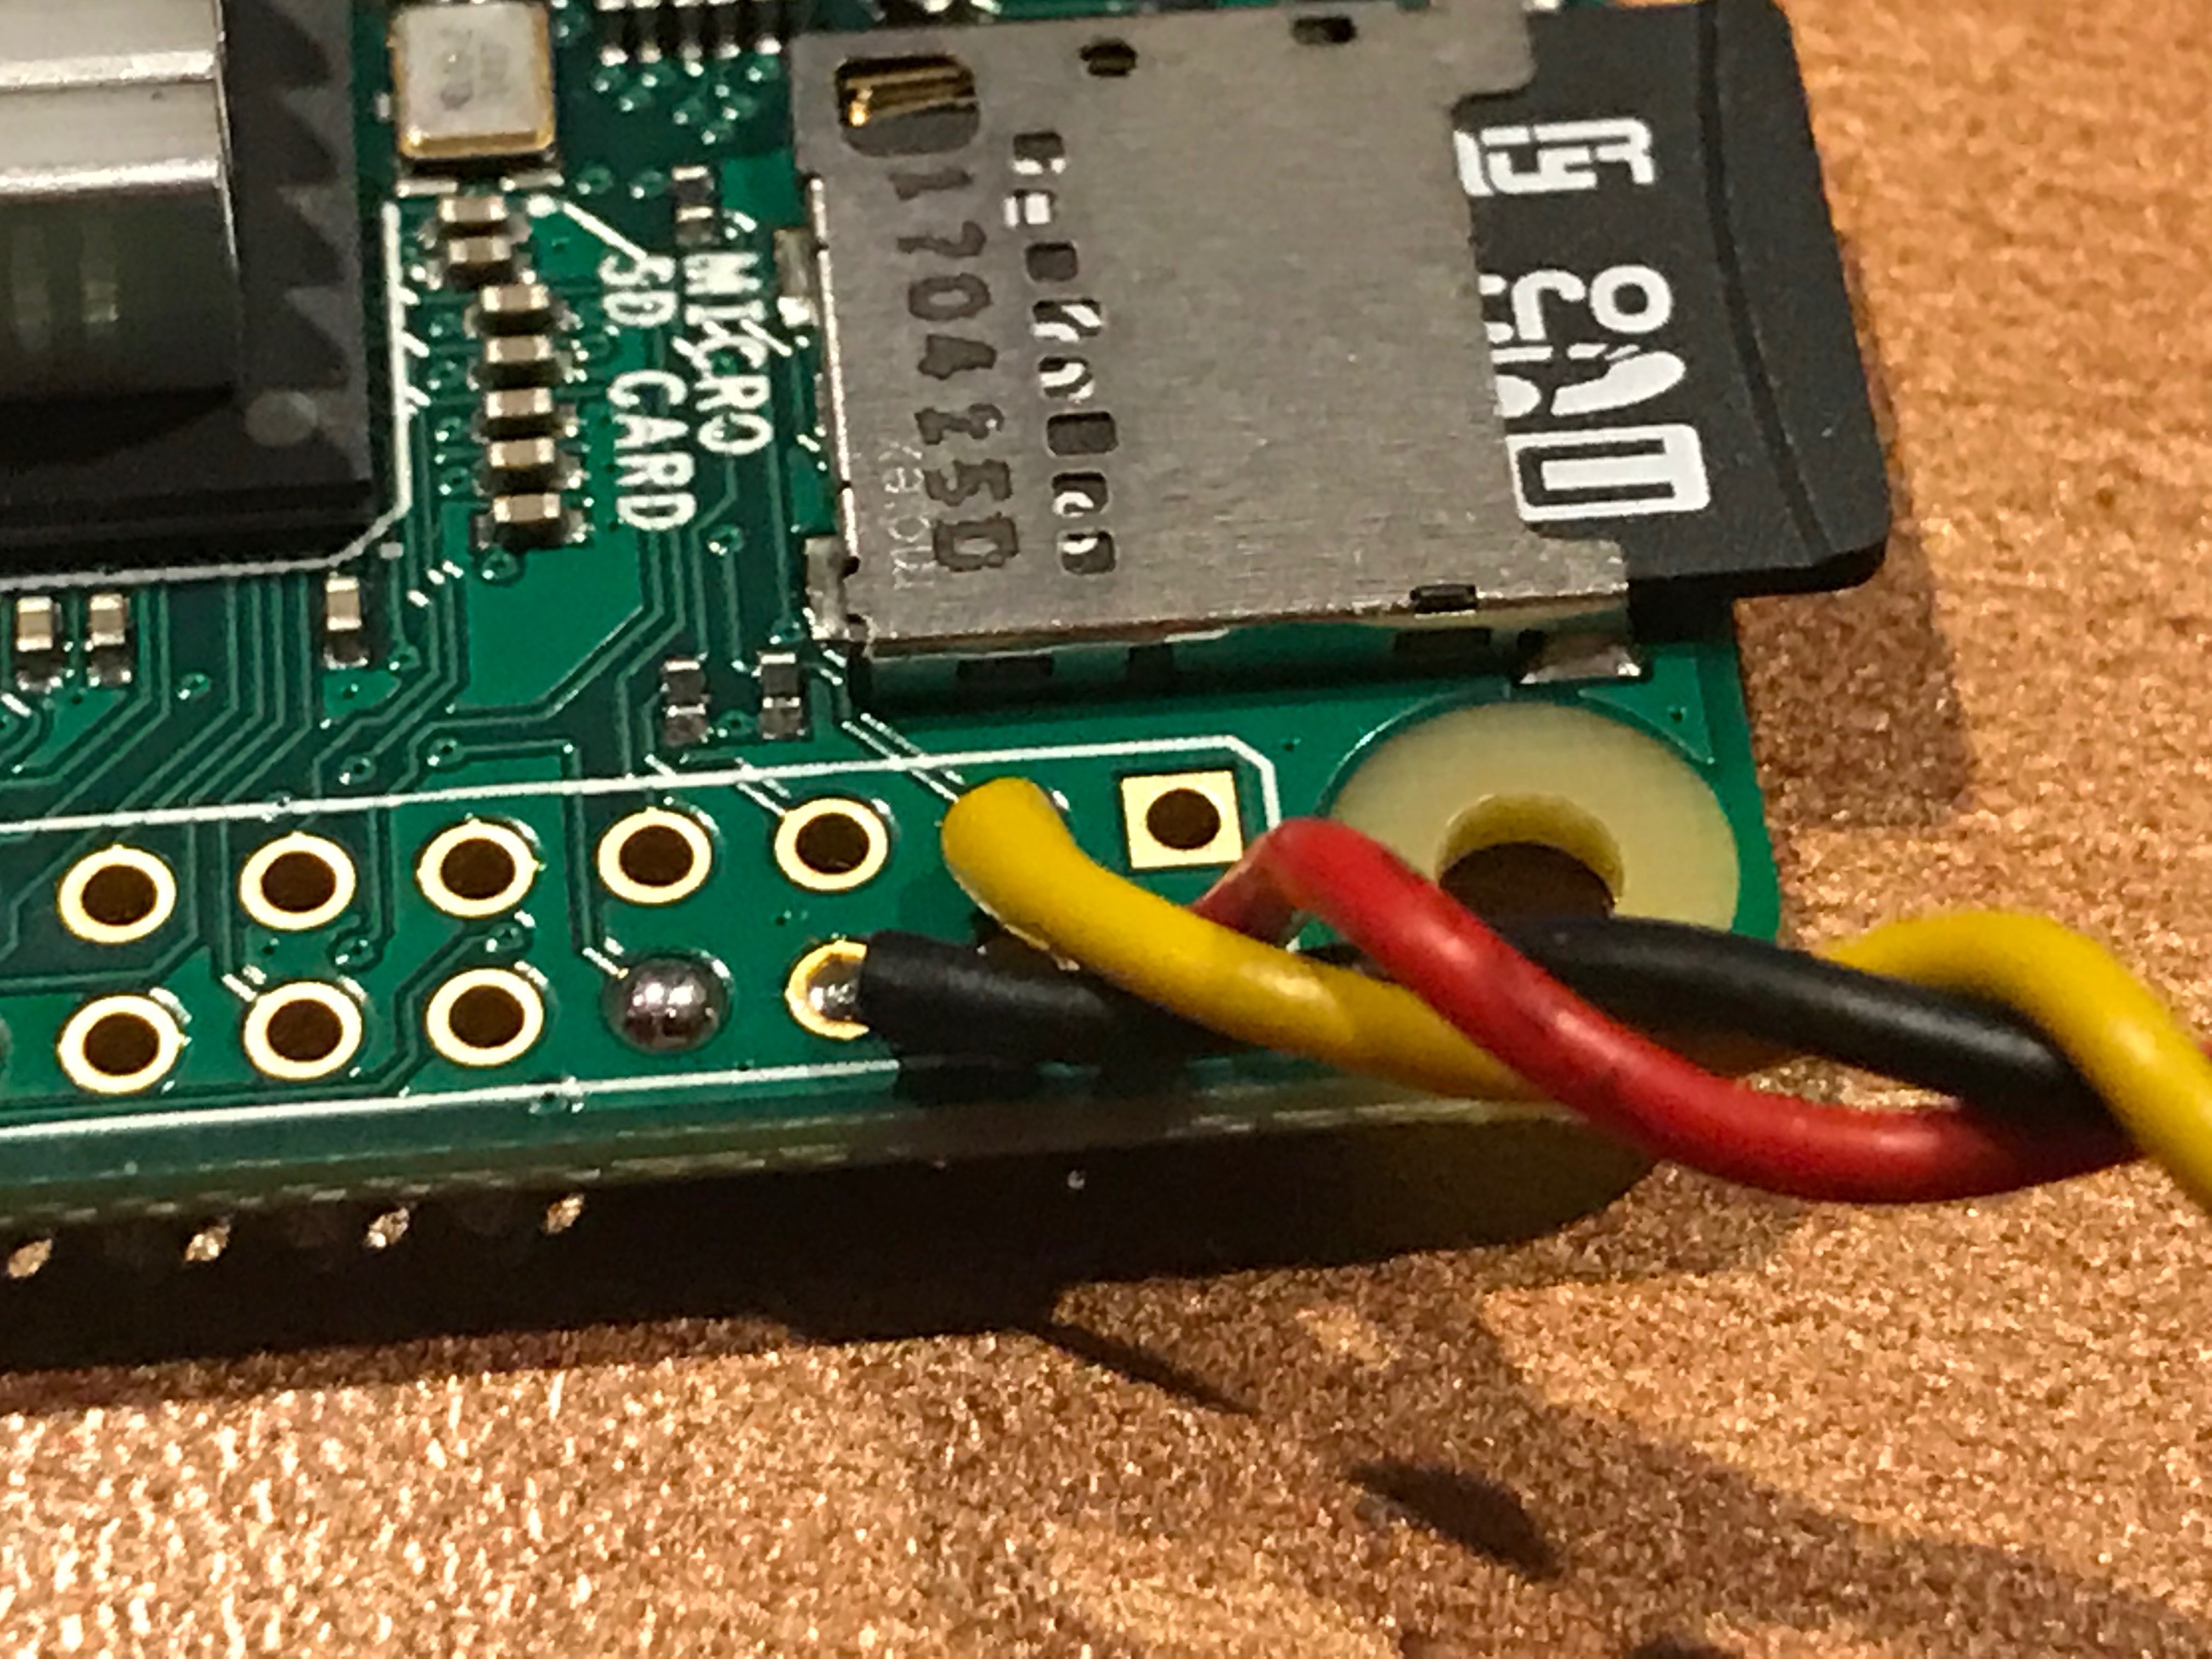
soldered the breadboard to the GPIO pins on my Pi
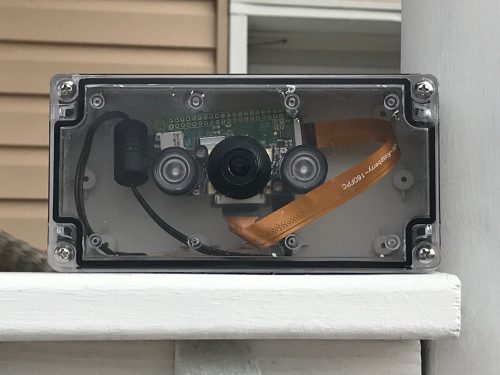
finally mounted the whole thing into the camera box
Closed up the box and placed the unit back into service
DONE!
The fan is able to keep my cameras below 70ºC on even the hottest of days and don’t have to run 24×7 saving the longevity of the fan.
Final thoughts and notes:
- I was thinking of adding an indicator to visually show if the fan was running, however if you SSH into the Pi Zero you can run this command to see if GPIO pin 2 is Hi/On (1) or Low/Off(0)
cat /sys/class/gpio/gpio2/value- Some boards run hotter than others. I have one Pi Zero that is 10° warmer at night than the other two.
- Can we use a 3 or 4 wire fan and connect to another GPIO pin to detect fan failure?
- IMPORTANT! If you used the MotioneyeOS image and run an update. it will overwrite your modifications. So keep this post handy or don’t update.
Thank you for reading my blog
Joe
Don’t forget to read PART 1