

In our consume it and toss it world we tend to discard our old electronics for the faster, better newer items. I know we are pretty good at recycling our old electronics, but wouldn’t it be even better to repurpose our old gear, maybe give it a new life as something else? I had an old Microsoft Surface 3 sitting on my desk collecting dust for a while. The specifications were pretty weak. 4GB of RAM, 64GB disk, and a really slow mobile processor. Compared to today’s standards its barely enough to run Windows 10, at least the disk was SSD.
What I did with my Microsoft Surface 3
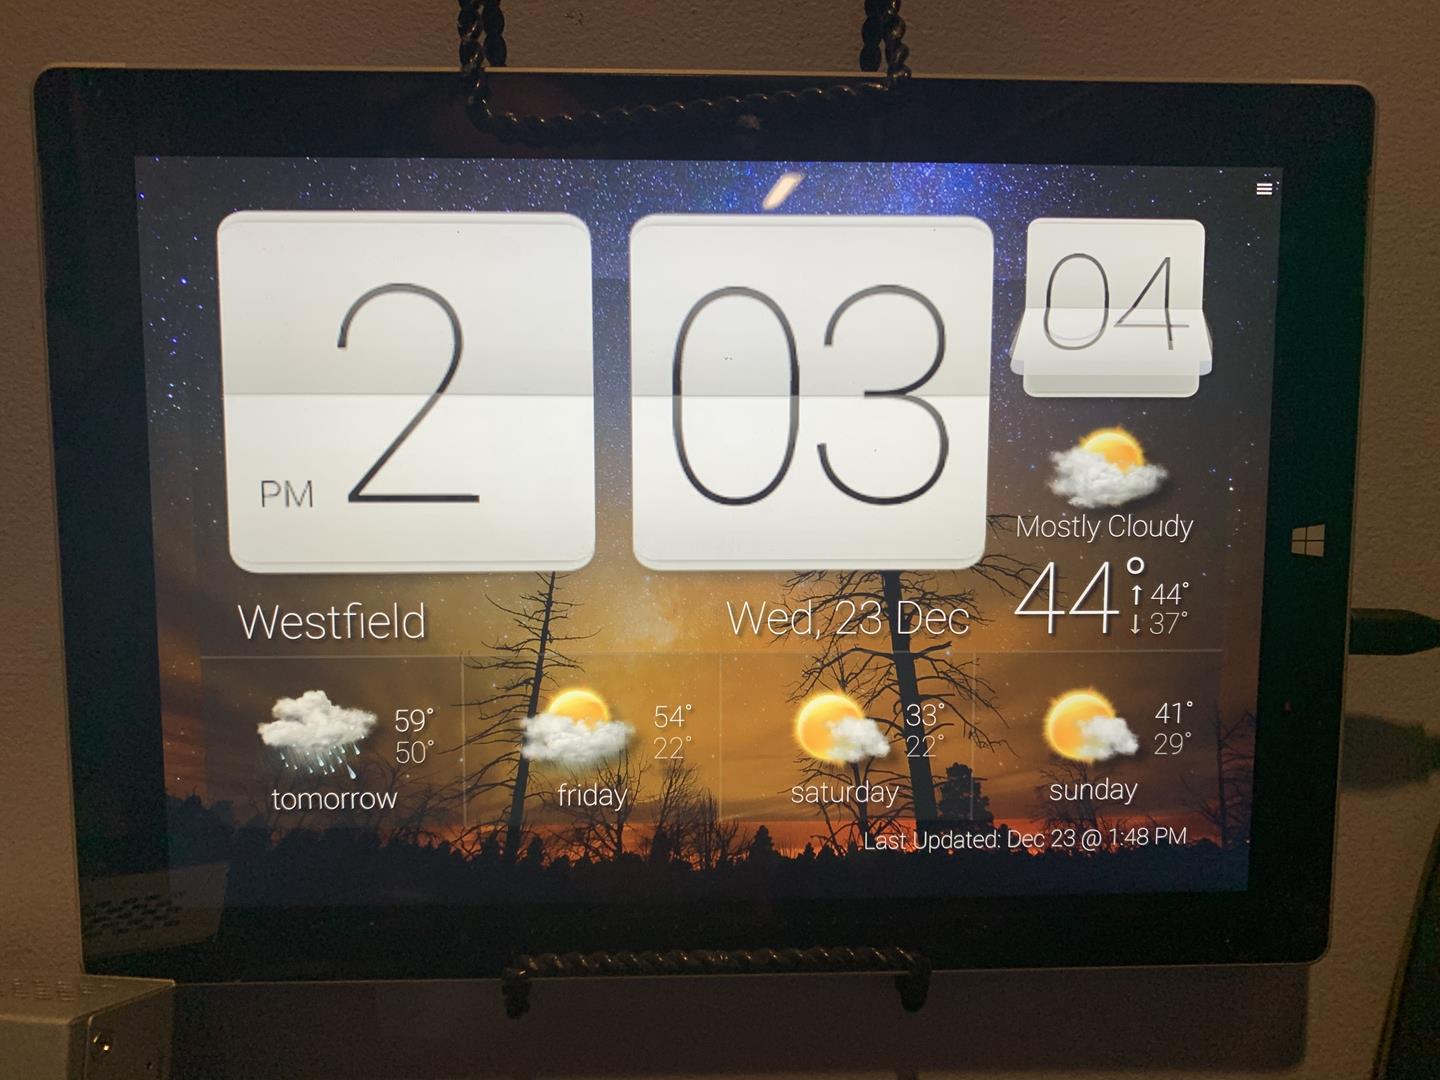
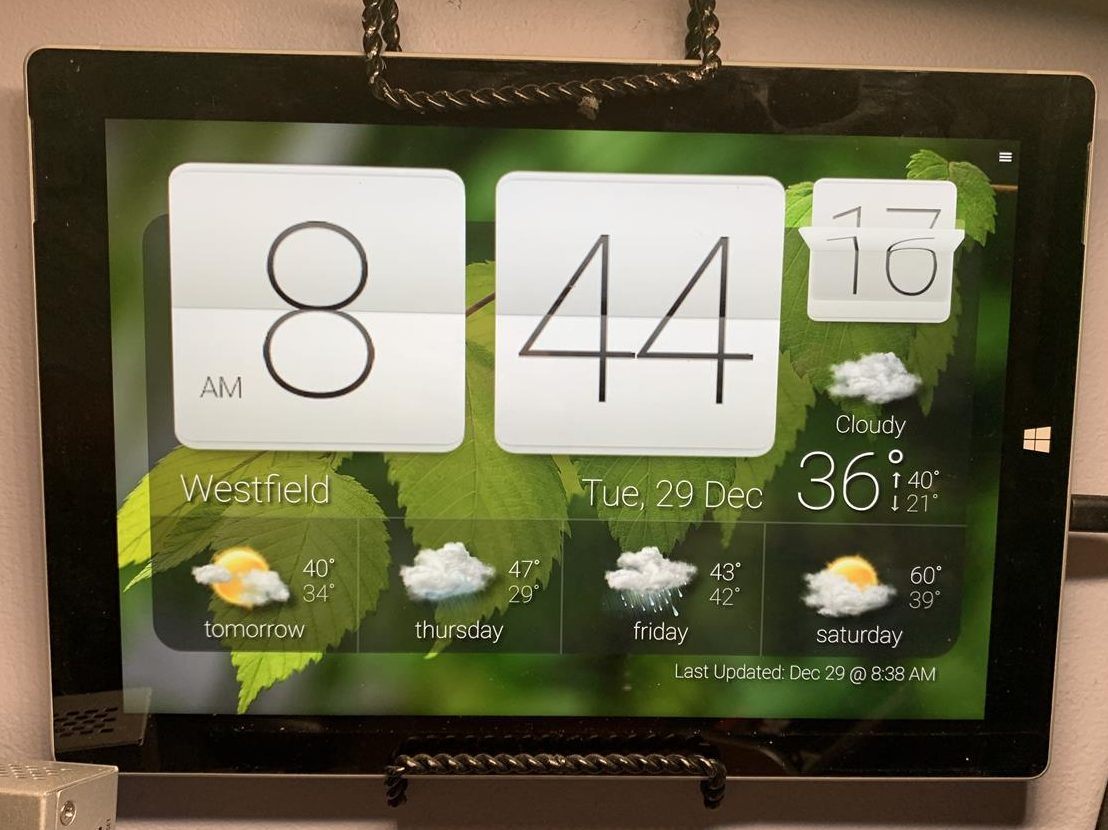
Looking at the Surface I saw a great opportunity to make a wall clock weather station! With just a few prep steps and a neat low cost trick to mount the surface to the wall I had this project done in under an hour.
STEP 1 – Refresh the Windows installation
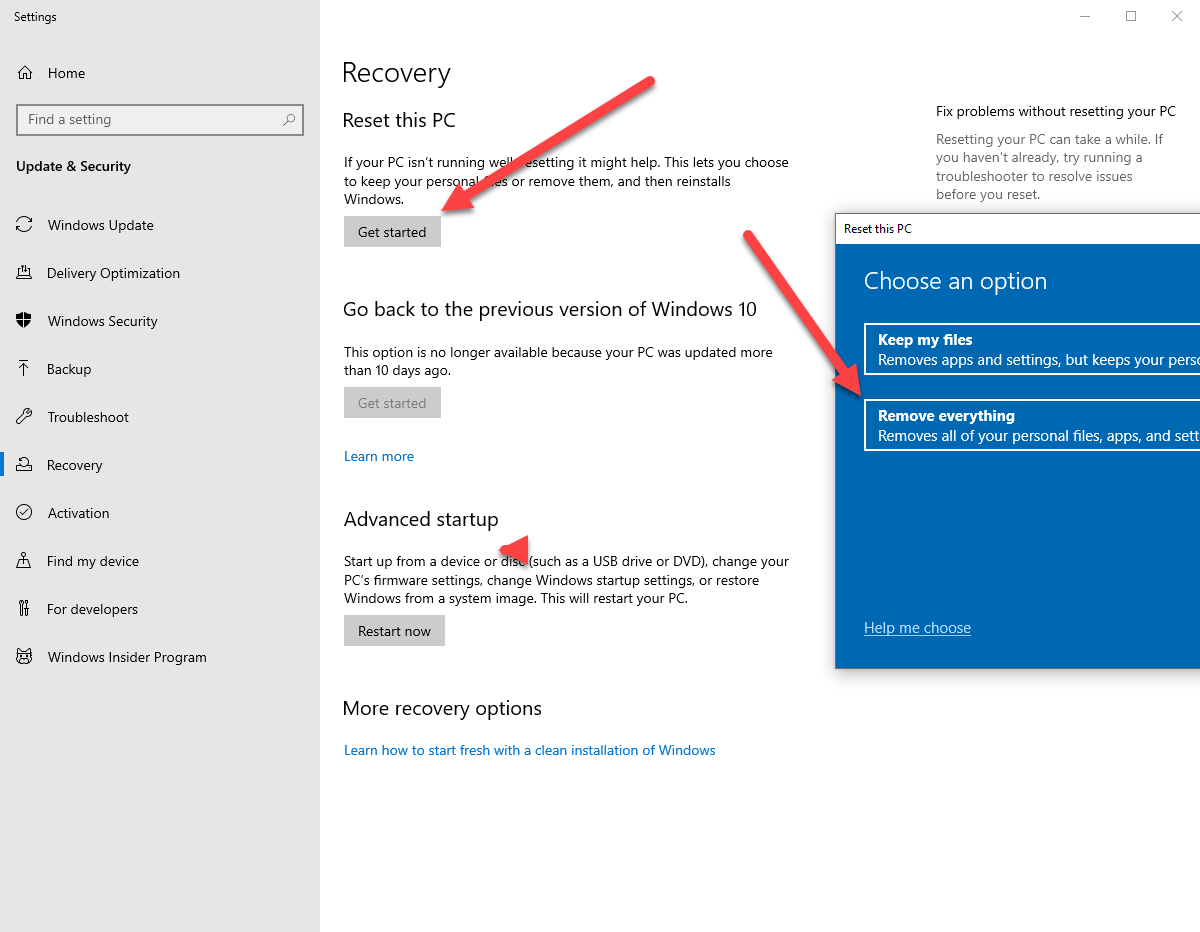
Your Microsoft Surface has some mileage on it and probably can use a factory reset. In settings type “Recovery” to access the recovery options. Click the menu item “Reset This PC” Then choose “Remove Everything” – This process can take over an hour so sit back, relax and let your PC refresh itself. The first stop after reinstalling Windows is heading over to Windows update to make sure you have the latest and greatest Microsoft has to offer.
Now that your Surface is back to stock condition and fully updated there are a few more steps to make this happen.
STEP 2 – Install the clock software
I searched the Internet and found lots of screen saver software that could provide a clock. Some looked like the classic 70’s flip clock and others resembled the time circuits in Back to The Future.
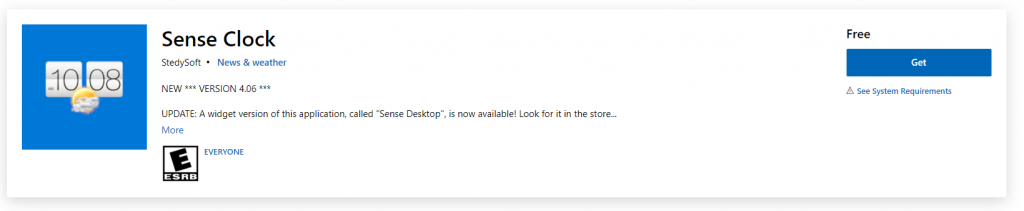
The one I liked the most was Sense Clock. This software is a free download from the Microsoft Store. Simply add the software to your surface and configure the settings to your preference. A couple of recommended settings would be – start with windows & full screen option.
Since this is going to be wall mounted and not “easily” accessible I also added REALVNC software so the clock can be accessed remotely from my desktop.
There are two configuration options that need to be setup as well. The first is the power settings. You will need to tell the display to NEVER shutoff. This will keep the clock display on all the time, and finally login without a password. Windows likes to update on its own from time to time or if you need to reboot, the Microsoft Surface will login on its own and automatically start the Sense Clock software.
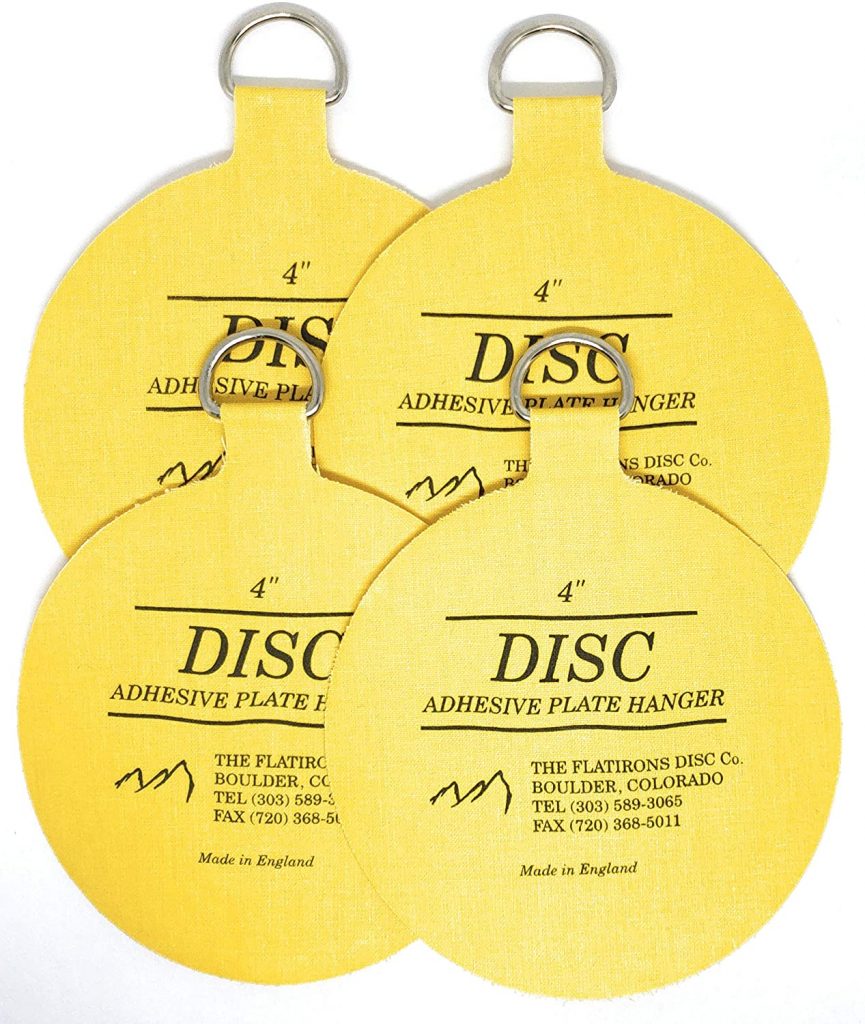
STEP 3 – Mounting the Surface to the wall
There are specific wall mounts for the Microsoft Surface, however they are pricey and really not worth the expense. I used a simple plate hanger to mount mine. They come both in spring mount and glue mount. I personally prefer the spring mount as there is no glue to remove in case you want to later repurpose your Microsoft Surface for yet another task.
Plate / Microsoft Surface Hanger Available At Amazon

Plate Hanger – at Amazon $4.00 –CLICK
Adhesive Plate Hanger – at Amazon $12.00 – CLICK
Its that simple, a little software and $4.00 plate hanger turns your old Microsoft Surface into a beautiful wall clock for everyone to enjoy. This would also work for old iPads, Android tablets, smart phones and more!
Thank you for reading my blog,
Joe