


This is a fun project even without the sound. I enjoy taking vintage NES cartridges and making them into clocks. No worries the cartridges are broken beyond repair before I gut and start drilling holes in them. The NES cartridge clock is a great way to recycle.
I will cover building the clock in another post later on. This article is going to focus on adding the audio module and making them sing.
Supplies You Will Need
- 30 Second audio recording module – $12.00
- An old Nintendo NES cartridge – Ebay or Free(if you have one)
- Soldering iron – $16.00
- Small piece of wire – You got this
- Hot glue / or any glue $11.00
- NES Security bit – $5.00
Let’s get building
Step 1 – Prepare the cartridge
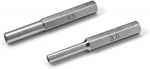 Depending on the age of your NES cartridge you will find 3 to 5 screws that need to be removed. Older cartridges have regular screws while newer generations will have a security screw that requires a special bit. The
 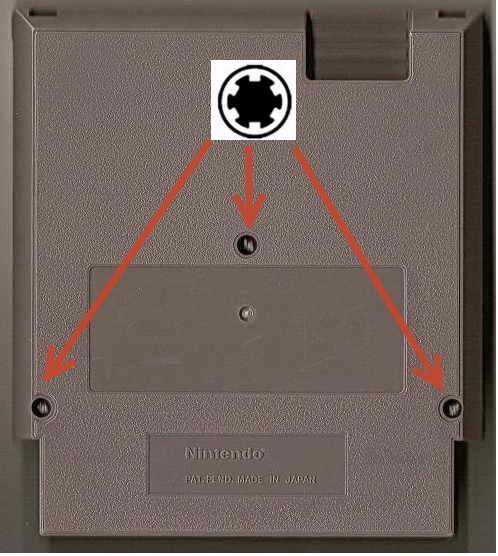 tools are very inexpensive and can be found for $5.00 on Amazon. If you are creative, attempt to fabricate your own bit. There are a few guides on the web that will show you how.
Remove the screws and place on the side for reuse later, open the cartridge and remove the circuit board. The original circuit board will not be used so please recycle it.
Step 2 – Prepare the sound module
 We are going to embed the sound module inside the cartridge so accessing it when we are done will be difficult. I suggest you make your 30 second recording now. For this project we are recording the first 30 seconds of the Super Mario theme song.
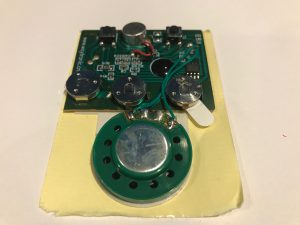
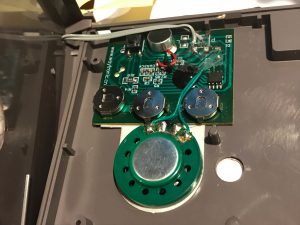
My sound module has two micro switches and a small microphone on top. One switch marked “R” is for recording and needs to be held for the duration of the audio capture. (You can re-record as necessary) The other is marked “P” and is obvious for playback of your recording. The small green circle at the bottom of the photo is the playback speaker. My module came with the batteries and also has an adhesive back. I would say the sound module I used is one or two steps up from a Hallmark card. If you need one it can be purchased here for about $12.00
Step 3 – Remove the playback micro switch
 Since we want the playback switch on the outside of the cartridge we need to relocate it by removing it and then extending with additional wiring.
Warm up your soldering iron and heat the two connectors that are holding the playback switch. DON’T use too much heat as you could damage the switch and the traces on circuit board.
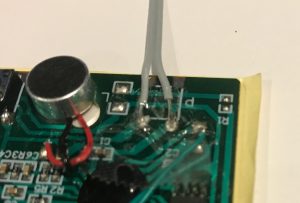 Next prepare some thin light gauge wire (I used an old computer hard drive ribbon cable) strip and tin the ends and solder to the two connectors where you removed the switch. I used a small blob of hot glue on the wire and my solder joint to help keep it secure.
Step 4 – Test Fit the sound module and drill small hole in the cartridge back
 Place the sound module inside the cartridge to get an idea of how it will fit.
Also take note on how you will route the wire to the external micro switch. I chose to use the self adhesive and glue the sound module to the FRONT of the cartridge and then used my drill to 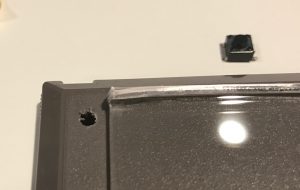 make a small hole on the upper right of the BACK of the cartridge to route the switch wire.
I glued the module to the front of the cartridge in the hope that the audio would be slightly louder.
Step 5 – Solder the switch and reassemble.
 Heat up your soldering iron again! By now you should have the circuit board glued down, and the wire through the hole to the back of the cartridge.
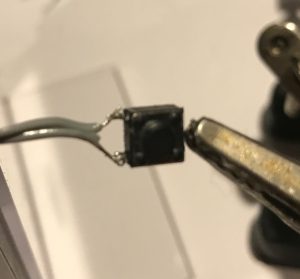
Strip and tin the ends of the wire. If you have “helping hands” use them to steady the switch. Using as little heat as possible melt the solder and connect the wire to the switch. Polarity does not matter in this 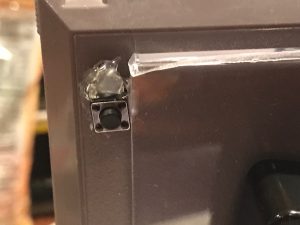 case so connect the wires in any order.
Pull the wire slack back into the cartridge and close it up using the screws from step 1. I placed a dab of hot glue on the switch and hole to protect my solder joints and keep the switch in place.
DONE! ENJOY!
Finished Project – Watch the video to hear the sound
https://youtu.be/ogplML1yc38
Finished Project#2 – Dr Mario
https://youtu.be/4Sfl0Z1IErw
Finished Project #3 Super Mario 3 W/ theme song.
If you don’t have the time to make this on your own, stop by my Etsy store to pick up a finished one. I will customize it any way you like. $28.99 at my shop
Thank you for reading my blog
-Joe