


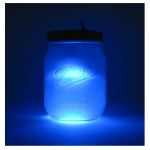
Have an old painting that could use a little lift? Maybe you want to light up a jar or a clock? LEDs can help add a little extra something and turn drab into fab.
LED is an acronym for Light Emitting Diode and they have been appearing in our devices since the early 1960’s. Over the years LED’s have become increasingly popular and can now be found in everything from our home lighting, cars and even our television and computer monitors.
LED’s are very inexpensive and easy to work with. In this post I will do my best to explain some of the basics to get started with your project.
Before we begin its a good idea to make sure you have the correct tools. A suggested list of tools can be found below:
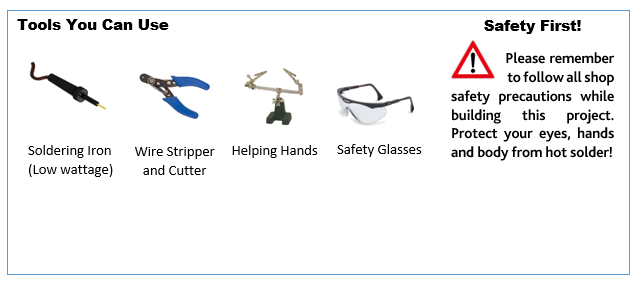
At the bottom of this post I will have a list of good sources where you can purchase the tools.
The next step is to make sure you have the correct parts. Not only will you need LEDs, but you should also have a battery holder, resistors, an on/off switch, batteries, a length of wire and some solder.
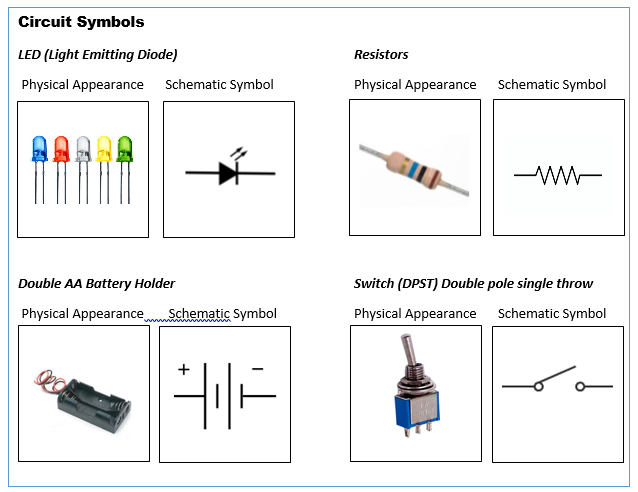
Great, we now have our tools and our parts and can begin working on lighting our project. One of the most important things to remember about LEDs is connecting them in the circuit with the correct polarity. LEDs like all diodes can only conduct electricity in one direction. It is very important to locate the CATHODE (- Negative) side of the LED and the ANODE (+ Positive) side of the LED.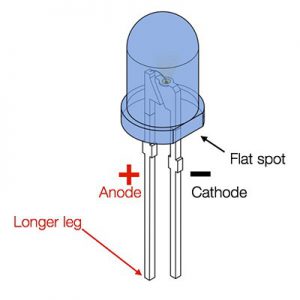
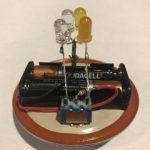
As you can see in the diagram to the left, the negative side of the LED can be identified easily by looking for the shorter leg. It is also the FLAT side of the LED. The positive side of the LED will have a longer leg.
When connecting to the battery, the positive + side connects to the RED wire and the negative – side connects to the black wire. Please do not connect your LED to power just yet. We still need to install the resistor or your LED WILL BURN OUT INSTANTLY!
To prevent your led from burning out we need to place a current limiting resistor in the circuit.
Why do I need the resistor?
The simple answer is LEDs have a very low internal resistance, when connected to the power source there will be an unrestricted flow of current from the battery through the LED. Unfortunately, LEDs do not like an unrestricted current flow and will generate an excessive heat load and burn up almost instantly. By placing a resistor in series with the LED you can limit the current to a safe level and enjoy the brilliance of your LED lighting project!
LETS GET BUILDING!
STEP 1 – Prep Your Work Area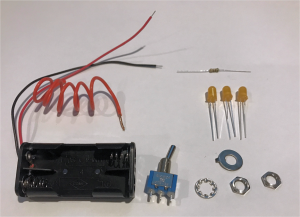
- Lay all your parts out so you can easily reach them
- Heat your soldering iron (a low wattage iron is best)
- Get your helping hands ready (optional, but makes soldering a whole lot easier)
STEP 2 – Connect Resistor to negative (black) wire on battery holder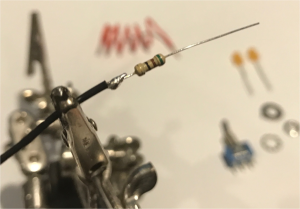
- Strip the black wire on the battery holder exposing about 1/4” of the copper wire.
- Heat the exposed copper for a few seconds with your soldering iron and apply the solder, allowing it to flow into the wire. (this is known as tinning the wire)
- Pick up the resistor and trim one of the leads to about 1/4” in length.
- Apply a dab of solder to the resistor lead
- Bring the resistor lead in contact with the black wire, heat for a few seconds to melt the solder and then allow to cool.
- Both wires should now be soldered together
STEP 3 – Connect Resistor to center pole of the switch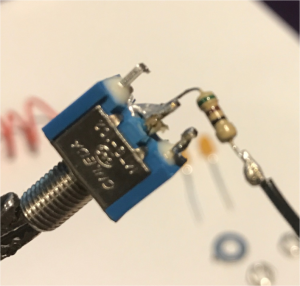
- Trim the other resistor lead to about 1/2 inch and bend at the base of the resistor
- Tin the end of the resistor lead with solder
- Place the switch in your helping hands (by the toggle) and tin the poles (there are 3 of them you only need to tin two the center and one of the end ones – your choice)
- IMPORTANT – the switch is heat sensitive and if you make it too hot it will FAIL to operate!!!
- Lastly, bring the end of the resistor in contact with the center pole of the switch and heat to melt the solder, continue to hold the two parts together until the solder solidifies
STEP 4 – Prepare the LEDs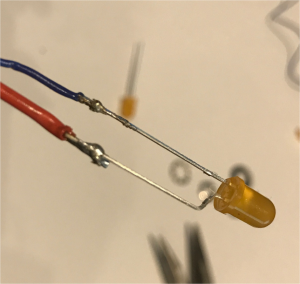
- Cut lengths of wire to the desired length to reach the battery pack and the switch. In other words, if you were adding lighting to a picture frame or paining the wires would have to all reach from the location of the LEDs back to the switch and battery pack. Make them longer than needed, you can always trim later.
- Place the LED into your helping hands, bend the two leads apart slightly to give yourself some extra room to work.
- Take note of with lead is the ANNODE (positive – longer) and CATHODE (negative – shorter)
- TIP – you can use two different color wires to help you keep from mixing them up
- Strip away about 1/4 inch of the vinyl shielding from each wire and solder to the appropriate leads on the LED
- REPEAT THIS STEP for as many LEDs you will be using in your project.
STEP 5 – Tie all the POSITIVE leads together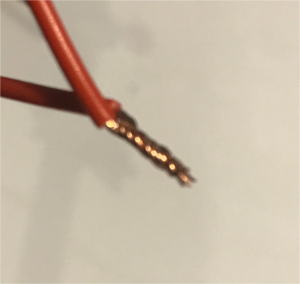
- Locate all the positive leads from each LED and the battery holder
- Strip about 1/4 inch of the vinyl insulation off the wires
- Twist all the wires together and then solder
- It is recommended to cover the exposed wire with electrical tape
STEP 6 – Tie all the NEGATIVE leads together and solder to the switch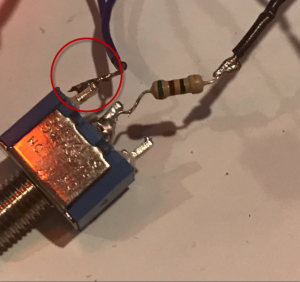
- Locate all the negative leads from each LED
- Strip about 1/4 inch of the vinyl insulation off the wires
- Twist all the wires together and then solder
- Take the bundle of wires and solder to the switch (one of the outer poles)
STEP 6 – Add the batteries and turn on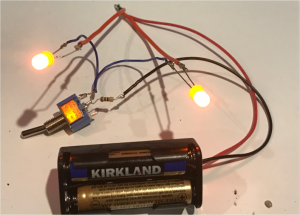
- Secure the battery holder to your project using glue or double stick tape
- Secure the switch to your project using the mounting hardware provided
- Add the batteries and flip the switch
LET THERE BE LIGHT!
Where to source parts –
If you don’t want to scour the tubes of the internet looking for parts.
www.GeekGearStore.com has a great kit ready to go.
The kit includes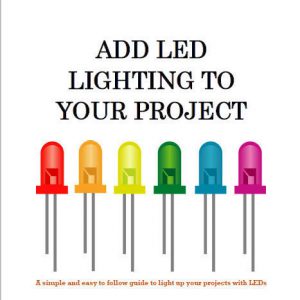
- Your choice of LED color (5 LEDs)
- Battery holder
- Switch
- Resistor
- A length of solder
- Detailed instructions
COST $9.99 plus shipping!
Click here to check it out
Other tools you may need
- A low wattage soldering iron $15.49 at Amazon
- Helping Hands $9.00 at Amazon
- Small wire stripper / cutter $12.00 at Amazon
- Safety glasses $7.50 at Amazon
If you made it this far, here are a few examples of projects I have added LEDs to

Check out all my projects – www.GeekGearStore.com
Thanks for reading my article
-Joe
One Reply to “Light Up Your Projects With (LED) Light Emitting Diodes”